There is a specific kind of silence that falls over a workshop when you put down the router. It is not just the absence of the high-pitched whine that usually dominates the room; it is a shift in energy. For decades, we have been told that speed is the ultimate virtue in woodworking. If you can cut a groove in three seconds, why would you spend twenty minutes doing it by hand? But lately, something has changed. In 2026, as digital fatigue seeps into every corner of our lives, woodworkers are returning to the bench with chisels and marking gauges, seeking something the router simply cannot give them.
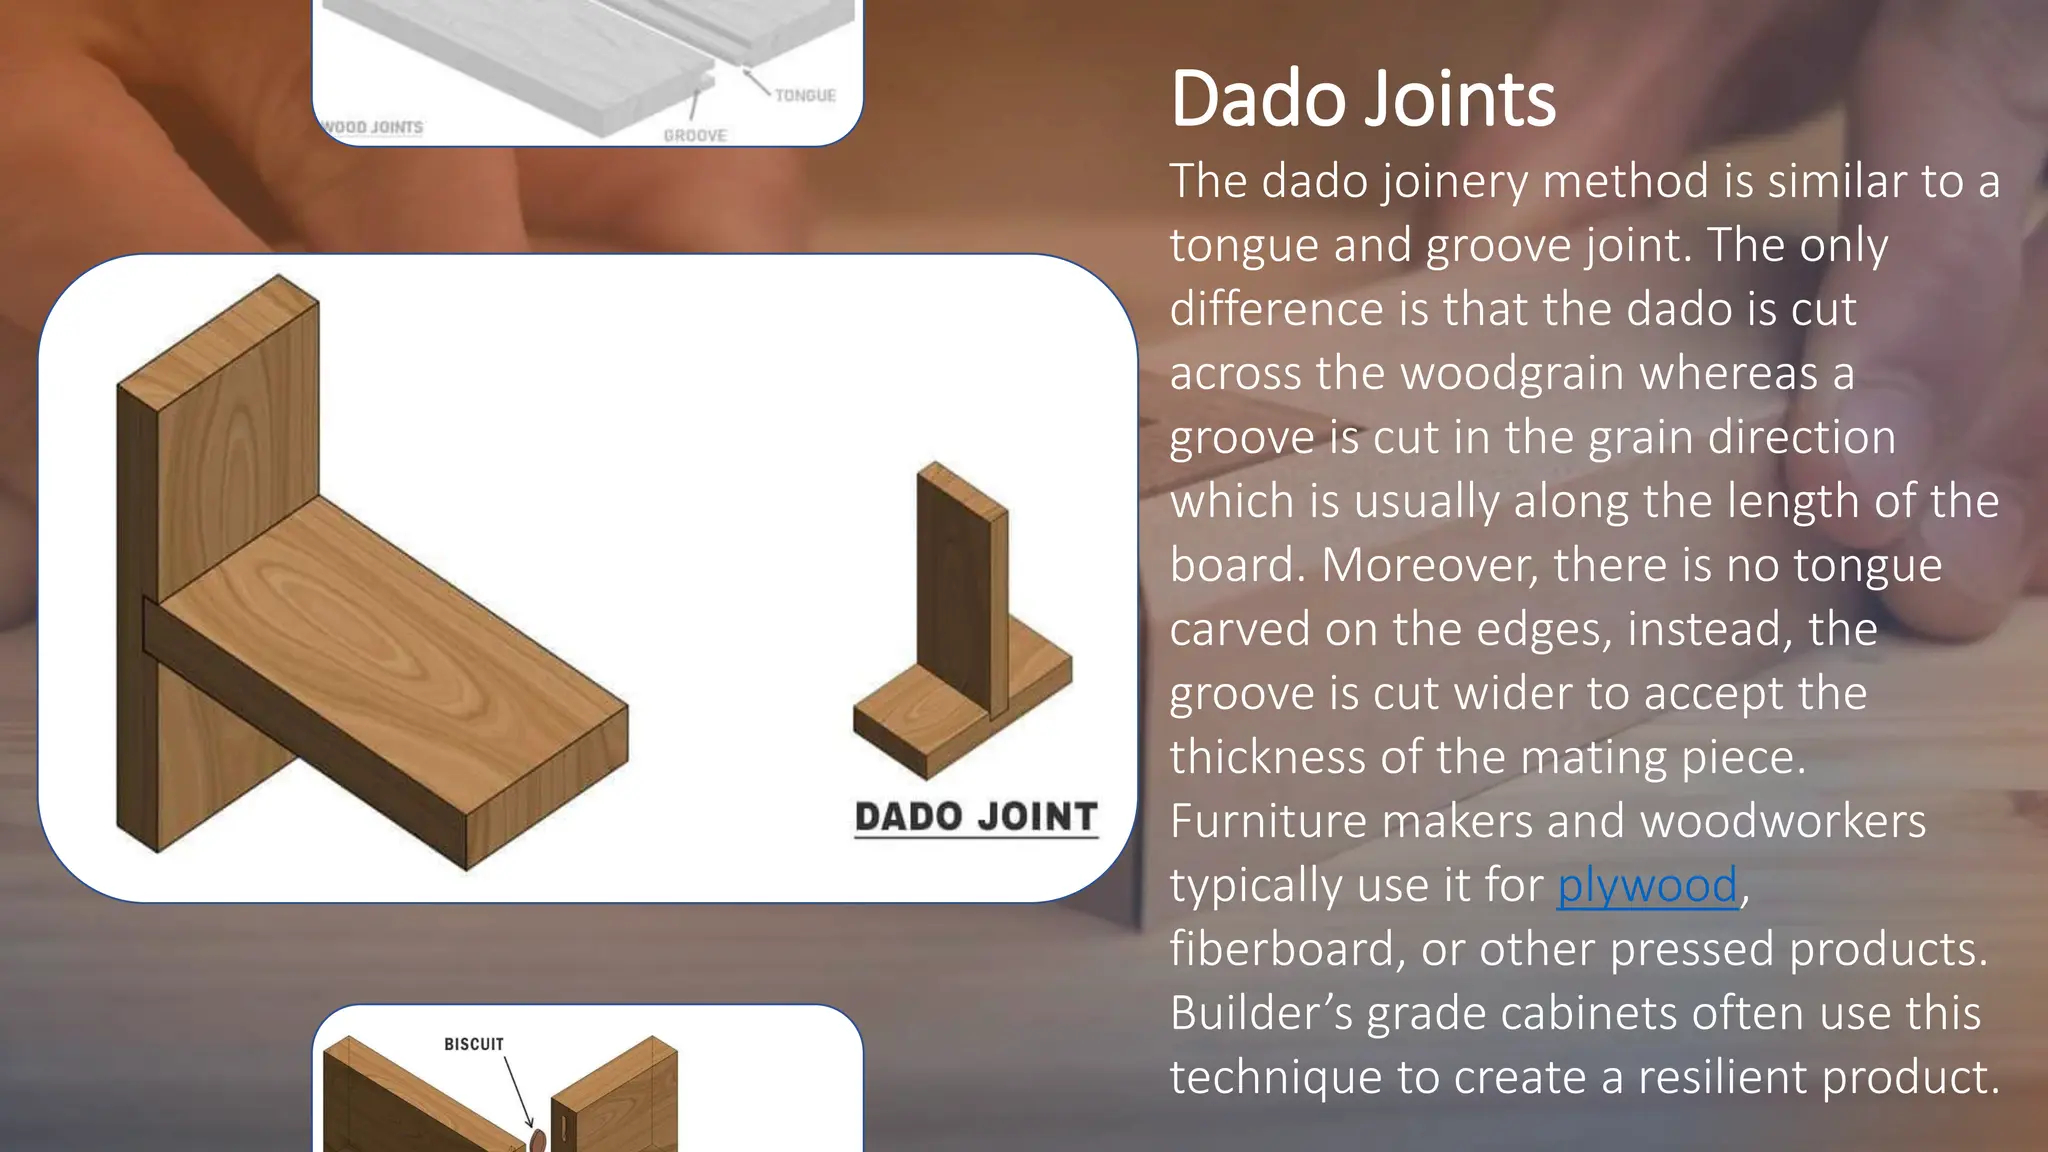
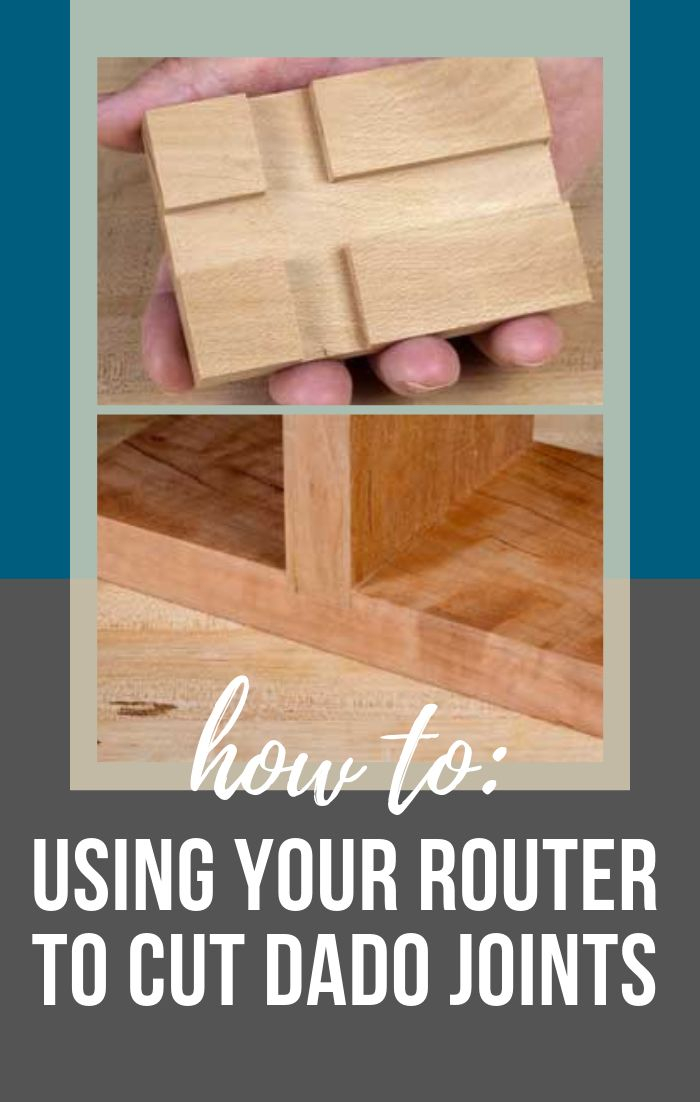
The dado joint is the workhorse of cabinetry. It is strong, reliable, and relatively simple. Yet, for many, it has become synonymous with a template and a spinning bit. We rush through the process, often dealing with tear-out or slightly loose fits that we mask with glue and hope. But what if we slowed down? What if we looked at the dado not as a hurdle to clear before assembly, but as an opportunity to connect with the material? This fresh look at traditional techniques is not about rejecting modern tools entirely. It is about expanding our toolkit to include methods that offer unparalleled control and satisfaction.
When you cut a dado by hand, you are not just removing wood. You are negotiating with the grain. You learn where the fiber wants to break and where it resists. This knowledge transforms how you approach every subsequent project. The result is a joint that fits with a gentle thunk, not a forced hammer blow. It is a small difference, but it echoes through the entire piece of furniture. Let us explore why these old methods are finding new life in contemporary shops and how you can start using them today.
The Quiet Rebellion Against Speed
We live in an era of instant gratification. Amazon delivers same-day. Streaming services buffer less than ever. Even our hobbies have been optimized for efficiency. But there is a growing movement, particularly noticeable in the woodworking communities of 2026, that pushes back against this relentless pace. People are tired of the noise. They are tired of the dust clouds that seem to follow them home. The router, while efficient, is a chaotic tool. It tears rather than slices. It demands hearing protection and dust collection systems that cost more than the tool itself.
Hand-cutting dados is a form of meditation. It requires focus. You cannot scroll through your phone while paring out waste with a sharp chisel. This forced mindfulness is part of the appeal. When you mark out your lines with a knife rather than a pencil, you are making a commitment to accuracy. The knife severs the surface fibers, creating a clean wall for your chisel to register against. This simple step, often skipped in the rush to get to the cutting, is the foundation of a perfect joint. It prevents the tear-out that plagues so many machine-cut dados.
Consider the sensory experience. The smell of fresh shavings is distinct from the burnt odor of router bits pushing through hardwood. The sound of a mallet tapping a chisel is rhythmic and soothing. These details matter. They create a workspace that feels inviting rather than industrial. Many woodworkers report that their best ideas come not when they are sanding or assembling, but during these quiet moments of removal. The slow process allows the mind to wander and solve problems that were invisible during the frantic pace of machine work. It is a rebellion, yes, but a gentle one.
Essential Tools for the Modern Traditionalist
You do not need a museum-quality set of antique tools to start cutting traditional dados. In fact, some of the best tools available in 2026 are modern reproductions designed with contemporary steel alloys. However, the selection matters. You need a few key items that perform specific roles. First, a marking gauge. Not a pencil. A wheel marker or a knife-edge gauge creates a precise line that does not widen as you work. This precision is critical because a dado is defined by its walls. If the walls are fuzzy, the fit will be sloppy.
Next, you need a decent backsaw. It does not have to be expensive, but it must be sharp. A Japanese dozuki or a Western tenon saw works well. The thin kerf and stiff back allow for accurate cuts that stop exactly on the line. Pair this with a set of bench chisels. You do not need every size. A half-inch and a three-quarter-inch chisel will handle most standard dado widths. The key is keeping them razor-sharp. A dull chisel is dangerous and frustrating. It crushes the wood fibers instead of slicing them, leading to ragged bottoms and uneven depths.
Finally, consider a router plane. This is the secret weapon of traditional dado cutting. While you can remove the bulk of the waste with a chisel, getting a perfectly flat bottom across the width of the dado is challenging. A router plane allows you to skim off thin layers until the depth is consistent from edge to edge. It bridges the gap between hand tools and the consistency we expect from machines. Using these tools together creates a workflow that is both efficient and precise. It proves that hand tools are not just for luddites; they are for craftsmen who value results over speed.
Mastering the Layout and Marking Phase
The success of a hand-cut dado is determined before you make a single cut. It happens at the layout stage. This is where many beginners stumble, rushing to mark with a blunt pencil and moving on. Take your time here. Use a square that you trust. Check it against a known straight edge. If your square is off, your joint will be too. Mark the shoulders of the dado with a marking knife. Press firmly enough to create a visible groove, but not so hard that you tear the veneer if you are working with plywood or laminated stock.
Depth measurement is equally critical. Use a marking gauge set to the exact depth of your stock thickness, or slightly less if you want a recessed joint. Scribe this line around the inside of the dado area. This visual boundary helps you know when to stop chopping. Some woodworkers like to score the waste area with a series of parallel lines. This weakens the fibers and makes it easier to remove the bulk material later. It is a small step that saves significant effort downstream.
Pay attention to the grain direction. If you are cutting a dado across the grain, which is typical, the fibers will want to tear out at the exit side of your saw cuts. To prevent this, make relief cuts with your chisel along the waste side of the line before you saw. This isolates the fibers and ensures a clean shoulder. It is a technique that feels counterintuitive at first—cutting before you cut—but it makes a huge difference in the final appearance. Precision in layout eliminates the need for excessive force during cutting. Force is the enemy of accuracy.
The Art of Sawing and Waste Removal
Once your layout is complete, it is time to cut. Position your board securely in a vise. Do not rely on clamps alone if you can avoid it; a vise provides the stability needed for fine work. Start your saw cut just on the waste side of the knife line. Let the weight of the saw do the work. Do not push. Pushing causes the blade to wander. Keep your eye on the line, not the teeth. Cut down to your depth line. It is better to stop slightly short than to go too deep. You can always remove more material, but you cannot add it back.
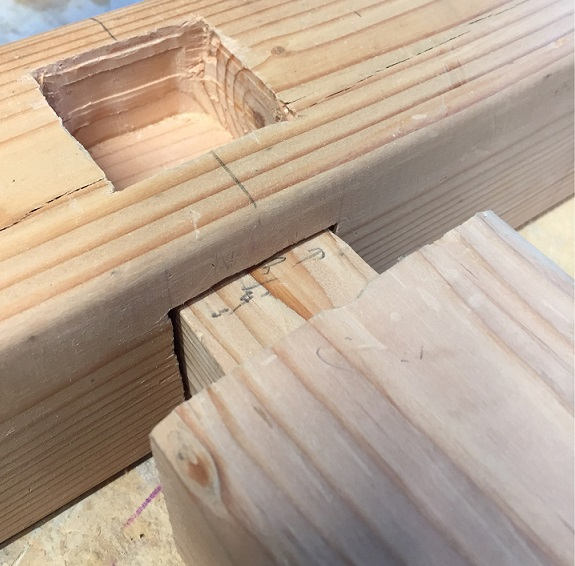
With the shoulders cut, you need to remove the waste. There are two main approaches. The first is the chop-and-pare method. Use your chisel to make a series of vertical chops across the width of the dado, staying away from the walls. Then, turn the chisel bevel down and pare away the ridges. This is effective but can be tiring for wider dados. The second approach involves drilling. Use a brace and bit or a hand drill to remove the bulk of the material. This is faster and leaves a rougher surface that you will need to clean up with a chisel or router plane.
Regardless of the method, always work from the edges toward the center. This supports the fibers at the walls and prevents blowout. If you try to remove the center first, the unsupported edges may splinter when you trim them later. Take small bites. Removing a little bit of wood at a time gives you more control. It also reduces the risk of slipping and damaging the joint. Patience is not just a virtue here; it is a technical requirement. Rushing this stage leads to uneven depths and wavy walls that are difficult to correct.
Achieving Perfect Fit with Hand Planes
The bottom of your dado needs to be flat. If it is rounded or uneven, the mating piece will rock, weakening the joint. This is where the router plane shines. Set the depth carefully. Make a pass along one edge, then the other, and finally the center. The cutter shears the wood cleanly, leaving a smooth surface that requires minimal sanding. If you do not have a router plane, you can use a wide chisel held horizontally. This requires a steady hand and a good eye, but it is possible. Look for the high spots by shining a light across the surface. Shadows reveal imperfections.
Check the fit frequently. Do not wait until the end to test the joint. Insert the mating piece gently. It should slide in with slight resistance. If it is too tight, identify where it binds. Mark those areas with a pencil. Remove small amounts of material from the high spots. Do not try to force it. Forcing splits the wood and compromises the integrity of the joint. A proper hand-cut dado relies on friction and surface area, not glue alone. The fit should be snug enough to hold the pieces together temporarily without clamps.
Sanding should be minimal. If you have used sharp tools, the surfaces will be smooth. Sanding can round over the crisp corners of the dado, which weakens the mechanical lock of the joint. If you must sand, wrap paper around a flat block. Never sand with your fingers, as this creates an uneven surface. The goal is a crisp, clean interface between the two pieces of wood. This attention to detail is what separates a handmade piece from a mass-produced one. It is the signature of the maker.
You might wonder if these techniques are practical in 2026. Do we have time for this? The answer is yes, if you integrate them wisely. You do not need to hand-cut every dado in every project. Use traditional methods for visible joints or high-end pieces where the quality of construction is part of the value proposition. Use routers for hidden joints or production work where speed is essential. This hybrid approach allows you to enjoy the benefits of both worlds. It keeps your skills sharp without burning you out.
Moreover, teaching these techniques to others is becoming increasingly popular. Workshops focused on hand-tool joinery are seeing a resurgence. People are eager to learn skills that feel tangible and permanent. Sharing this knowledge strengthens the community. It creates a network of makers who value craftsmanship over consumption. When you master hand-cut dados, you gain confidence in other areas of woodworking. You begin to trust your hands more than your jigs. This shift in perspective can transform your entire approach to the craft.
Technology can support tradition. Digital calipers help set marking gauges with precision. High-resolution photos allow you to document your progress and share tips with online communities. The internet has made it easier than ever to learn from masters around the world. Use these resources. Watch videos, read blogs, and ask questions. But then, put the screen away and pick up the chisel. The real learning happens in the doing. It happens when you feel the wood yield under your tool. That connection is irreplaceable.
In the end, moving beyond the router bit is not about abandoning progress. It is about reclaiming agency. It is about choosing how you create. Traditional dado techniques offer a path to deeper engagement with your work. They provide a level of precision and satisfaction that machines struggle to match. As we navigate the complexities of modern life, there is comfort in the simplicity of a well-cut joint. It is a reminder that some things are worth taking the time to do right. So, sharpen your chisels. Clear your bench. And let the silence of the workshop speak to you.
[sps_html tag=”img” src=”https://cdn.northcarolinafinearchitecture.com/2026/06/rescuing-mistakes-how-to-fix-common-woodworking-errors-and-salvage-pertaining-to-dado-joint-design.png” alt=”Rescuing Mistakes: How To Fix Common Woodworking Errors And Salvage … pertaining to Dado Joint Design” style=”width: 100%; height: auto;”]
[sps_html tag=”img” src=”https://cdn.northcarolinafinearchitecture.com/2026/06/types-of-wood-joints-pptx-intended-for-common-dado-joint-mistakes-that-ruin-your-woodworking-projects.jpg” alt=”Types-Of-Wood-Joints.pptx intended for Common Dado Joint Mistakes That Ruin Your Woodworking Projects” style=”width: 100%; height: auto;”]
[sps_html tag=”img” src=”https://cdn.northcarolinafinearchitecture.com/2026/06/common-woodworking-mistakes-and-how-to-fix-them-workshopshed-with-dado-joint-design.jpg” alt=”Common Woodworking Mistakes And How To Fix Them - Workshopshed with Dado Joint Design” style=”width: 100%; height: auto;”]
[sps_html tag=”img” src=”https://cdn.northcarolinafinearchitecture.com/2026/06/using-your-router-to-cut-dado-joints-router-woodworking-woodworking-for-common-dado-joint-mistakes-that-ruin-your-woodworking-projects.jpg” alt=”Using Your Router To Cut Dado Joints | Router Woodworking, Woodworking … for Common Dado Joint Mistakes That Ruin Your Woodworking Projects” style=”width: 100%; height: auto;”]
[sps_html tag=”img” src=”https://cdn.northcarolinafinearchitecture.com/2026/06/a-complete-guide-to-the-most-common-types-of-woodworking-joints-may-regarding-common-dado-joint-mistakes-that-ruin-your-woodworking-projects.jpg” alt=”A Complete Guide To The Most Common Types Of Woodworking Joints (May … regarding Common Dado Joint Mistakes That Ruin Your Woodworking Projects” style=”width: 100%; height: auto;”]