You’ve done everything right. You checked the spec sheet. You bought the gasket that matches the ASME B16.20 standard. You torqued the bolts in the star pattern, just like the manual said. You even used a calibrated torque wrench because you’re thorough like that. And yet, there it is. A drip. Maybe a small one at first, barely enough to stain the insulation, but then it grows. By Tuesday, it’s a steady stream. By Wednesday, maintenance is screaming, and you’re standing there with your hands on your hips, wondering what in the world went wrong.
It’s frustrating, isn’t it? It feels like a betrayal. You followed the rules. The book said this would work. So why is fluid escaping onto the floor? The truth is, ASME standards are fantastic. They give us a common language and a baseline for safety. But they aren’t magic spells. They don’t account for the rust on that old flange face, the slight warp in the pipe support, or the fact that the guy tightening the bolts had a bad back that day. Standards describe the ideal world. We live in the real one. And in the real world, gaskets don’t just "fail" on their own. The whole assembly lets you down.
Let’s be honest for a second. Most of us think of a gasket as a simple rubber or metal ring. We buy it, we squish it between two metal plates, and we expect it to hold back thousands of pounds of pressure. But a gasket is actually the weakest link in a very complex chain. It’s the sacrificial lamb. If anything is slightly off—the flange alignment, the bolt stretch, the temperature swing—the gasket takes the hit. Understanding why this happens requires looking past the part number and into the messy, unpredictable physics of bolted joints.
The Myth of the Perfect Flange Face
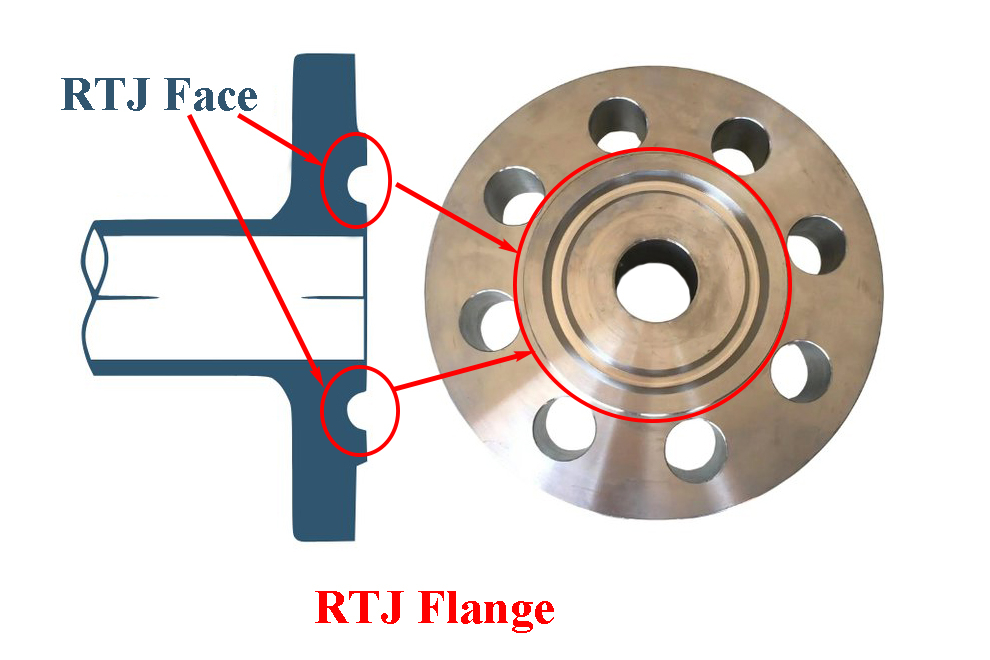
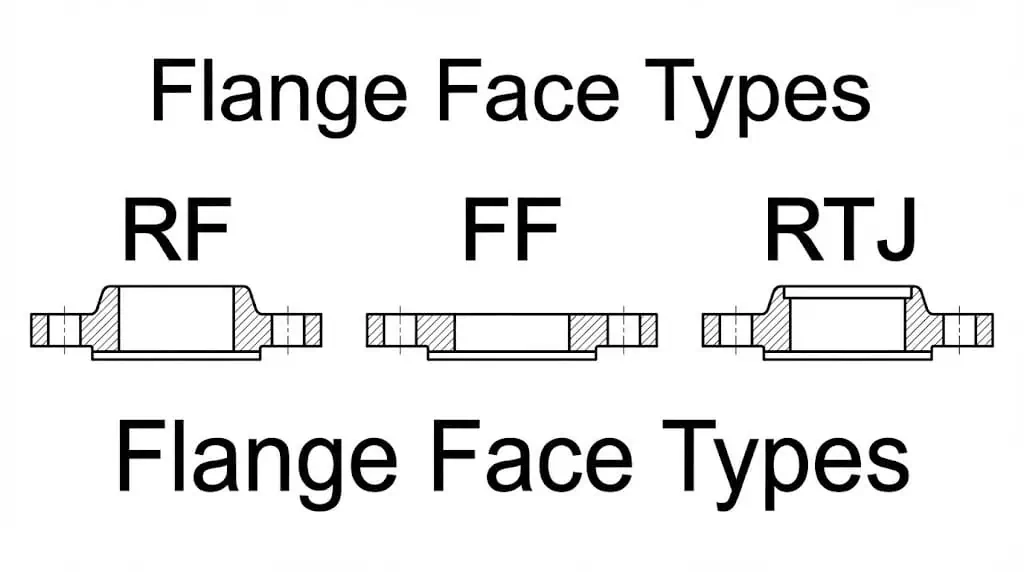
Here is a hard pill to swallow: your flanges are probably not flat. Not really. ASME B16.5 sets tolerances for flange facing, sure. It says how much roughness is allowed and how flat the surface should be. But "within tolerance" doesn’t mean "perfect." In the field, especially in older plants or after years of thermal cycling, those faces get damaged. You might see radial scratches from previous gasket removal. Maybe there’s a little pit from corrosion. Or perhaps the flange has warped slightly because the pipe supports settled unevenly over the last decade.
When you slap a new gasket onto a less-than-perfect surface, you’re asking it to do some heavy lifting. The gasket material has to flow into those tiny imperfections to create a seal. If the scratch is too deep, or the warp is too severe, the gasket can’t bridge the gap. It’s like trying to plug a hole in a boat with a piece of paper. No matter how good the paper is, if the hole is jagged and wide, water gets through. This is why visual inspection is so critical before installation. If you see deep gouges or significant warping, no amount of correct torque will save you. You need to machine the face or replace the flange. Ignoring this step is the fastest way to guarantee a leak.
And let’s talk about cleanliness for a moment. It sounds basic, but it’s overlooked constantly. Dust, old gasket material, grease, or even a fingerprint can create a pathway for leakage. These contaminants act like spacers, preventing the gasket from making full contact with the metal. In 2026, we have better cleaning tools and solvents than ever before, yet people still use wire brushes that leave behind bristles or rags that leave lint. Take the time to clean the surfaces properly. Use a solvent that evaporates completely. Check with a white cloth. If the cloth comes away dirty, keep cleaning. It’s tedious, but it’s cheaper than a shutdown.
The Bolt Load Balancing Act
Torque is not load. This is the single biggest misconception in the industry. When you use a torque wrench, you are measuring the resistance to turning the nut. You are not measuring how much the bolt is stretching. And it’s the stretch—the tension in the bolt—that clamps the flanges together. About 90% of the torque you apply is lost to friction. Friction under the nut face, friction in the threads. Only about 10% actually goes into stretching the bolt. If those threads are dry, rusty, or poorly lubricated, your torque reading is meaningless. You could be hitting the target torque number but only achieving half the required clamp load.
This is why lubrication matters so much. Not just any lubricant, but the specific one recommended for your application. A consistent coefficient of friction is key. If one bolt is slick and another is gritty, they will stretch differently even if you torque them to the exact same value. This leads to uneven loading. Some bolts are over-stressed (risking yield or breakage), while others are under-stressed (allowing the gasket to relax and leak). It’s a delicate balance. In recent years, we’ve seen more adoption of hydraulic tensioners and ultrasonic bolt measurement tools. These methods bypass the friction problem entirely by measuring the actual elongation of the bolt. They’re expensive, yes, but for critical services, they’re worth every penny.
Then there’s the issue of relaxation. Bolts aren’t static. Once you tighten them, things start to move. The gasket compresses and creeps. The flanges might rotate slightly under pressure. The bolts themselves can settle into the threads. This causes a loss of preload, often within the first few hours of operation. This is why re-torquing is sometimes recommended, though it’s controversial. Some experts say it helps; others say it introduces more inconsistency. The better approach is to use high-quality fasteners and gaskets designed to resist creep, and to follow a precise tightening sequence. Speaking of which, let’s talk about that star pattern.
Installation Errors That Sabotage Success
You know the star pattern. Tighten opposite bolts, then move around the circle. It’s designed to pull the flanges together evenly, preventing them from tilting or pinching the gasket on one side. But here’s the thing: doing it once isn’t enough. Proper installation requires multiple passes. You start at a low torque, maybe 30% of the final value, and go around in the star pattern. Then you bump it up to 60%, again in the star pattern. Finally, you hit 100%. This gradual approach allows the gasket to seat properly and the flanges to align. If you just crank one bolt to 100% and then move to the next, you’re distorting the flange. You’re creating a hill and valley effect that the gasket can’t compensate for.
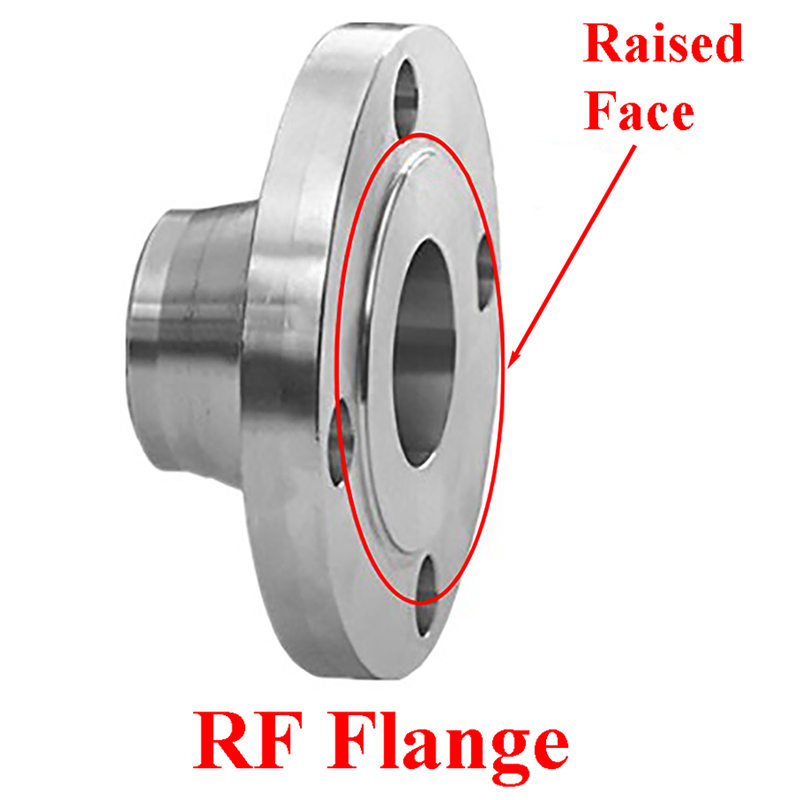
Another common mistake is using the wrong gasket for the class. A Class 150 flange and a Class 600 flange of the same nominal pipe size (NPS) have different dimensions. The bolt holes are in different places. The raised faces might have different diameters. If you try to force a Class 150 gasket onto a Class 600 flange, it won’t sit right. It might be too small, leaving gaps, or too large, getting crushed by the bolts. Always specify gaskets by NPS, class, and type per ASME B16.20 or B16.21. It seems obvious, but in the rush of a turnaround, mistakes happen. Someone grabs the nearest box. Someone assumes "8-inch is 8-inch." Don’t assume. Verify.
Human error also plays a huge role in assembly. Are the bolts clean? Are the nuts free-spinning? Did someone cross-thread a nut and force it down, damaging the threads? These small oversights add up. In 2026, we’re seeing more use of smart torque tools that record data for each bolt. This creates a digital trail. If a joint leaks, you can look back and see exactly what torque was applied to each fastener. It removes the guesswork and holds installers accountable. It’s not about blaming people; it’s about ensuring consistency. Because when you’re dealing with high pressure and hazardous fluids, consistency is safety.
Material Mismatch and Environmental Surprises
Selecting the right gasket material is like choosing the right tire for your car. You wouldn’t put summer tires on in the middle of winter, right? Same logic applies here. You need a material that can handle the specific chemical, temperature, and pressure environment. ASME standards give you guidelines, but they don’t know your specific process. Is there acid present? Is the temperature cycling rapidly? Is there vibration? A graphite gasket might work great for steady steam, but if you have strong oxidizing agents, it could disintegrate. A PTFE gasket is chemically resistant, but it creeps easily under load. If you don’t account for creep, the bolt load drops, and you leak.
Temperature swings are particularly nasty. Metals expand and contract when heated and cooled. But they do so at different rates. The bolts, the flanges, and the gasket all have different coefficients of thermal expansion. When the system heats up, the bolts might stretch more than the flanges, losing clamp load. Or the gasket might soften and extrude out from between the flanges. This is called "blowout." It’s catastrophic. To prevent this, engineers use materials with matching expansion rates or design joints with enough flexibility to accommodate the movement. But in the real world, processes change. A unit designed for one service might be repurposed for another without a proper review of the sealing components. That’s a recipe for disaster.
Don’t forget about external factors too. Is the flange exposed to sunlight? Rain? Salt spray? These environmental conditions can corrode the bolts or degrade non-metallic gasket materials over time. A gasket that looks fine during installation might be brittle and cracked six months later due to UV exposure. Or the bolts might be rusted, increasing friction and making future maintenance difficult. Protecting the joint from the elements is just as important as selecting the right internal materials. Use protective covers if the joint sits idle. Inspect regularly. Catching early signs of degradation can prevent a sudden failure.
The System Stress You Can’t See
A bolted flange joint doesn’t exist in a vacuum. It’s part of a piping system. And piping systems move. They vibrate. They sag. They expand. If the pipe is poorly supported, the weight of the fluid and the pipe itself can put bending moments on the flange. Imagine trying to hold two plates together while someone is trying to twist them apart. That’s what bad pipe support does to a flange joint. The bolts aren’t designed to handle bending loads. They’re designed for tension. When you introduce bending, you create uneven stress across the gasket. One side gets compressed too much, the other side opens up. Leak city.
Vibration is another silent killer. Pumps, compressors, and flowing fluids create vibration. Over time, this can loosen nuts. It’s called "vibrational loosening." Even with lock washers or thread lockers, severe vibration can back off a nut. This reduces the clamp load incrementally until the seal is broken. In high-vibration areas, consider using specialized fasteners or damping solutions. Sometimes, adding a flexible connector near the equipment can isolate the flange from the worst of the vibration. It’s about understanding the dynamic forces at play, not just the static pressure.
Thermal expansion of the pipe itself can also cause issues. If the pipe expands significantly when hot, it can push against the flange, again creating bending moments. Proper guidance and anchors in the piping design are crucial to direct this expansion away from sensitive joints. But often, these design features are compromised during construction or modified during repairs. A missing guide shoe or a relocated anchor can change the entire load profile on a flange. When troubleshooting a leak, look beyond the joint. Look at the pipes leading to it. Are they aligned? Are the supports intact? Is there evidence of rubbing or binding? The answer might be ten feet away from the leak.
When a gasket fails, it leaves a story behind. Learning to read this story is a superpower for any engineer or technician. The pattern of damage on the gasket tells you what went wrong. If the gasket is crushed uniformly, it might indicate over-compression or excessive bolt load. If it’s blown out on one side, you likely had flange rotation or bending. If you see distinct impressions of the bolt holes, the gasket was probably too narrow or misaligned. Radial cracks suggest thermal degradation or chemical attack. Extrusion into the pipe bore indicates high velocity or turbulence eroding the inner edge.
Take the time to examine the failed gasket carefully. Don’t just throw it in the trash. Clean it gently and lay it flat. Compare it to a new one. Look for discoloration, which hints at temperature issues. Feel for brittleness or stickiness, which points to chemical incompatibility. Check the flange faces too. Did the gasket stick to one side more than the other? That suggests uneven loading. Did the flange faces touch each other in spots? That means the gasket wasn’t thick enough or the bolts were over-torqued, crushing the gasket completely. These visual clues are invaluable for preventing recurrence.
In 2026, we’re also using more advanced analysis techniques. Microscopic examination can reveal chemical changes in the material. Strain gauges can measure residual stress in bolts. Thermal imaging can detect hot spots indicating leaks before they become visible. But you don’t always need high-tech gear. A keen eye and a systematic approach can solve most problems. Document your findings. Take photos. Share them with your team. Build a knowledge base of failure modes specific to your plant. Over time, you’ll start to recognize patterns. You’ll know that Pump A always leaks if you don’t use spacer rings. You’ll know that Valve B requires a specific torque sequence. This institutional knowledge is your best defense against future failures.
So, where does this leave us? It leaves us with a respect for the complexity of something that looks so simple. A gasket isn’t just a part; it’s the culmination of design, material science, installation skill, and operational care. Following ASME standards is necessary, but it’s not sufficient. You have to go beyond the book. You have to look at the specific conditions of your joint. You have to pay attention to the details—the cleanliness of the face, the lubrication of the threads, the alignment of the pipe.
It’s about mindset. Stop thinking of the gasket as a commodity. Start thinking of the bolted flange joint as a system. Every component matters. Every step matters. When you approach it with this level of care, the leaks stop. The frustration fades. And you get to go home on time, knowing that your plant is safe, efficient, and tight. It’s not easy. It takes effort. But isn’t that better than chasing drips forever?
[sps_html tag=”img” src=”https://cdn.northcarolinafinearchitecture.com/2026/05/3-common-flange-sealing-faces-intended-for-the-2026-guide-to-reliable-flange-sealing-without-overengineering-the-joint.jpg” alt=”3 Common Flange Sealing Faces intended for The 2026 Guide to Reliable Flange Sealing Without Overengineering the Joint” style=”width: 100%; height: auto;”]
[sps_html tag=”img” src=”https://cdn.northcarolinafinearchitecture.com/2026/05/ansi-flanges-dimensions-and-selection-guide-for-2026-inside-the-2026-guide-to-reliable-flange-sealing-without-overengineering-the-joint.webp” alt=”Ansi Flanges Dimensions And Selection Guide For 2026 inside The 2026 Guide to Reliable Flange Sealing Without Overengineering the Joint” style=”width: 100%; height: auto;”]
[sps_html tag=”img” src=”https://cdn.northcarolinafinearchitecture.com/2026/05/pocket-guide-to-flanges-and-fittings-download-guide-https-lnkd-in-in-the-2026-guide-to-reliable-flange-sealing-without-overengineering-the-joint.jpg” alt=”Pocket Guide To Flanges And Fittings Download Guide: Https://Lnkd.in … in The 2026 Guide to Reliable Flange Sealing Without Overengineering the Joint” style=”width: 100%; height: auto;”]
[sps_html tag=”img” src=”https://cdn.northcarolinafinearchitecture.com/2026/05/3-common-flange-sealing-faces-with-gasket-design.jpg” alt=”3 Common Flange Sealing Faces with Gasket Design” style=”width: 100%; height: auto;”]
[sps_html tag=”img” src=”https://cdn.northcarolinafinearchitecture.com/2026/05/flange-size-chart-complete-guide-2025-pdf-mech-forged-within-gasket-design.jpg” alt=”Flange Size Chart: Complete Guide 2025 + Pdf - Mech Forged within Gasket Design” style=”width: 100%; height: auto;”]