Measure for a storm door at the exterior trim where the new frame will mount, rather than measuring only the existing entry-door slab. Record the opening width at the top, middle, and bottom, measure the height from the sill, and check the mounting surface and handle clearance. Then compare those measurements with the chart for the exact storm door model you intend to order.
A familiar size printed on the entry door is not enough to establish fit. The exterior trim may narrow the opening, the jamb may lack depth, or the two handles may collide. This guide uses Andersen’s published storm door measurement instructions as a concrete U.S. manufacturer example. Its dimensions are manufacturer requirements to check against a chosen product, not a universal standard for every brand.
Identify the opening and the mounting surfaces
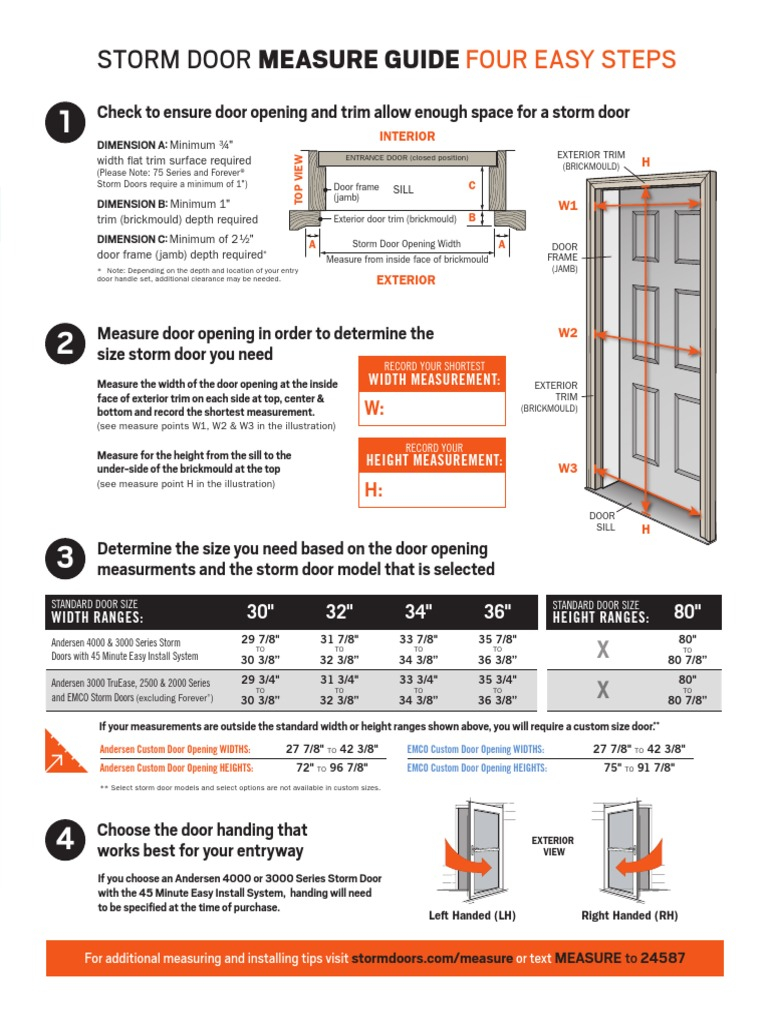
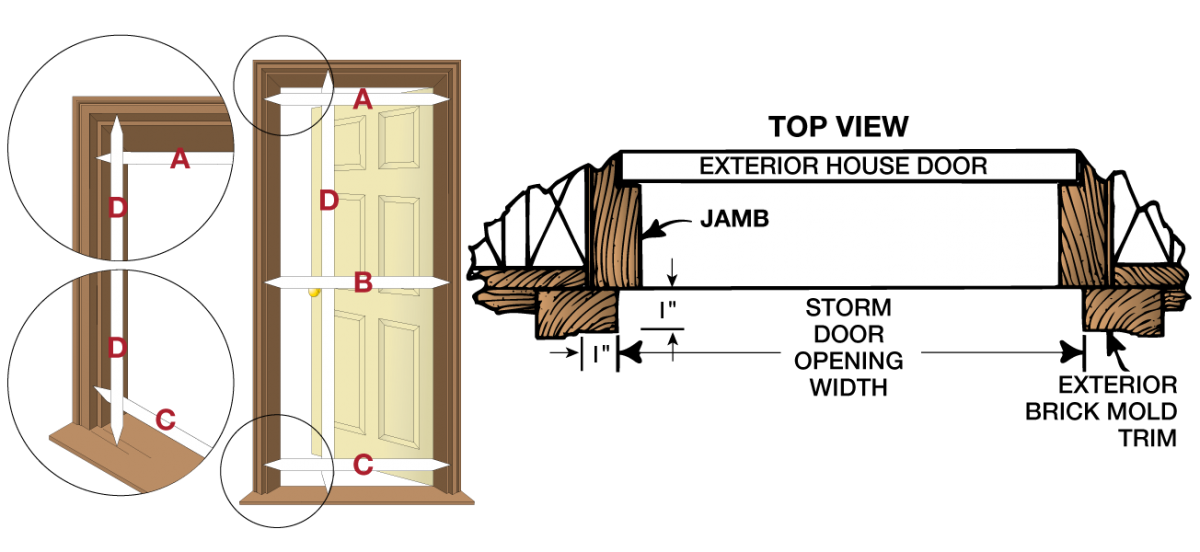
Stand outside and locate the exterior trim surrounding the entry door. The storm door frame needs a suitable place to attach, and the opening you measure must match the location shown in the manufacturer’s diagram. Measuring between the wrong edges can produce a plausible number that describes a different opening.
Before reaching for a tape measure, look for loose trim, deteriorated material, or an irregular sill. A correct size cannot compensate for a mounting surface that needs repair. If the trim or threshold appears damaged, have that assessed before ordering a door around the existing condition.
Use a tape measure, a pencil, and a worksheet or phone note. Draw a simple view of the opening and label which edges you used. Keep measurements in inches and record the fractions you actually read. Do not round an awkward opening up to the nearest familiar door size.
Measure the width in three places
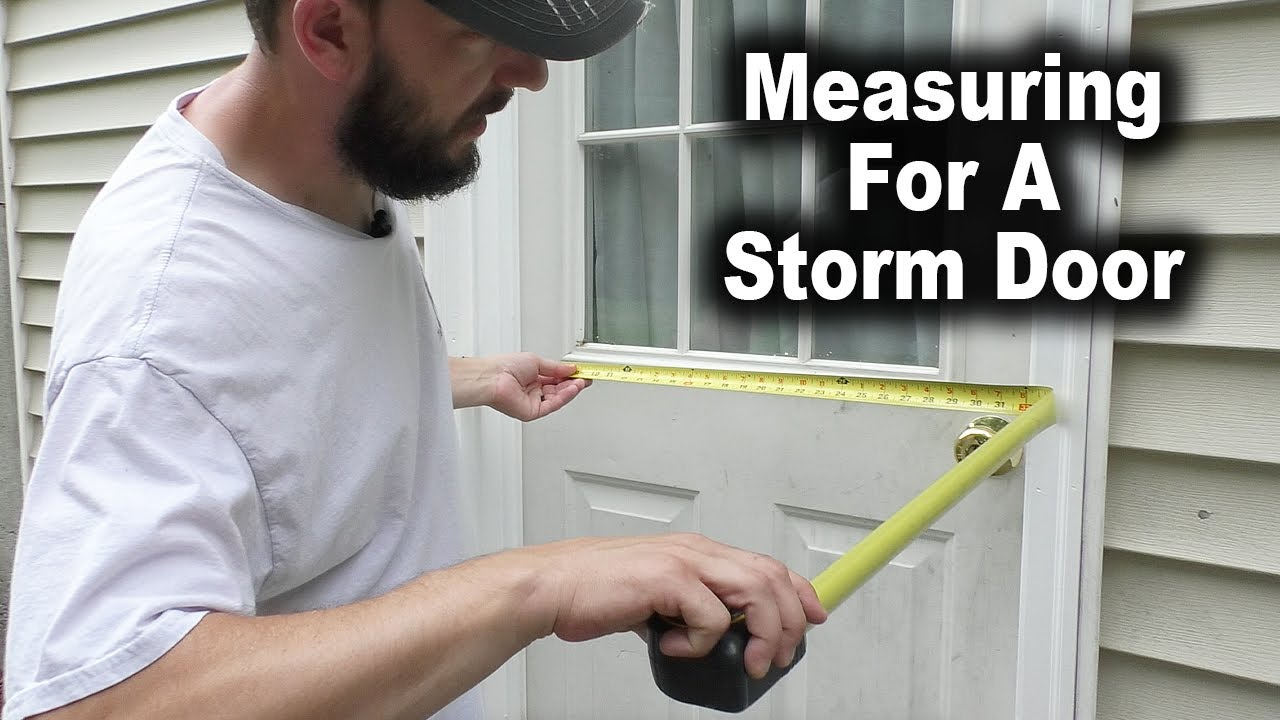
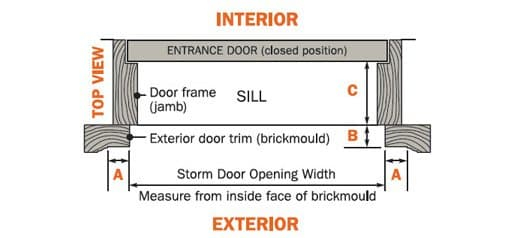
Andersen directs homeowners to measure the opening at the inside face of the exterior trim on each side. Take one width near the top, a second across the center, and a third near the bottom. Keep the tape straight between the same reference surfaces each time.
Write down all three numbers, then identify the shortest measurement, as Andersen’s instructions require. Keeping the other two readings is useful because the variation gives the retailer or installer information that a single rounded number would hide. If the readings differ unexpectedly, repeat them before deciding whether the opening needs further assessment.
For an illustrative worksheet, you might label the entries “top width,” “center width,” and “bottom width,” followed by “shortest width used for the model chart.” This keeps the observation separate from the buying decision. The chart determines which product fits; a nominal width on a box does not replace that comparison.
Measure the height from the sill to the upper trim
The height reference in Andersen’s guide runs from the sill to the underside of the brickmould at the top. Identify those surfaces using the manufacturer’s diagram, and record the measurement without substituting the entry-door slab height.
Thresholds and trim can make the reference points less obvious, especially when an old storm door frame is still installed. If existing parts hide the mounting surfaces, consult the selected product’s measurement instructions or have an installer establish the opening. Do not guess by subtracting the old frame’s apparent thickness.
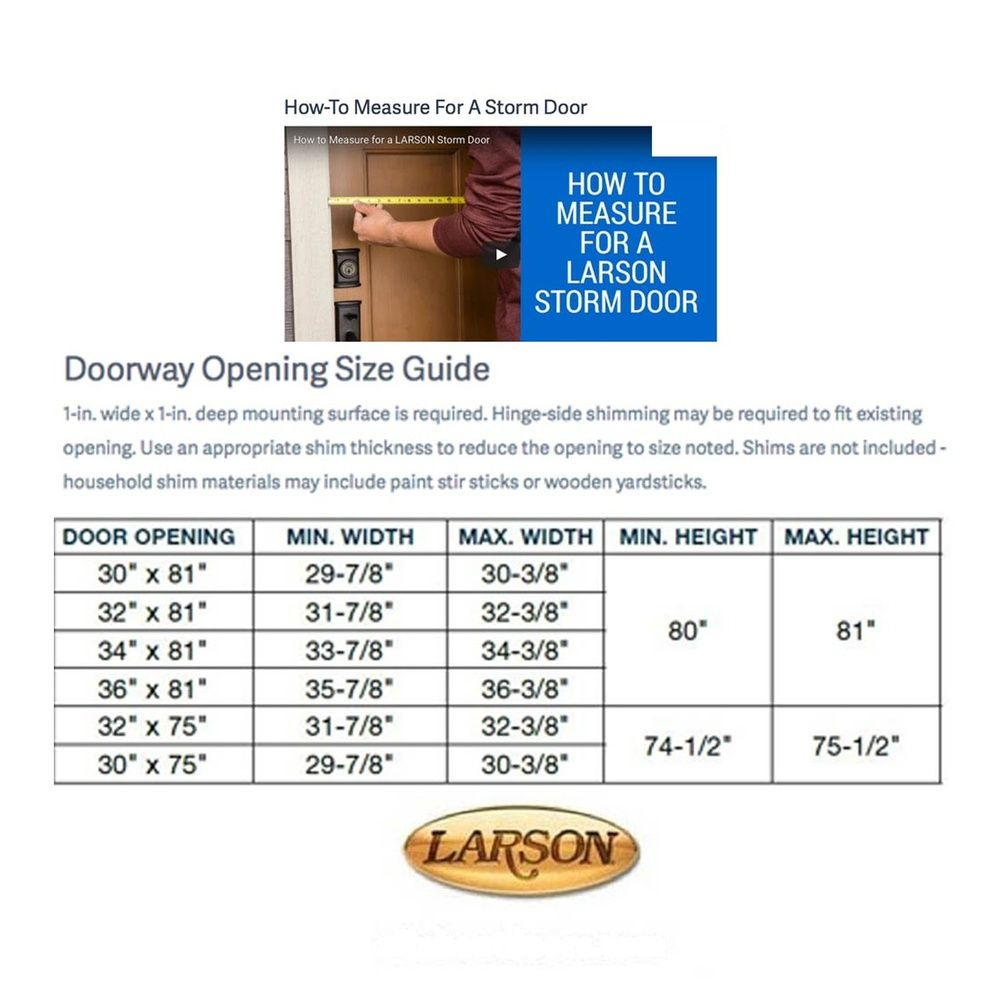
Compare the resulting height with the allowed range for the selected model and installation system. Treat width and height as a pair: a model that accepts the width can still be wrong for the height. If either measurement is outside the published range, ask about an appropriate custom size or a professionally assessed opening modification.
Check trim width, trim depth, and jamb depth separately
Andersen lists three mounting-surface checks in addition to the opening size. Its example requirements are a minimum 3/4-inch-wide flat trim surface, a minimum 1-inch trim or brickmould depth, and a minimum 2-1/2-inch door-frame or jamb depth. These describe different parts of the opening. A generous measurement in one direction does not make up for insufficient space in another.
Use the guide’s labeled diagram to record each dimension. A decorative profile can look broad while leaving only a narrow flat fastening surface. Similarly, measuring the overall thickness of the exterior wall tells you little about the usable space between the entry door and the storm door mounting location.
Those numbers are the requirements on the cited Andersen page. Confirm the current installation guide for your exact product before purchase, particularly if considering another manufacturer. If the opening needs additional trim or other changes, settle the approved detail with the retailer or installer before ordering.
Check both handles and choose the handing from outside
Jamb depth is only part of the clearance check. Andersen specifically notes that the depth and location of the entry-door handle set can require additional space. Inspect a projecting lever, knob, deadbolt, or decorative handle together with the proposed storm door hardware. Ask for the selected model’s handle-clearance information rather than assuming the minimum jamb depth guarantees a collision-free installation.
Andersen also says to determine handing from outside the home. Use the manufacturer’s diagram to describe the hinge and handle positions. Record your outside view explicitly when speaking with a retailer, since describing “left” from inside the house can reverse the intended arrangement.
Consider the usable landing and the route through the entry as you compare options. Check whether the proposed swing would meet a wall, railing, or another obstruction. If the entry is constrained or its layout raises an installation question, obtain an installer assessment rather than treating a measurement article as approval of the arrangement.
Compare the exact model chart before placing the order
Your order worksheet should now contain three widths, the shortest width, the opening height, all required mounting-surface dimensions, the proposed handing, and notes about the handles. Add the brand, model, and installation system to the same sheet. Andersen offers multiple systems, so instructions for a different package can send you toward the wrong preparation steps.
Bring photographs showing the full exterior opening, the sill, the trim profile, and the existing handle. Have the retailer check any measurement close to an allowed limit. Do not assume a custom-size door solves inadequate mounting depth or a hardware conflict; size and installation compatibility are separate decisions.
If comfort is the broader reason for the project, keep a separate list of other openings that need attention. Our guide to locating and sealing window drafts addresses a different part of that inspection. For the storm door itself, finish the fit check first: the measured opening, mounting surfaces, handle clearance, and exact product chart should all agree before you buy.