You know that feeling when you’re staring at two pieces of steel, torch in hand, and you just know the connection is going to be the weak point? It’s a nagging doubt. Maybe it’s because the fit-up isn’t quite right, or maybe you’re second-guessing if a simple fillet weld is enough for the load this thing is gonna carry. We’ve all been there. In 2026, with new high-strength alloys and automated assist tools becoming common in even small shops, the basics haven’t changed. If anything, they matter more. Because no matter how fancy your inverter welder is, if you pick the wrong joint geometry, you’re building on sand.
Let’s be real for a second. Welding isn’t just about laying a pretty bead. It’s about physics. It’s about understanding how force moves through metal. The American Welding Society (AWS) has long recognized five basic joint types: butt, lap, tee, corner, and edge. These aren’t just textbook diagrams; they are the alphabet of fabrication. You can’t write a sentence without letters, and you can’t build a sturdy frame without mastering these five configurations. Whether you’re fixing a garden gate or fabricating a custom roll cage for a track car, the rules of engagement remain the same. Get the joint right, and the weld writes itself. Get it wrong, and you’re grinding out failures before they even happen.
The Butt Joint: Strength in Alignment
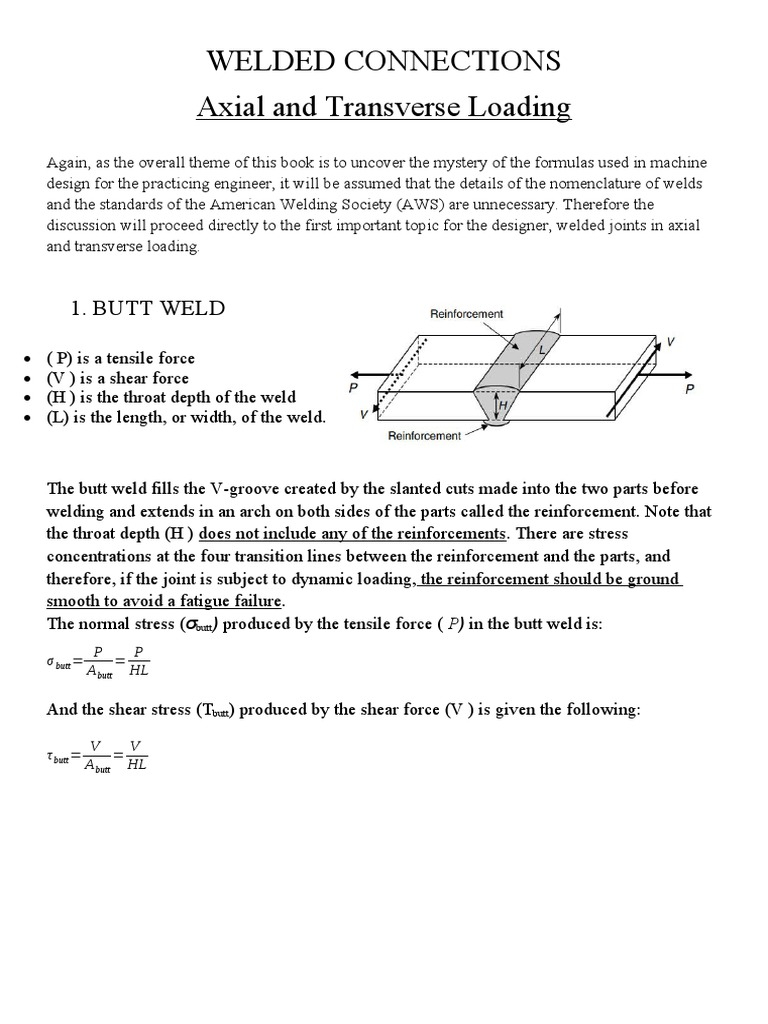
The butt joint is the gold standard for joining two pieces of metal that lie in the same plane. Think of it as shaking hands palm-to-palm. It’s clean, it’s direct, and when done right, it offers incredible strength because the load path is straight through the material. You see this everywhere in 2026, from pipeline construction to high-end architectural steelwork. But here’s the catch: it demands precision. If your edges aren’t square or your gap is inconsistent, you’re asking for trouble.
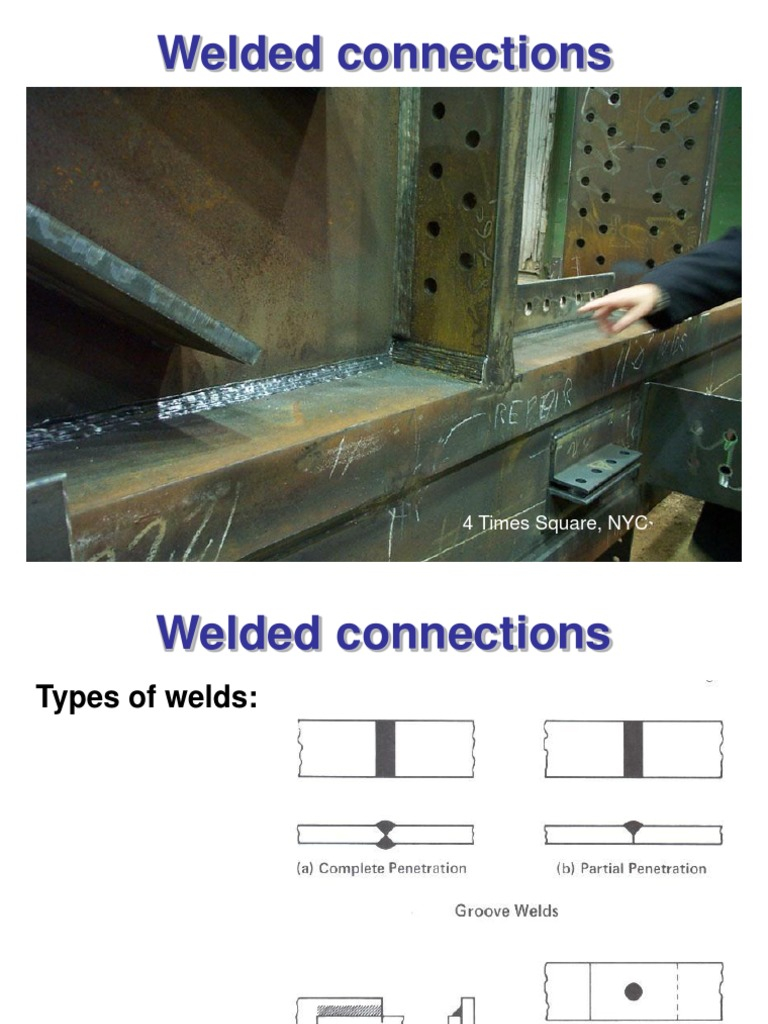
For thinner materials, a simple square groove butt joint works fine. You just butt them up against each other and weld. But as soon as you get into thicker plate—say, anything over 3/16 inch—you need to think about penetration. This is where bevels come in. A V-groove or U-groove preparation allows the arc to reach the root of the joint, ensuring full fusion. In modern shops, we’re seeing more use of hybrid laser-arc welding for these joints, which allows for deeper penetration with less heat input, but the principle remains: access to the root is key. Without it, you’ve got a cold lap waiting to crack under stress.
Preparation is everything here. You gotta clean those edges. Rust, mill scale, oil—it all acts like a barrier, preventing the weld metal from fusing with the base metal. Take the time to grind it bright. And don’t forget the backing bar or backing gas if you’re welding from one side only. It supports the molten pool and prevents burn-through. It’s a bit of extra work, sure, but the resulting joint is smooth, strong, and often requires less post-weld cleanup. That’s a win for your productivity and your sanity.
The Lap Joint: Overlapping for Ease and Speed
Sometimes, you don’t need the elegance of a butt joint. Sometimes, you just need things to stick together quickly and reliably. Enter the lap joint. This is where one piece of metal overlaps another. It’s arguably the easiest joint to fit up because you don’t need perfect edge alignment. You just lay one plate on top of the other and tack it down. For beginners, this is a forgiving friend. It’s widely used in sheet metal work, automotive repairs, and light structural applications where appearance isn’t the primary concern.
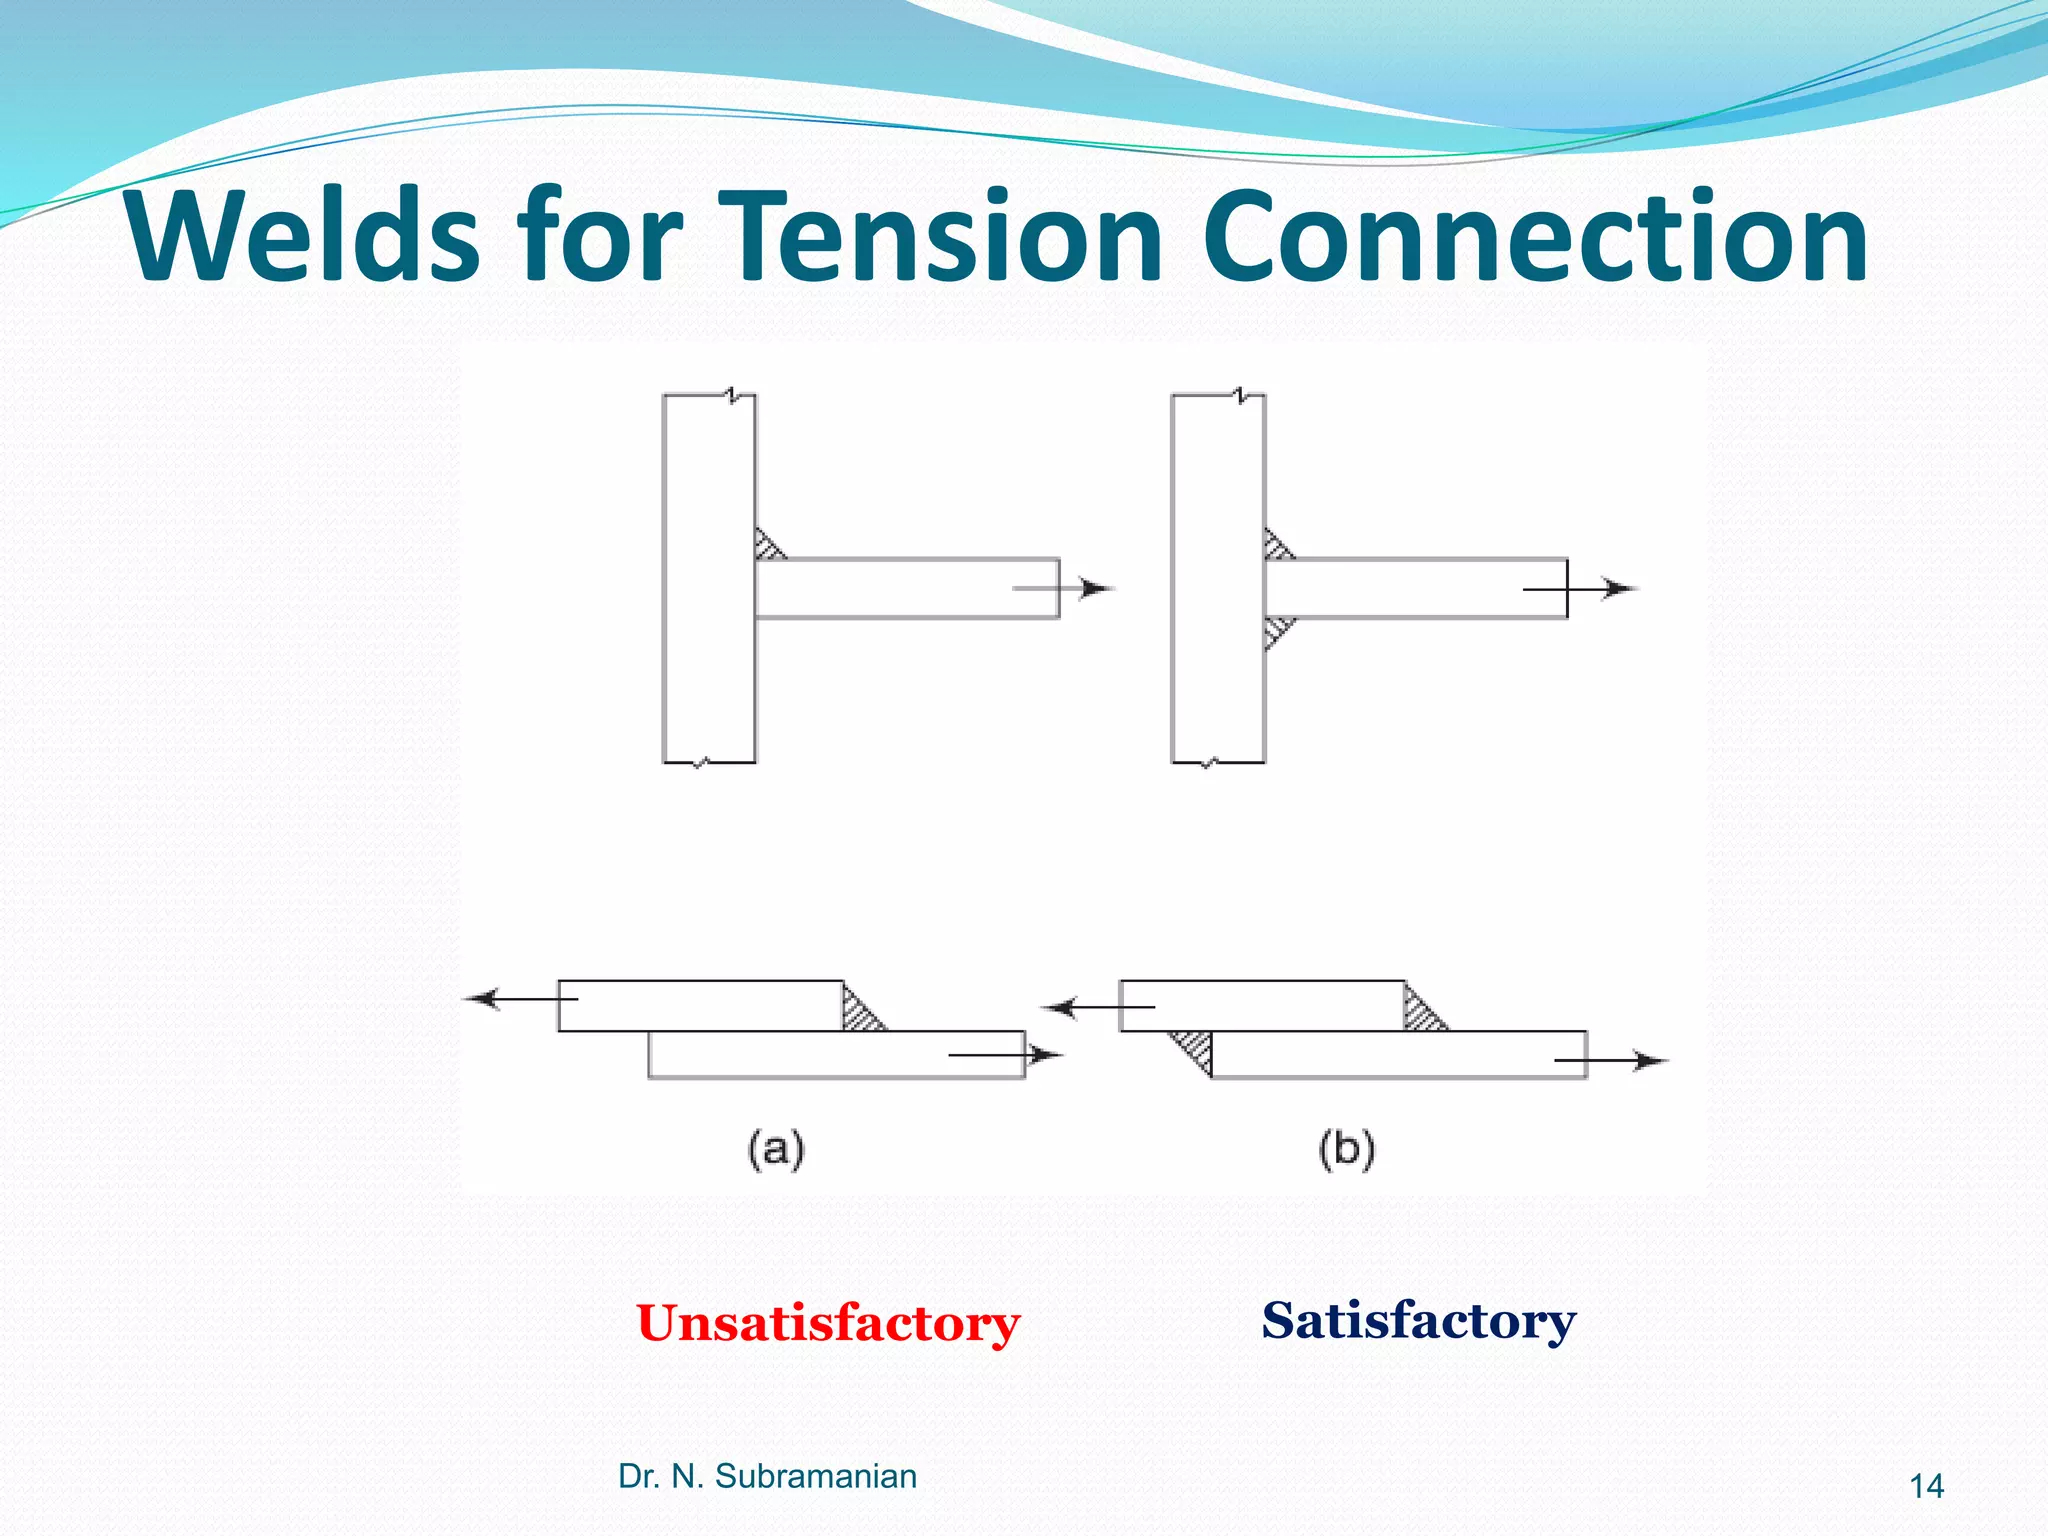
The strength of a lap joint comes from the fillet welds along the edges of the overlap. The wider the overlap, the stronger the joint, generally speaking. But there’s a trap here. If you only weld one side, the joint can peel open under certain loads. It’s like trying to pull apart two pieces of tape stuck together; if you peel from one end, it gives way. To avoid this, weld both sides if possible. Or, if you’re dealing with heavy loads, consider adding plug welds or slot welds through the top plate into the bottom one. This creates a mechanical lock that resists that peeling action.
One thing to watch out for in 2026’s thinner, high-strength steels is distortion. Because you’re heating two layers of metal, there’s more mass to absorb the heat, but also more potential for warping if you’re not careful. Use a staggered welding sequence. Don’t just run one long bead from start to finish. Break it up. Skip around. Let the metal cool a bit between passes. This keeps the plates flat and ensures your final assembly doesn’t look like a potato chip. Also, keep an eye on the root. Since the plates are overlapping, there’s a tiny gap between them. If that gap is too big, you’ll burn through the top plate before you even touch the bottom one. Clamp it tight.
The Tee Joint: Building Structures One T at a Time
If you’ve ever looked at a steel frame building, you’ve seen thousands of tee joints. It’s exactly what it sounds like: one piece of metal perpendicular to another, forming a T shape. This is the bread and butter of structural fabrication. You’ll find it in I-beams, brackets, machinery frames, and basically any time you need to attach a vertical member to a horizontal base. The primary weld here is the fillet weld, sitting in the corner created by the two plates.
The challenge with tee joints is getting good penetration into the root of the joint. If you just slap a bead on the surface, you might have a nice-looking weld, but it could be sitting on top of the joint rather than fusing into it. This is called "lack of fusion," and it’s a silent killer. To combat this, many pros in 2026 are using slightly higher amperage or adjusting their travel angle to push the arc deeper into the corner. Some even prefer a slight weave motion to ensure the heat penetrates both plates evenly. Remember, the vertical plate tends to dissipate heat faster than the horizontal one, so you need to balance your heat input.
Another consideration is the size of the fillet weld. Bigger isn’t always better. An oversized weld adds unnecessary weight, costs more in filler metal, and introduces more heat, which leads to more distortion. The rule of thumb is that the leg size of the fillet should match the thickness of the thinner member, up to a certain point. Check your engineering specs, but don’t just guess. And if the joint is going to be under heavy cyclic loading—like on a vibrating machine or a vehicle suspension—consider grinding the toe of the weld smooth. This reduces stress concentrations and significantly improves fatigue life. It’s a small step that makes a huge difference in longevity.
The Corner Joint: Framing Your World
Corner joints are what hold boxes together. Literally. Whether you’re building a simple metal planter box, a cabinet frame, or a structural column, the corner joint is essential. There are two main types: the open corner (where the edges meet at a 90-degree angle but don’t overlap) and the closed corner (where one or both edges are flanged or overlapped). The open corner is common in light gauge work, while the closed corner is preferred for heavier structural applications because it provides more surface area for welding and better alignment.
In 2026, we’re seeing a resurgence in artistic metalwork, and corner joints are front and center. Furniture makers love them for their clean lines. But achieving that perfect 90-degree angle is tricky. If your cut isn’t square, your whole assembly will be racked. Use a good square. Better yet, use a fixture. Clamping your pieces in a jig ensures they stay put while you tack weld. Once tacked, check your diagonals. If they’re equal, you’re square. If not, adjust before you commit to the final welds.
Welding corner joints can be prone to distortion because the heat is concentrated in one area. As the weld cools, it shrinks, pulling the plates inward. This can close up the angle, making it less than 90 degrees. To counteract this, some welders intentionally set the angle slightly open (like 91 or 92 degrees) knowing it will pull shut as it cools. It’s a trick of the trade that takes practice to master. Also, consider welding the inside and outside of the corner if access allows. This balances the stresses and keeps the joint straight. If you can only weld one side, make sure it’s a full penetration weld if strength is critical.
The Edge Joint: Sealing the Deal
The edge joint is the odd one out, but it’s still vital. It’s used when two or more parallel plates are joined along their edges. You see this often in tank fabrication, where you need to join sheets to create a seamless container, or in situations where you need to seal a seam against leaks. It’s not typically used for heavy structural loading because the load path isn’t ideal, but for containment and sealing, it’s unbeatable.
The key to a successful edge joint is maintaining a consistent gap between the plates. If the gap varies, your weld bead will vary, leading to potential leaks or weak spots. In older methods, you might have seen these joints riveted or bolted, but welding provides a continuous seal. In modern applications, especially with stainless steel or aluminum tanks for food or chemical processing, the edge joint is often welded using TIG (GTAW) for its precision and cleanliness. The goal is a smooth, uniform bead that doesn’t trap contaminants.
One common mistake is burning through the edge. Since you’re welding on the very edge of the plate, there’s less material to absorb the heat. Keep your travel speed steady and your amperage controlled. If you’re working with thin material, consider using a copper backing bar behind the joint. Copper absorbs heat rapidly, helping to prevent burn-through and supporting the molten pool. It’s a simple tool that solves a complex problem. And remember, if the joint is going to be exposed to corrosive environments, make sure the weld is fully fused and free of crevices where moisture can hide. Corrosion loves a good hiding spot.
So, you’ve got the five types. How do you choose? It’s not just about what looks cool. It’s about function. Start by asking: What is the load path? Where is the force coming from, and where does it need to go? If the force is tension (pulling apart), a butt joint is usually best. If it’s shear (sliding past), a lap or tee joint might work well. If it’s compression, almost any joint will do, but stability matters.
Next, consider accessibility. Can you get your torch to all sides of the joint? If you’re welding in a tight corner, a tee joint might be easier to handle than a butt joint that requires back-gouging. Material thickness is another huge factor. Thin stuff bends and burns; thick stuff needs preheat and multiple passes. Don’t try to force a butt joint on 16-gauge sheet metal unless you’re a wizard. A lap joint is far more forgiving there.
Finally, think about production volume and cost. In 2026, labor costs are high. A joint that takes ten minutes to prep but five minutes to weld might be slower overall than a joint that takes two minutes to prep and fifteen minutes to weld. Factor in fit-up time, welding time, and cleanup time. And don’t forget inspection. Some joints are easier to inspect than others. A butt joint with full penetration can be hard to verify without X-ray or ultrasound, whereas a fillet weld on a tee joint is visually inspectable. Choose the joint that gives you confidence in the final product.
At the end of the day, mastering these five joints isn’t about memorizing diagrams. It’s about developing an intuition for how metal behaves. It’s about looking at a pile of steel and seeing the connections before you even pick up the grinder. It’s about knowing that a little extra time on fit-up saves hours of repair later. So, next time you’re in the shop, take a breath. Look at your pieces. Ask yourself which of the five friends—butt, lap, tee, corner, or edge—is the right one for the job. Then, weld it like you mean it. Because in 2026, quality isn’t just a buzzword. It’s the only thing that stands between a job well done and a call-back you don’t want.
[sps_html tag=”img” src=”https://cdn.northcarolinafinearchitecture.com/2026/05/welded_connections-pptx-with-weld-joint-design.jpg” alt=”Welded_Connections | Pptx with Weld Joint Design” style=”width: 100%; height: auto;”]
[sps_html tag=”img” src=”https://cdn.northcarolinafinearchitecture.com/2026/05/design-of-welded-connections-pdf-electric-arc-welding-inside-stop-guessing-how-to-design-welded-connections-for-dynamic-loads.jpg” alt=”Design Of Welded Connections | Pdf | Electric Arc | Welding inside Stop Guessing How to Design Welded Connections for Dynamic Loads” style=”width: 100%; height: auto;”]
[sps_html tag=”img” src=”https://cdn.northcarolinafinearchitecture.com/2026/05/design-of-welded-connections-in-steel-pdf-throughout-stop-guessing-how-to-design-welded-connections-for-dynamic-loads.jpg” alt=”Design Of Welded Connections In Steel | Pdf throughout Stop Guessing How to Design Welded Connections for Dynamic Loads” style=”width: 100%; height: auto;”]
[sps_html tag=”img” src=”https://cdn.northcarolinafinearchitecture.com/2026/05/steel-connections-design-guidelines-steelexplained-com-with-regard-to-stop-guessing-how-to-design-welded-connections-for-dynamic-loads.png” alt=”Steel Connections - Design Guidelines - Steelexplained.com with regard to Stop Guessing How to Design Welded Connections for Dynamic Loads” style=”width: 100%; height: auto;”]
[sps_html tag=”img” src=”https://cdn.northcarolinafinearchitecture.com/2026/05/welded_connections-pptx-throughout-weld-joint-design.jpg” alt=”Welded_Connections | Pptx throughout Weld Joint Design” style=”width: 100%; height: auto;”]