You wake up one morning and smell it. That damp, earthy scent that clings to the back of your throat. It’s not just "old house smell." It’s a warning sign. For millions of homeowners, the battle against mold doesn’t start in the bathroom or the basement kitchenette. It starts much lower. Down in the dark, cramped, and often ignored crawl space.
Most people think insulation is just about keeping warm in winter. But if you’re dealing with a vented crawl space full of fiberglass batts that look like soggy cereal, you’re missing the point entirely. Proper wall insulation isn’t just about energy bills. It’s about stopping the moisture engine that feeds mold before it ever gets a foothold. In 2026, we know better than to just throw pink fluff against dirt walls and hope for the best. We know that sealing the envelope is the only way to win.
Let’s be honest. Crawling under your house isn’t anyone’s idea of a fun weekend. But ignoring what’s happening down there can cost you thousands later. Mold doesn’t care if you don’t like tight spaces. It thrives in the neglect. By focusing on the walls—the vertical barrier between your home’s structure and the ground—you cut off the supply line. This guide walks you through exactly how to do it right, without the jargon, so you can breathe easier. Literally.
Why Your Crawl Space Walls Are the Critical Barrier
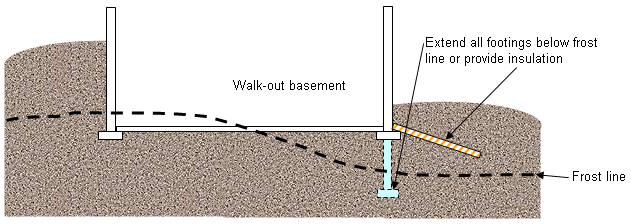
Think of your home like a boat. The hull keeps the water out. If the hull has holes, it doesn’t matter how nice the cabins are; you’re still sinking. In housing terms, the crawl space walls are part of that hull. When we talk about "wall insulation" in a crawl space, we aren’t usually talking about the wooden studs inside your living rooms. We’re talking about the foundation walls themselves—the concrete or block perimeter that holds up your floor joists.
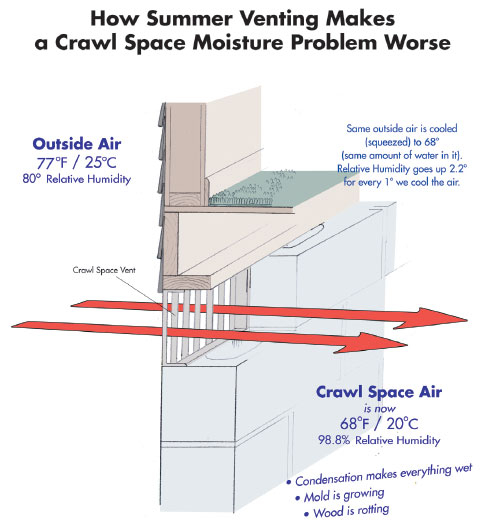
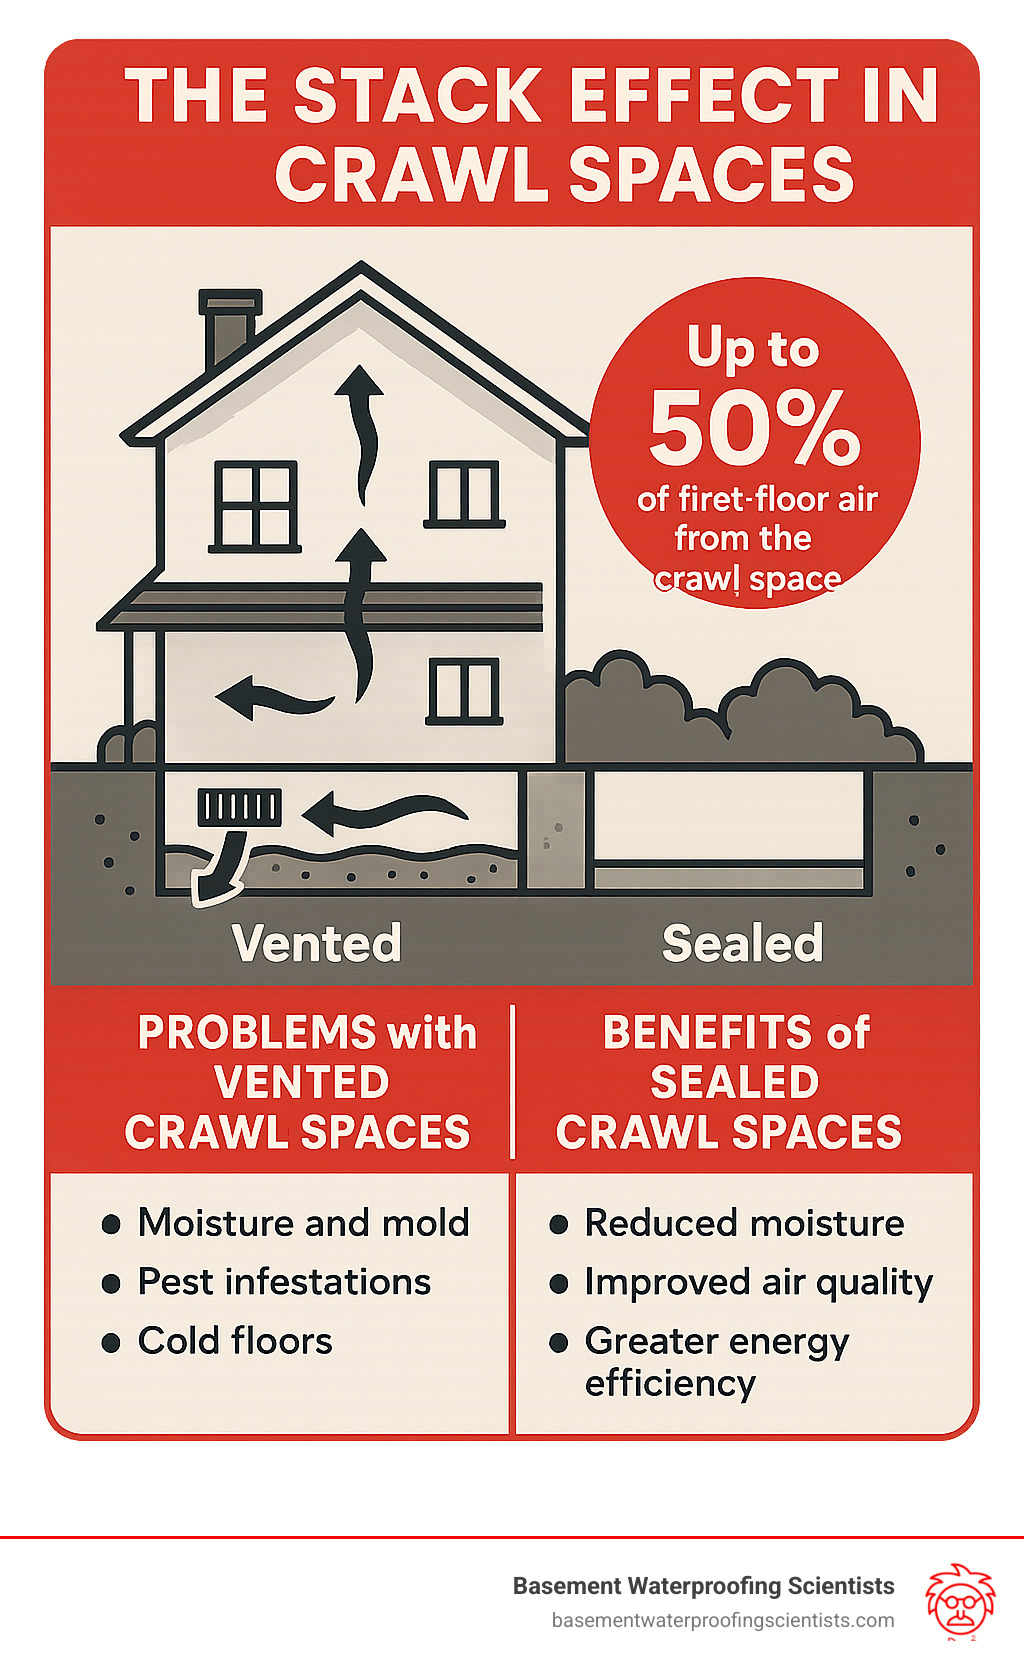
For decades, the standard advice was to vent these spaces. The logic was simple: let fresh air circulate to dry out moisture. But here’s the thing. In humid climates, "fresh air" is actually wet air. When that warm, humid summer air hits the cool foundation walls, it condenses. Just like a cold soda can on a hot day. That condensation drips onto your wood framing, your insulation, and the dirt floor. It creates a perfect buffet for mold spores.
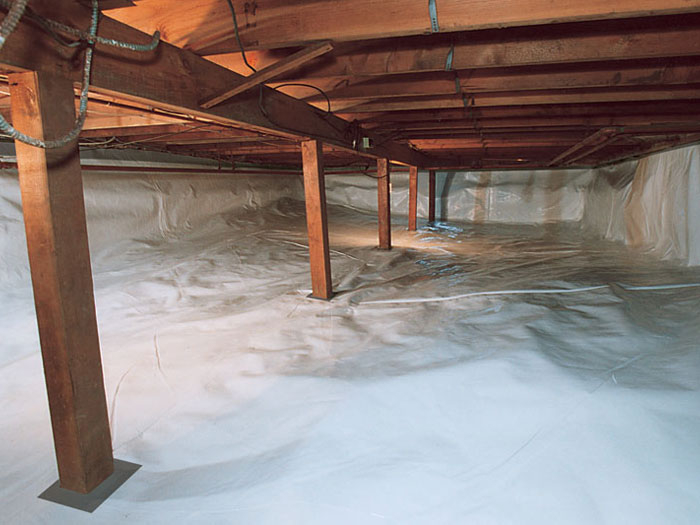
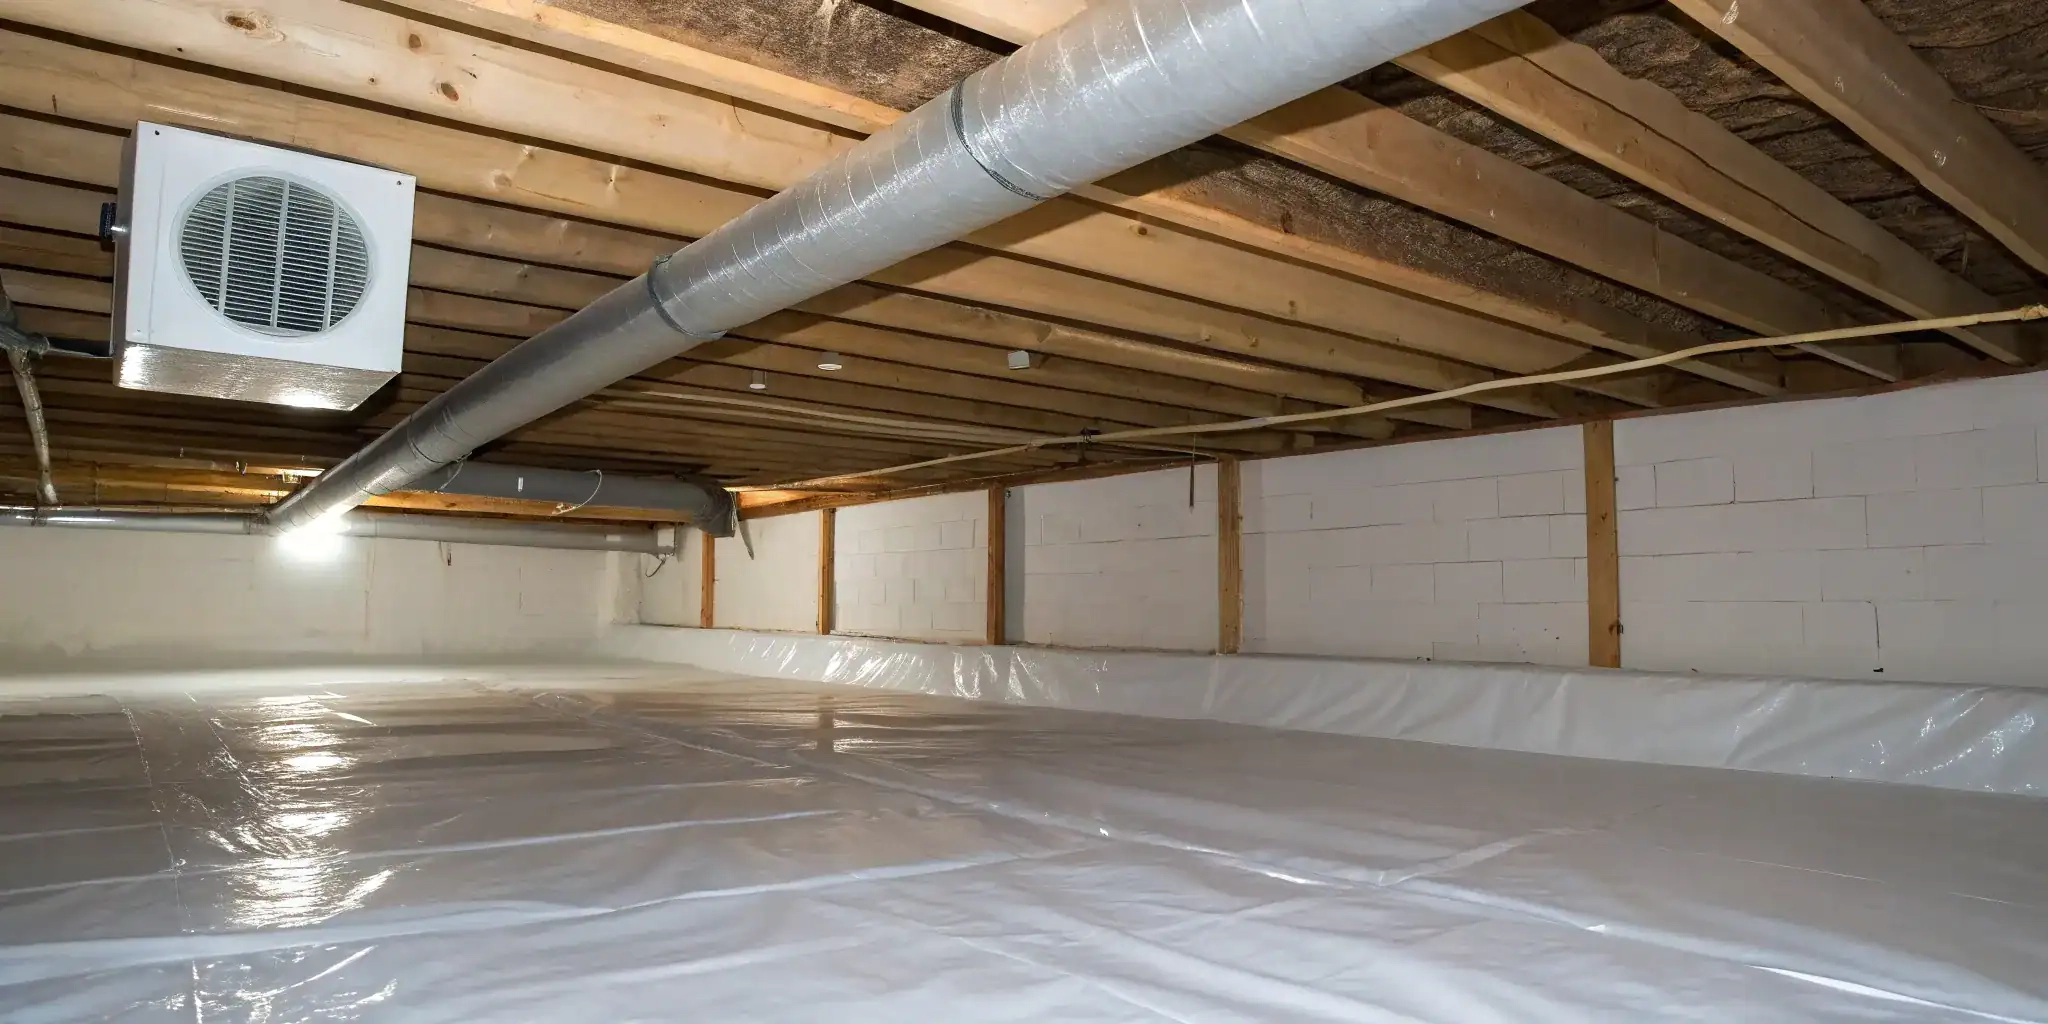
By shifting our focus to insulating the walls directly, we change the game. We stop treating the crawl space as an outdoor area and start treating it as part of the conditioned home. This technique, often called a "conditioned crawl space" or "sealed crawl," removes the temperature difference that causes condensation. No condensation means no free water for mold. It’s physics, plain and simple. And in 2026, building codes across many states are finally catching up to this reality, pushing for sealed, insulated walls over old-school venting.
Prepping the Space: Clean Slate Before You Seal
You wouldn’t paint a wall covered in dust and grease, right? Same rule applies here. Before you even think about buying insulation, you have to deal with what’s already down there. This step is boring, dirty, and absolutely non-negotiable. If you skip it, you’re just trapping problems inside a pretty package.
Start by removing any old, damaged insulation. If you have fiberglass batts hanging from the floor joists that are sagging, wet, or moldy, take them out. They’re done. They’ve absorbed moisture and likely lost their R-value (that’s the measure of how well it resists heat flow). While you’re at it, look for signs of pests. Mouse droppings, insect nests, or chewed wires need to be addressed. You don’t want to seal critters in with you.
Next, inspect for active water leaks. Is there standing water after a rainstorm? Do you see efflorescence—that white, chalky powder—on the concrete walls? That’s mineral deposit left behind by evaporating water, and it means moisture is moving through the masonry. Fix any grading issues outside first. Make sure gutters are directing water away from the foundation. If the ground outside slopes toward your house, no amount of interior insulation will save you. You might need a sump pump or a French drain if water intrusion is severe. Get the bulk water under control before you worry about the vapor.
Choosing the Right Material for Wall Insulation
Not all insulation is created equal. In fact, using the wrong type in a crawl space can make things worse. Remember, we are insulating the vertical foundation walls. The material needs to handle potential moisture, resist mold growth itself, and provide an air seal. Here are the top contenders for 2026.
Rigid foam board is the gold standard for many pros. Specifically, extruded polystyrene (XPS) or expanded polystyrene (EPS). XPS is that smooth, usually pink or blue board. It’s dense, water-resistant, and has a high R-value per inch. EPS is the beadboard stuff, often white. It’s cheaper and breathable, which can be good in some specific drying scenarios, but XPS is generally tougher against moisture. You can glue these directly to the concrete walls using specialized construction adhesive.
Spray foam is another heavy hitter. Closed-cell spray foam expands as it sprays, filling every crack, crevice, and irregularity in the stone or block foundation. It acts as both insulation and an air barrier. It’s fantastic for odd-shaped crawl spaces with lots of obstructions. However, it’s pricey and requires professional installation. You can’t really DIY this safely without serious gear.
Avoid fiberglass batts for wall applications in crawl spaces. They absorb water like a sponge. If they get wet, they stay wet, and they become a mold farm. Mineral wool (rock wool) is better than fiberglass because it’s water-repellent and fire-resistant, but it still doesn’t provide the air-sealing benefits of foam. For wall insulation, rigid foam or spray foam are the winners because they stop the air movement that carries moisture.
The Installation Process: Sealing the Envelope
So you’ve cleaned the space and bought your rigid foam boards. Now comes the actual work. This is where attention to detail separates a job that lasts from one that fails in two years. The goal is continuity. There should be no gaps in your insulation layer.
Measure your foundation walls and cut the foam boards to fit. Use a utility knife or a saw. Dry fit them first to make sure they sit flat against the wall. If your foundation is rough stone, you might need to use shims or choose spray foam instead, because rigid board won’t bridge big gaps. Once fitted, apply construction adhesive designed for foam to the back of the board and press it firmly against the concrete. Some folks also use mechanical fasteners with large washers, but adhesive is often enough if the wall is clean.
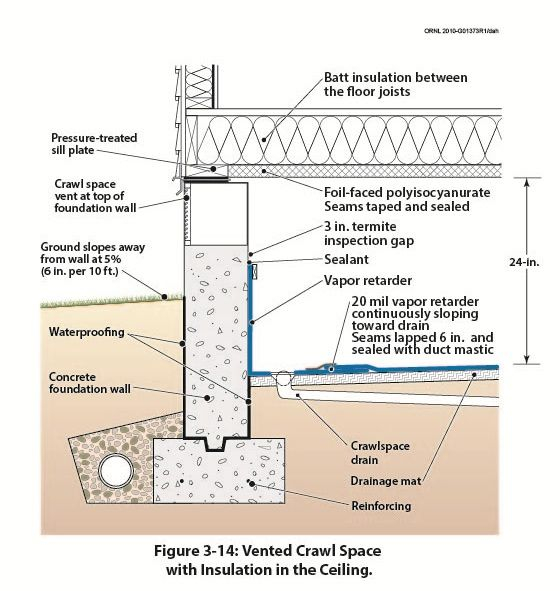
Here is the critical part: sealing the seams. Use foil-faced tape or specialized foam seam tape to seal every joint between the boards. Air leaks through these seams can lead to condensation behind the insulation. Treat the tape job like you’re wrapping a present for someone who hates surprises. Also, seal the top edge where the foam meets the rim joist (the wooden band at the top of the foundation). Use expanding foam sealant or caulk to close that gap. This connects your wall insulation to the rest of your home’s thermal envelope.
Don’t forget the penetrations. Pipes, wires, and vents going through the foundation need to be sealed too. Use expanding foam or rubber grommets to close these holes. Every hole is a door for moist air. Shut them all.
Managing Moisture: The Vapor Barrier Connection
Insulating the walls is half the battle. The other half is controlling the ground. Even with perfect wall insulation, moisture will rise from the soil through a process called vapor diffusion. If you ignore the floor, you’re leaving a major source of humidity active.
Install a heavy-duty vapor barrier on the crawl space floor. This isn’t the thin plastic sheeting you might find in a hardware store bargain bin. Look for reinforced polyethylene, at least 10-20 mils thick. It needs to be tough enough to walk on without tearing. Lay it out across the entire dirt floor, overlapping seams by at least 12 inches. Tape those seams securely with acoustic or construction tape.
Run the vapor barrier up the sides of the foundation walls, overlapping your new foam insulation by a few inches. Tape it to the foam. This creates a continuous "bathtub" effect. The walls are insulated, and the floor is sealed. Now, the only moisture in the crawl space is what’s already there, which will eventually dry out, or what leaks in from a pipe burst. You’ve stopped the constant influx of ground moisture.
In some very humid climates, experts in 2026 recommend adding a small dehumidifier rated for crawl spaces. This is an extra layer of insurance. It keeps the relative humidity below 60%, which is the threshold where mold struggles to grow. But remember, the dehumidifier is a backup, not a fix for bad insulation or missing vapor barriers.
You’ve done the work. The crawl space is clean, insulated, and sealed. Can you forget about it? Not quite. Think of this as preventive medicine. You don’t go to the doctor only when you’re dying; you go for checkups. Your crawl space needs checkups too.
Twice a year, ideally in spring and fall, crawl back in. Bring a flashlight and a moisture meter if you have one. Look for any signs of new water intrusion. Check the vapor barrier for tears. Did a pest chew through it? Did a service technician walking on it rip a seam? Repair any damage immediately with tape.
Check the insulation boards. Are they still adhered to the wall? Did any pull away? Re-glue them if needed. Look at the rim joists and the top of the walls. Any new condensation? If you see water droplets, your air sealing might have failed, or your home’s overall humidity is too high.
If you installed a dehumidifier, check its filter and empty the bucket or check the drain line. A clogged drain line is a common failure point that leads to overflow and… you guessed it, mold. Keep the space clear of storage items if possible. Boxes and clutter restrict airflow and make inspections harder. Keep it open, keep it clean, and keep it dry.
Mold prevention isn’t a one-time project. It’s a mindset. By maintaining the integrity of your crawl space envelope, you’re protecting your health and your investment. It’s easy to ignore what you can’t see, but taking ten minutes twice a year can save you from a ten-thousand-dollar remediation bill later.
Stopping mold before it starts isn’t magic. It’s just good building science applied with care. By insulating your crawl space walls properly, sealing the air leaks, and managing the ground moisture, you turn a damp, dangerous cavity into a dry, stable part of your home. It takes effort, sure. But the peace of mind? That’s worth every minute spent in the dark.
[sps_html tag=”img” src=”https://cdn.northcarolinafinearchitecture.com/2026/05/best-way-to-seal-crawl-space-vents-ultimate-guide-2025-intended-for-why-sealed-crawl-space-walls-beat-vented-designs-in-2026.jpg” alt=”Best Way To Seal Crawl Space Vents: Ultimate Guide 2025 intended for Why Sealed Crawl Space Walls Beat Vented Designs in 2026″ style=”width: 100%; height: auto;”]
[sps_html tag=”img” src=”https://cdn.northcarolinafinearchitecture.com/2026/05/how-and-why-we-seal-crawl-spaces-intended-for-why-sealed-crawl-space-walls-beat-vented-designs-in-2026.jpg” alt=”How (And Why) We Seal Crawl Spaces intended for Why Sealed Crawl Space Walls Beat Vented Designs in 2026″ style=”width: 100%; height: auto;”]
[sps_html tag=”img” src=”https://cdn.northcarolinafinearchitecture.com/2026/05/what-is-a-conditioned-crawl-space-a-simple-guide-residential-and-with-crawl-space-wall-design.webp” alt=”What Is A Conditioned Crawl Space? A Simple Guide - Residential And … with Crawl Space Wall Design” style=”width: 100%; height: auto;”]
[sps_html tag=”img” src=”https://cdn.northcarolinafinearchitecture.com/2026/05/vented-crawl-space-with-concrete-foundation-wall-inside-crawl-space-wall-design.jpg” alt=”Vented Crawl Space With Concrete Foundation Wall inside Crawl Space Wall Design” style=”width: 100%; height: auto;”]
[sps_html tag=”img” src=”https://cdn.northcarolinafinearchitecture.com/2026/05/25-basement-remodeling-ideas-inspiration-basement-crawl-space-in-why-sealed-crawl-space-walls-beat-vented-designs-in-2026.jpg” alt=”25 Basement Remodeling Ideas & Inspiration: Basement Crawl Space … in Why Sealed Crawl Space Walls Beat Vented Designs in 2026″ style=”width: 100%; height: auto;”]