The rain had been relentless for three days straight, turning the unpaved gravel lot into a muddy morass. Out by the fence line sat a pristine, thirty-eight-foot Class A diesel pusher—a mobile apartment on wheels representing a six-figure ticket to open-road freedom. But freedom doesn’t maintain itself. As water pooled around the tires and the relentless ultraviolet radiation baked the fiberglass roof caps, the unspoken tax of motorhome ownership came due.
Most owners purchase an RV with visions of national parks and coastal highways dancing in their heads. They rarely plan for the quiet, destructive reality of what happens when the rig sits idle for eight months out of the year. Unprotected storage is a slow-motion catastrophe. Sun-baked rubber seals crack, water finds its way past compromised roof seams, and shifting, unengineered soil slowly twists the chassis frame.
Protecting that rolling investment requires more than a tarp and a patch of dirt. It demands a rigorous, calculated approach to overhead clearance and structural foundations. When you marry precise vertical measurements with a solid, engineered concrete pad, you transform a vulnerable backyard parking spot into a professional-grade fortress. This is the blueprint for keeping your motorhome road-ready for decades, safeguarding both its mechanical integrity and its resale value.
The Anatomy of RV Vulnerability: Why Basic Storage Fails Your Rig
A modern motorhome is an engineering marvel, combining residential amenities with heavy-duty automotive hardware. Yet, this complexity makes it uniquely susceptible to environmental decay. Fiberglass siding chalks and oxidizes under direct sunlight. EPDM rubber and TPO roofs degrade rapidly when exposed to constant thermal cycling, freeze-thaw sequences, and punishing hail storms. When left exposed to the elements, a motorhome suffers from accelerated wear long before the engine ever turns over a hundred thousand miles.
Compounding environmental damage is the hidden threat of ground moisture. Soil beneath an unprotected RV constantly releases vapor. This moisture rises, gets trapped underneath the chassis, and attacks metal brake lines, structural frame components, and steel leveling jacks. Rust doesn’t care how much your rig cost; it thrives wherever humidity lingers unchecked. Furthermore, standard organic soil shifts with seasonal moisture changes. One heavy downpour can saturate the ground on one side of your motorhome, causing the tires to sink unevenly and placing torsional stress on the fiberglass walls and slide-out mechanisms.
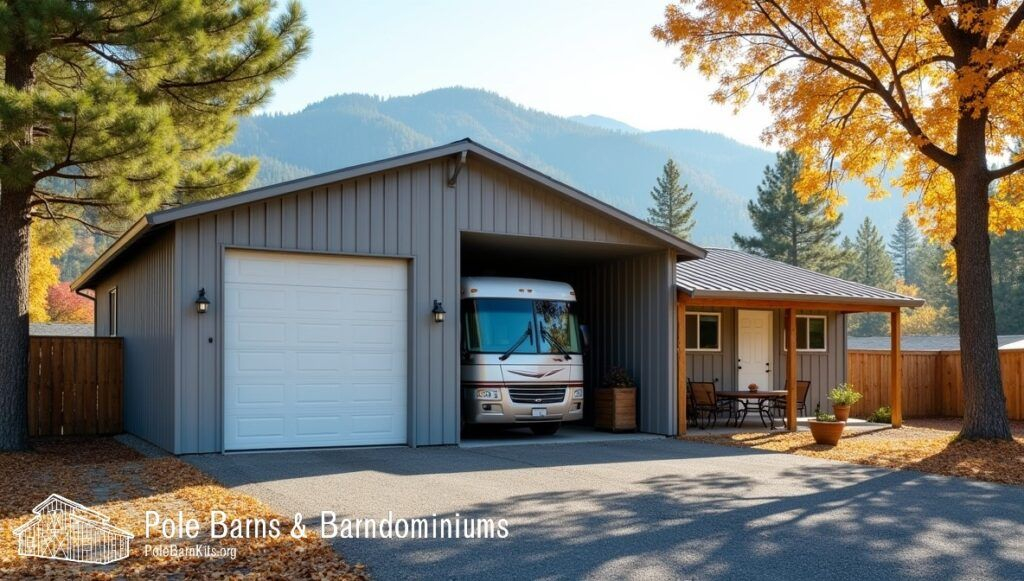
Mitigating these compounding risks requires shifting your mindset from casual parking to permanent asset protection. Whether you are looking at open-air metal carports or fully enclosed steel garages, the philosophy remains identical. You must isolate the vehicle from atmospheric assault and ground-level moisture migration. A quality shelter acts as a thermal buffer, drastically reducing the extreme temperature swings that cause interior condensation, mold growth, and premature interior wear.
Calculating True Vertical Clearance and Eliminating Margin of Error
The single most common and expensive mistake motorhome owners make during shelter planning is underestimating vertical dimensions. Many owners pull out the manufacturer brochure, see a stated height of twelve feet, and order a thirteen-foot-clearance carport. That miscalculation leads to a terrifying morning when the lowest roof truss of the new shelter impacts your rear air conditioning shroud. Brochures rarely account for aftermarket modifications, satellite dishes, solar arrays, or suspension adjustments.
Measuring your motorhome requires a rigorous, physical audit on level ground. Park your rig, ensure the air suspension is fully inflated and operational, and use a reliable builder’s leveling rod or a weighted tape dropped from a straightedge resting across your highest fixed point. Remember that your highest point is rarely the raw roofline. It is usually the top of the rooftop air conditioner, the roof-mounted TV antenna, or a newly installed cell booster.
Once you have established the absolute peak dimension of your coach, you must factor in safety margins. Industry standards recommend adding a minimum of two to three feet of overhead clearance between the highest point of the RV and the lowest structural member of the overhead shelter. This buffer is not just for peace of mind during parking maneuvers. It accommodates natural grade slopes, allows adequate airflow to prevent heat buildup underneath the roof panels, and gives you vertical working room if you need to climb onto the roof for maintenance while parked under the structure.
Engineering the Ideal Foundation for Heavyweight Class A and Super C Rigs
A shelter is only as reliable as the ground it stands on. A massive Class A motorhome or heavy Super C diesel hauler can easily tip the scales between twenty-five and forty thousand pounds. Parking that kind of dead weight onto packed earth, crushed asphalt, or unreinforced gravel invites disaster. Over time, heavy dual-rear wheels will rut the surface, creating low spots where water pools, mosquitoes breed, and structural stability is severely compromised.
Pouring the correct concrete foundation transforms your storage site into an enduring engineering platform. For a motorhome installation, standard four-inch residential driveway concrete will not suffice. You need a minimum of a six-inch-thick, fiber-reinforced concrete slab poured over a well-compacted sub-base of crushed stone and aggregate. Along the perimeter where the primary steel columns or carport legs anchor down, the concrete should be thickened into integrated grade beams or footings to handle uplift wind loads and heavy point loads.
Beyond structural load-bearing capacity, a properly engineered slab provides crucial moisture management. The concrete should feature a gentle, calculated slope of roughly one-eighth to one-quarter inch per foot away from the center toward the perimeter. This ensures that any rainwater driven under the open sides of a carport drains completely away from the tires and undercarriage, keeping the chassis dry and preventing the hydrostatic pressure buildup that cracks lesser foundations.
Step-by-Step Methodology for Planning Your Motorhome Shelter
Building a long-lasting protective envelope around your motorhome is a sequential engineering project. Skipping a step or rushing the site preparation almost always results in alignment headaches, building code rejections, or premature structural fatigue. Follow this rigorous methodology from conception to final anchor bolt.
- Step 1 (Site Selection and Soil Analysis): Evaluate your property for natural drainage patterns, set-back compliance with local zoning boards, and overhead utility lines. Hire a local contractor to test soil compaction if you are building on fill dirt, ensuring the earth can support both the heavy concrete pad and the dead load of the steel structure.
- Step 2 (Precision Rig Measurement): Measure your motorhome in its fully loaded, ready-to-travel state with all aftermarket accessories installed. Document overall length, extreme width including extended mirrors and slide-outs, and true peak height with suspension fully inflated.
- Step 3 (Dimension and Clearance Engineering): Calculate your shelter dimensions by adding two to four feet of length for easy walk-around space, one to two feet of width per side (plus extra clearance if you operate slide-outs while parked), and two to three feet of vertical overhead clearance.
- Step 4 (Foundation Pouring and Curing): Excavate the site, lay down a robust crushed stone base, install steel reinforcement rebar grids, and pour a minimum six-inch fiber-reinforced concrete slab. Allow the concrete to cure for at least twenty-eight days to reach its maximum compressive strength before anchoring any heavy steel framework.
- Step 5 (Structure Erection and Anchoring): Erect the certified steel carport or enclosed garage kit using heavy-duty concrete wedge anchors or helical ground anchors suited for your specific wind and snow load zone. Verify squareness and plumb alignment before torquing all structural fasteners to manufacturer specifications.
Navigating Advanced Sizing Realities and Avoiding Costary Oversight
Even experienced DIY builders stumble when trying to balance budget constraints with real-world usability. One frequent misstep is sizing a carport strictly to the physical dimensions of the parked vehicle while ignoring how humans actually interact with the space. If you want to check fluid levels, wash the windshield, or deploy slide-outs to air out the interior upholstery between trips, you need operational clearance, not just parking clearance.
Another critical oversight involves local meteorological loads. Snow loads and wind ratings are not marketing suggestions; they are engineering mandates governed by municipal building codes. If you live in a region prone to heavy winter snowfall or high wind gusts, a standard economy carport kit with thin tubing will buckle under pressure. You must specify vertical-roof panel orientations and heavy-gauge galvanized steel framing that allows snow to slide off naturally rather than accumulating and collapsing the roof trusses.
Furthermore, consider future-proofing your investment. Many owners trade up within a few years, moving from a twenty-eight-foot Class C motorhome to a forty-foot luxury Class A diesel pusher. If you size your foundation and overhead clearance strictly for your current rig, you paint yourself into a structural corner. Designing your initial pad and carport with an extra four to six feet of length and a standard sixteen-foot eave height ensures that your investment remains adaptable to whatever adventure machine you buy next.
Long-Term Economics: Calculating the True ROI of Professional RV Protection
When people first look at quotes for custom steel carports and engineered concrete foundations, sticker shock is common. Investing thousands of dollars into a parking structure feels like a steep luxury until you calculate the alternative costs. Consider the financial impact of neglecting proper storage over a five-to-ten-year horizon: replacing a water-damaged rubber roof costs upwards of ten thousand dollars. Professional fiberglass gelcoat repair and decal replacement runs into the thousands.
Then factor in depreciation. A motorhome stored under a certified, well-ventilated metal shelter retains its exterior finish, window seals, and undercarriage integrity far better than one left exposed to relentless weathering. When the time comes to sell or trade in the vehicle, a pristine roofline and a rust-free chassis command top dollar on the private market. Dealers and private buyers alike pay a premium for rigs that show zero signs of UV chalking or moisture infiltration.
Beyond direct asset preservation, a dedicated motorhome shelter enhances your property’s overall appraisal value. Unlike temporary canvas covers that shred in high winds and look unappealing in a suburban yard, a professionally installed steel RV carport or fully enclosed garage is a permanent property improvement. It signals meticulous maintenance and adds functional utility that appeals directly to future real estate buyers who share your passion for outdoor recreation.
Essential Maintenance Protocols for Your Motorhome Shelter and Pad
Installing a high-end carport and concrete foundation does not mean you can walk away and forget about your motorhome for the winter. Protection is an active system requiring periodic inspection and basic upkeep. Over time, leaf debris, pine needles, and wind-blown dirt accumulate on the roof of your shelter and around the base of the concrete pad. Left unchecked, organic debris holds moisture against the steel anchors and can clog perimeter drainage paths.
Inspect your structure semi-annually, specifically checking the concrete anchor bolts for any signs of loosening caused by seasonal thermal expansion and contraction of the steel framework. Ensure that the perimeter drainage around your slab remains clear so that water never pools against the foundation edges. For the motorhome itself, periodically check that your clearance margins haven’t been compromised by shifting terrain or settling pavement, and keep the roof vents open just enough to allow managed airflow beneath the protective canopy.
Your motorhome is much more than a collection of fiberglass, steel, and appliances. It is a passport to experiences, a vessel for family memories, and a significant financial commitment. Leaving it exposed to the elements is a gamble you don’t need to take. By combining rigorous, accurate vertical measurements with an engineered concrete foundation and a certified steel shelter, you build a bulwark against the ravages of nature.
Take the time to do the job right. Measure twice, engineer for tomorrow’s upgrades, and pour a foundation that commands respect. When you return from your next cross-country expedition, parking your rig beneath a structure built to professional standards offers a profound sense of security. Your investment remains protected, your maintenance headaches vanish, and your home on wheels stands ready for the next open road.