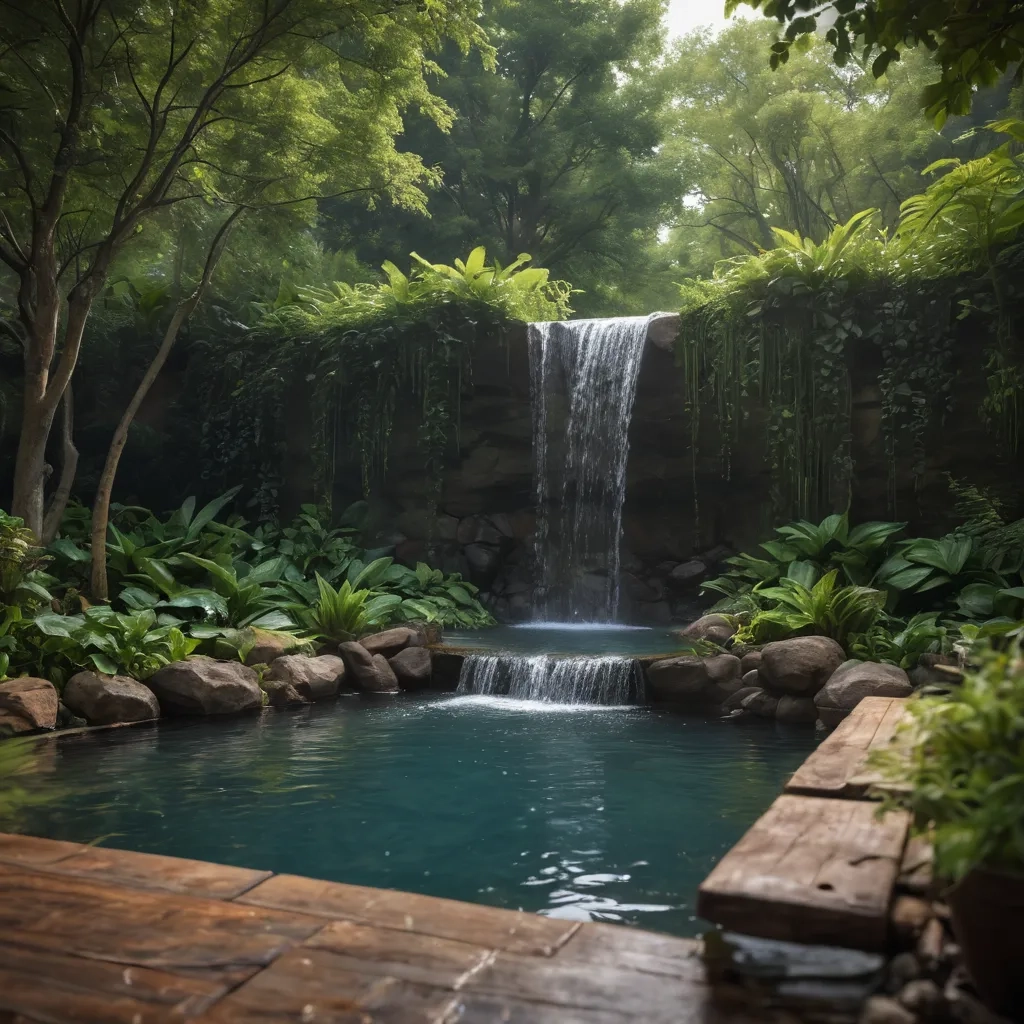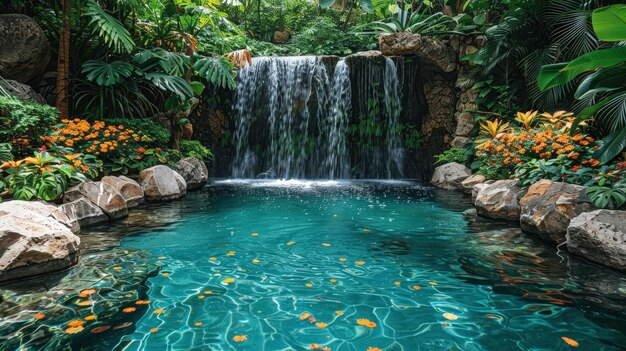
You know that feeling when you’re standing by a wild creek or a forest pool? The water doesn’t just stop abruptly. It spills over mossy rocks, tucks under fern fronds, and disappears into the soil in a way that feels effortless. Now, look at most backyard ponds. What do you see? A hard line. A black liner peeking out like an awkward hem on a too-short pair of pants. It breaks the spell. It reminds you that this is man-made. And while there’s nothing wrong with that, isn’t the whole point of a water garden to escape the rigid lines of our daily lives?
Creating a seamless transition between your pond and the rest of your yard is less about construction and more about illusion. It’s about tricking the eye. In 2026, the trend has shifted heavily away from the "pool-like" concrete edges of the past toward something far more organic. People want their water features to look like they grew out of the earth, not like they were dropped in by a crane. The secret ingredient? Natural stone. But not just any stone, and certainly not just piled up haphazardly. It requires a bit of know-how, a keen eye for texture, and a willingness to get your hands dirty.
This isn’t just about slapping some rocks around the perimeter. It’s about understanding how water moves, how light hits wet surfaces, and how plants interact with hardscape. When you get it right, the edge disappears. The pond becomes part of the land. And that’s where the magic happens. Let’s dive into how you can achieve that elusive, seamless look without needing a degree in landscape architecture.
Choosing the Right Rock for the Job
Not all stones are created equal. Walk into a landscaping supply yard, and you’ll be bombarded with options. Limestone, granite, sandstone, fieldstone, river rock. It’s overwhelming. But here’s the thing: the best stone for your pond is the one that looks like it belongs in your region. If you live in the Pacific Northwest, big, moss-covered basalt boulders make sense. If you’re in the Southwest, warm-toned sandstone or limestone fits the bill. Using local stone creates an instant connection to the surrounding environment. It feels right because it is right.
Size matters too. You don’t want uniformity. Nature hates perfect rows. You need a mix. Start with large anchor stones—these are your statement pieces. They should be heavy enough to stay put and large enough to hide the mechanical bits of your pond, like pumps or skimmers. Then, fill in with medium-sized stones to create structure. Finally, use smaller gravel or pebbles to soften the transitions. This variety creates depth. It gives the eye places to rest and explore. Avoid using only one size of rock; it looks artificial, like a bag of marbles spilled on the ground.
Also, consider the color. Wet stone looks different than dry stone. Always wet a sample before you buy it. That grey rock might turn a deep, rich charcoal when saturated, which could be exactly what you want to contrast with bright green foliage. Or it might disappear into the mud. Test it. Look at the undertones. Does it have hints of red, blue, or gold? Match those hints to your existing hardscape or home exterior for a cohesive look. Paramount Stone notes that careful material selection is the foundation of a durable edge, and they’re right. Pick the wrong rock, and you’ll be redoing it in five years.
The Hidden Foundation: Preparing the Shelf
Here’s where most DIYers mess up. They focus on the pretty rocks on top and ignore what’s underneath. A beautiful stone edge will slump, shift, or crack if the foundation is weak. You need a shelf. Think of it as a submerged step inside the pond, right at the waterline. This shelf should be about 6 to 12 inches wide and sit just below the surface of the water. Why? Because it hides the liner. It also provides a stable platform for your stones so they don’t slide into the deep end during a heavy rain or when someone accidentally kicks them.
Start by excavating this shelf carefully. Compact the soil firmly. You want it solid. Then, add a layer of crushed stone or gravel for drainage. This prevents water from pooling behind your edging stones, which can cause frost heave in colder climates. In 2026, many landscapers are also using a flexible, waterproof mortar or adhesive specifically designed for wet environments to secure the larger stones. Don’t use regular cement; it’s too rigid and will crack as the ground shifts. You need something that breathes and bends slightly.
Once the shelf is prepped, lay your liner over it. Trim the excess, but leave a little extra just in case. Now, here’s a pro tip: cover the liner on the shelf with a layer of sand or geotextile fabric before placing your stones. This protects the liner from punctures. Sharp rocks are the enemy of pond liners. One sharp edge pressing against the plastic for a season can lead to a slow leak that drives you crazy. Take the time to cushion the blow. It’s cheap insurance.
Layering Techniques for a Natural Look
Now comes the fun part: stacking. But don’t think "stacking." Think "nestling." You want the stones to look like they’ve been there for centuries. Start with your largest anchor stones. Place them irregularly. Vary the distance between them. Some should touch; others should have gaps. Tilt them slightly forward toward the water. This subtle angle helps direct rainwater runoff into the pond rather than behind the stones, and it creates a more dynamic visual line.
Fill the gaps with your medium stones. Don’t just drop them in. Wedge them. Make them tight. If a stone wobbles, it’s wrong. Add small shims of slate or gravel underneath to stabilize it. The goal is immobility. You should be able to stand on these edges without fear of them shifting. As you work your way around the pond, step back frequently. Look at the silhouette. Is it too uniform? Break it up. Add a stone that sticks out a bit more. Create a nook. Nature is chaotic, but it’s a balanced chaos. Mimic that.
Pay attention to the vertical face of the edge. You don’t want a sheer cliff. Try to stagger the stones so they overlap slightly, like scales. This creates shadows and texture. When the sun hits it, the edge will come alive with contrast. Also, vary the height. Some stones should sit higher above the water, others lower. This mimics the natural erosion patterns of a real shoreline. Lost At Minor describes this as drawing on nature’s inherent charm by using varying sizes and textures, and it’s spot on. The eye should travel smoothly along the edge, not jump from one level to another.
Softening the Hard Lines with Plant Integration
Stone alone is still hard. It’s cold. To truly make the edge seamless, you need to blur the boundary between the rock and the soil. This is where plants come in. But not just any plants. You need creepers, spillers, and marginal aquatics. Creepers like creeping jenny or Irish moss can grow over the tops of the stones, softening their harsh outlines. Spillers like variegated ivy or sweet potato vine can cascade down the vertical face, hiding any gaps or imperfections in your stonework.
Marginal plants are crucial. These are plants that love having their feet wet but their heads dry. Iris, pickerel rush, and horsetail reed are great choices. Plant them in the shallow shelf area, tucked between the stones. As they grow, their roots will help hold the soil and stones in place, acting as a living net. In 2026, there’s a huge emphasis on native species for this purpose. Native plants are adapted to your local climate, require less maintenance, and provide better habitat for local wildlife. Plus, they look like they belong there because, well, they do.
Don’t forget the underwater edge. Submerged plants like anacharis or hornwort can grow up along the submerged face of your stones. This algae-like growth (the good kind) helps camouflage the transition from water to stone. It makes the water look clearer and the edge feel softer. Garden.eco suggests using a pond edge planting kit to create a lush border, which is a great idea for beginners. But even without a kit, the principle remains: layer your plantings. Tall in the back, short in the front, spilling over the top. Create a green curtain that partially obscures the stone. Mystery is key.
Dealing with Water Levels and Maintenance
Ponds breathe. The water level rises with rain and falls with evaporation. Your edging needs to handle this fluctuation gracefully. If your stones are set too high, you’ll see a ugly band of dry, stained rock when the water drops. If they’re too low, they’ll be permanently submerged and covered in algae (which might be fine, but can look slimy). The sweet spot is to have the top of your primary edging stones sit just at the average water line. This way, when the water is high, it laps over them beautifully. When it’s low, they still look intentional.
Maintenance is easier than you think, but it’s not zero. Debris will get caught in the crevices. Leaves, twigs, pollen. You’ll need to rinse the edges occasionally with a hose. Avoid pressure washers, which can dislodge your carefully placed stones and damage the mortar. A gentle spray is enough. Also, keep an eye on the plants. Aggressive growers can take over. Prune them back to maintain the balance between stone and foliage. You want to see the rock, not just a green mound.
In winter, if you live in a freezing climate, be careful. Water expands when it freezes. If water gets trapped behind your stones, it can push them out. This is why that drainage layer we talked about earlier is so important. Ensure that water can escape from behind the edging. Some people choose to remove loose stones in extreme climates, but if your foundation is solid, they should stay put. Just check them in the spring for any shifting caused by the freeze-thaw cycle.
Let’s talk about the pitfalls. The biggest one? Visible liner. Nothing ruins the illusion faster than seeing black plastic. If you’ve already built your pond and the liner is showing, don’t panic. You can fix it. Add a wider shelf if possible, or use larger stones to cover it. Alternatively, use a gravel mix to bury the edge. Small, smooth river rocks can be glued or mortared over the liner flap to create a pebble beach effect. It’s a different look, but still natural.
Another common mistake is using rounded river rocks for the main structural edge. They look nice, but they roll. They’re unstable. Save the round rocks for the bottom of the pond or for decorative accents on top of flat stones. Use flat-faced stones for the main structure. They lock together better. If you’re stuck with round rocks, you’ll need to use a lot more mortar and really wedge them in tight. It’s harder work, but doable.
Finally, don’t ignore the scale. Tiny stones around a huge pond look cheap. Massive boulders around a tiny tub look comical. Match the size of the stone to the size of the water feature. And match it to your house. If you have a modest cottage, huge jagged boulders might overwhelm the space. If you have a sprawling modern estate, tiny pebbles might get lost. Context is everything. FarmFoodFamily highlights unique, budget-friendly designs, and often, the best design is simply respecting the scale of what you already have.
Creating a seamless pond edge is a journey, not a sprint. It takes observation. It takes patience. But when you sit back with a cup of coffee in the morning and watch the mist rise off the water, barely touching the mossy stones that seem to have grown there naturally, you’ll know it was worth every minute. The line between your garden and the wild blurs. And for a moment, you’re not just in your backyard. You’re somewhere else. Somewhere quieter. Somewhere real.
[sps_html tag=”img” src=”https://cdn.northcarolinafinearchitecture.com/2026/06/24-backyard-waterfall-ideas-to-create-a-serene-outdoor-oasis-throughout-outdoor-pond-design.jpg” alt=”24 Backyard Waterfall Ideas To Create A Serene Outdoor Oasis throughout Outdoor Pond Design” style=”width: 100%; height: auto;”]
[sps_html tag=”img” src=”https://cdn.northcarolinafinearchitecture.com/2026/06/serene-oasis-features-sparkling-waterfall-surrounded-by-lush-greenery-for-creating-a-serene-oasis-with-waterfalls-and-native-aquatic-plants-scaled.jpeg” alt=”Serene Oasis Features Sparkling Waterfall Surrounded By Lush Greenery … for Creating a Serene Oasis with Waterfalls and Native Aquatic Plants” style=”width: 100%; height: auto;”]
[sps_html tag=”img” src=”https://cdn.northcarolinafinearchitecture.com/2026/06/serene-tropical-oasis-with-waterfall-and-pond-premium-ai-generated-image-with-creating-a-serene-oasis-with-waterfalls-and-native-aquatic-plants.jpg” alt=”Serene Tropical Oasis With Waterfall And Pond | Premium Ai-Generated Image with Creating a Serene Oasis with Waterfalls and Native Aquatic Plants” style=”width: 100%; height: auto;”]
[sps_html tag=”img” src=”https://cdn.northcarolinafinearchitecture.com/2026/06/create-a-serene-oasis-with-waterfall-garden-design-the-outdoor-pond-throughout-outdoor-pond-design.jpg” alt=”Create A Serene Oasis With Waterfall Garden Design - The Outdoor Pond throughout Outdoor Pond Design” style=”width: 100%; height: auto;”]
[sps_html tag=”img” src=”https://cdn.northcarolinafinearchitecture.com/2026/06/tropical-oasis-serene-waterfall-and-pool-in-lush-garden-premium-ai-in-outdoor-pond-design.jpg” alt=”Tropical Oasis Serene Waterfall And Pool In Lush Garden | Premium Ai … in Outdoor Pond Design” style=”width: 100%; height: auto;”]