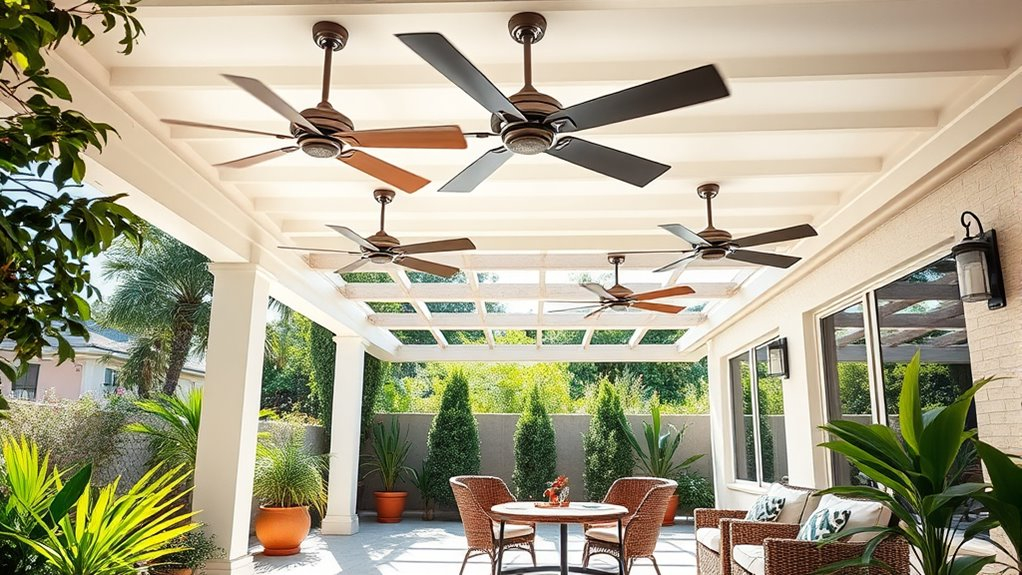
There is something undeniably magical about sitting on your back porch as the sun dips below the horizon. The air cools, the crickets start their nightly chorus, and you lean back in your chair, ready to relax. But then, it happens. A rhythmic thump-thump-thump starts overhead. You look up, and your brand-new outdoor fan is shaking like a leaf in a storm. It’s annoying, sure. But it’s also a sign that something went wrong during the setup.
We’ve all been there. You buy the perfect fan, maybe spend a Saturday afternoon wrestling with wires and screws, and think you’re done. But outdoor fans are a different beast than their indoor cousins. They face rain, humidity, wind, and temperature swings that would make an indoor unit quit in a week. Getting the install right isn’t just about aesthetics; it’s about safety and making sure that gentle breeze actually feels good, not like a headache inducer.
Let’s be honest, most of us aren’t electricians. We watch a few videos, grab a screwdriver, and dive in. And while that DIY spirit is admirable, it often leads to the same handful of mistakes. These aren’t just minor quirks; they can shorten the life of your fan or, worse, create a hazard. So, before you climb that ladder again, let’s walk through the five biggest blunders people make when installing outdoor fans. Knowing what to avoid is half the battle won.
Using the Wrong Electrical Box
This is probably the number one reason fans wobble, fall, or just plain fail. Inside your house, a standard plastic electrical box might hold up fine for a light fixture. But outside? It’s a recipe for disaster. Outdoor fans are heavy, and they move. That movement creates torque and vibration that a flimsy box simply can’t handle over time.
In 2026, building codes are stricter than ever about this. You need a box that is specifically rated for ceiling fan support. Look for the label "Fan Rated" or "UL Listed for Fan Support." These boxes are usually made of metal or heavy-duty composite materials and have special mounting brackets that attach directly to the joist or structural support above. If you use a regular old light box, the screws will eventually loosen. The fan will start to sway. And nobody wants a ceiling fan dancing on its own.
Check your existing box before you even unbox the new fan. If it’s plastic and doesn’t say it’s fan-rated, replace it. It’s an extra twenty bucks and maybe thirty minutes of work, but it saves you from a catastrophic failure later. Trust me, catching a falling fan is not a party trick you want to learn.
Ignoring the Wet vs. Damp Rating
Here is a question that trips up almost everyone: What’s the difference between "damp" and "wet"? It sounds like semantics, but it’s crucial. A "damp-rated" fan is designed for covered areas where it won’t get hit by direct rain or snow. Think of a covered porch, a screened-in lanai, or a gazebo with a solid roof. It can handle humidity and moisture in the air, but not a direct soak.
A "wet-rated" fan, on the other hand, is built to withstand direct exposure to the elements. These fans have sealed motors and stainless steel or treated hardware that won’t rust when rain hits them. If you put a damp-rated fan on an uncovered pergola or a deck with no roof, you are asking for trouble. The motor will corrode. The blades might warp. And you’ll likely void the warranty before the first summer is over.
Take a good look at your installation spot. Does rain blow in there? Can snow accumulate? If the answer is yes, you need a wet-rated unit. Don’t try to save money by buying a cheaper damp-rated model for an exposed spot. It’s a false economy. You’ll end up buying another fan next year anyway. Check the specs carefully. Manufacturers usually mark this clearly on the box and in the manual. Don’t guess.
Skipping the Downrod for Sloped Ceilings
Many modern patios and porches have vaulted or sloped ceilings. It looks great, adds architectural interest, and makes the space feel bigger. But it complicates fan installation. A common mistake is trying to mount a fan flush to a sloped ceiling without using the proper downrod and angled mounting kit.
When you mount a fan directly to a slope, the blades won’t hang level. This causes uneven airflow and, you guessed it, wobbling. The motor has to work harder to spin the unbalanced blades, which leads to premature wear. Most fans come with a downrod—a metal pipe that hangs the fan vertically from the ceiling mount. For sloped ceilings, you need a specific angled adapter that allows the downrod to hang straight down, even if the ceiling is at a 45-degree angle.
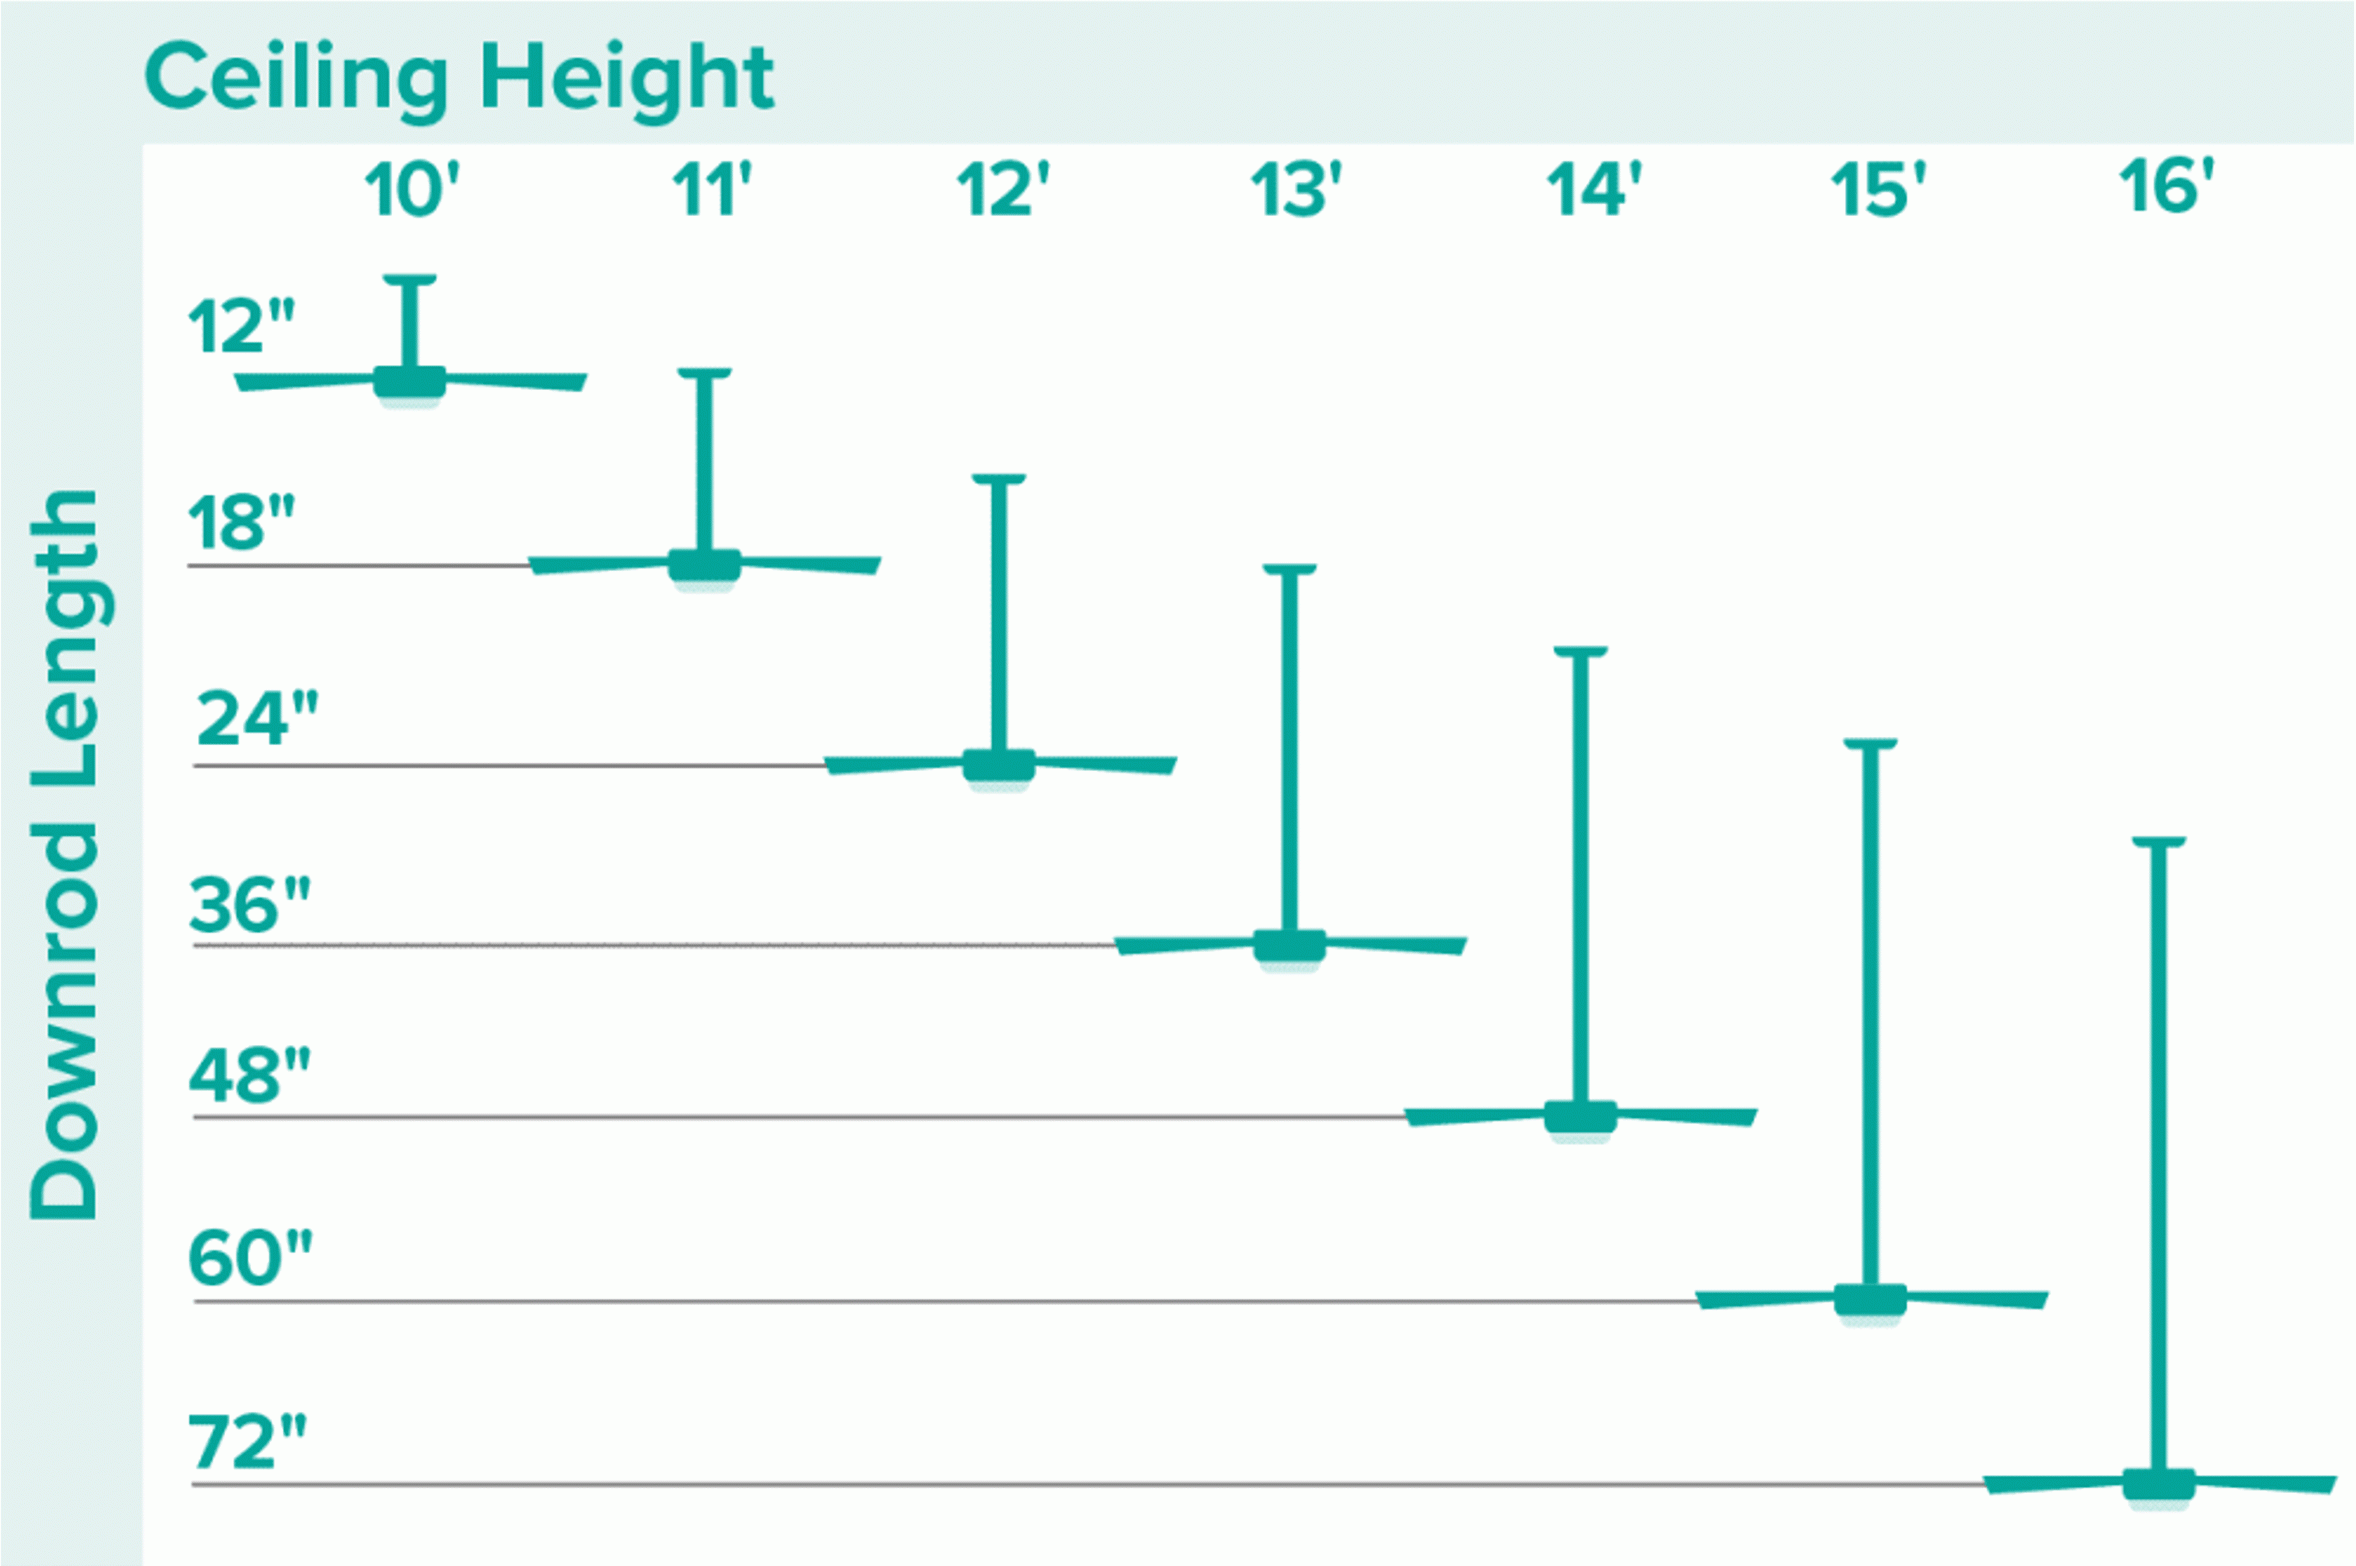
If your ceiling slope is steep (usually over 18 degrees), you might need a longer downrod to ensure the blades are at a safe distance from the ceiling and walls. Check the manufacturer’s guidelines for the minimum clearance. Usually, you want at least 7 feet from the floor to the blades, and 18 inches from the tip of the blade to any wall. Skipping the downrod or using the wrong angle kit is a shortcut that guarantees poor performance. Do it right the first time.
Poor Wiring Connections and Lack of Weatherproofing
Electricity and water don’t mix. It’s Science 101. Yet, so many DIYers skimp on the weatherproofing step when connecting their outdoor fan. Standard wire nuts are fine for dry indoor locations, but outdoors, they can let moisture seep in. This leads to corrosion, short circuits, and potentially dangerous electrical faults.
When you connect the wires, use wire nuts that are filled with silicone grease or are specifically rated for wet locations. Better yet, wrap the connections with high-quality electrical tape after securing them with the nuts. Some pros even use heat-shrink tubing with adhesive lining for an extra layer of protection. The goal is to create a seal that keeps water out, no matter how hard the wind blows the rain sideways.
Also, make sure your junction box cover is gasketed. Many outdoor-rated boxes come with a rubber gasket that seals the cover against the box. If yours doesn’t, you can buy aftermarket gaskets. Don’t leave any gaps. If you see exposed wires or loose connections, stop and fix it. It’s better to spend an extra ten minutes sealing things up than to deal with a tripped breaker or a fried motor later. Safety isn’t just a buzzword; it’s the foundation of a good install.
Incorrect Mounting Height and Clearance
We talked about clearance briefly, but it deserves its own section because it’s so often ignored. People get excited to hang their new fan and just slap it up wherever the box is. But placement matters for both safety and comfort. If the fan is too low, tall guests might bump their heads. If it’s too high, you won’t feel much breeze.
The sweet spot is usually 8 to 9 feet from the floor to the bottom of the fan blades. This provides optimal airflow while keeping everyone safe. If your ceiling is higher than 10 feet, use a longer downrod to bring the fan down to that ideal height. Don’t just let it dangle way up near the ceiling; you’ll lose the cooling effect.
Also, think about the blade sweep. Make sure the blades have at least 18 inches of clearance from any walls, beams, or light fixtures. If they’re too close, the air gets choppy and noisy. It creates a turbulent flow that feels erratic rather than smooth. Measure twice, cut once. Or in this case, measure twice, drill once. It’s easier to adjust the downrod length before you finalize the installation than to move the whole setup later.
You’ve hung the fan. You’ve wired it. You turn it on, and it spins. Great, right? Not so fast. Before you declare victory, you need to check for balance. Even a tiny imbalance in the blades can cause significant wobbling at high speeds. Most fans come with a balancing kit—small weights and a clip. Use it.
Start by running the fan at high speed. Watch the blades. If one seems to dip or shake more than the others, use the clip to test different positions on the blade edges. Once you find the spot that stabilizes the fan, attach the weight permanently. It’s a tedious process, but it makes a huge difference in noise and longevity. A balanced fan runs quieter and puts less stress on the motor mounts.
Also, double-check all your screws. Vibrations from shipping and installation can loosen them. Tighten every blade screw, every bracket screw, and every canopy screw. Give the fan a gentle tug to make sure it’s secure. Finally, test all the speeds and the light kit (if applicable). Make sure the remote or wall control is working properly. Taking these final fifteen minutes to fine-tune the install will save you hours of frustration down the road.
So, there you have it. Five common traps that catch even the most enthusiastic DIYers. It’s easy to rush through an installation, especially when you’re eager to enjoy that cool breeze. But taking the time to use the right box, choose the correct rating, account for slopes, weatherproof your wires, and balance the blades pays off.
Think of it as an investment in your comfort. A well-installed outdoor fan can last for years, providing reliable cooling and ambiance. A poorly installed one becomes a nuisance, a safety hazard, and a waste of money. In 2026, with better technology and stricter codes, we have no excuse for cutting corners.
Next time you’re on that ladder, pause. Check your work. Ask yourself if you’ve addressed each of these points. If you have, you’re set. If not, take the extra step. Your future self, relaxing on that quiet, wobble-free porch, will thank you. And really, isn’t that peace of mind worth a little extra effort?
[sps_html tag=”img” src=”https://cdn.northcarolinafinearchitecture.com/2026/06/how-to-pick-outdoor-patio-fans-what-no-one-told-you-ceiling-fans-intended-for-outdoor-cooling-design.jpg” alt=”How To Pick Outdoor Patio Fans: What No One Told You (Ceiling Fans … intended for Outdoor Cooling Design” style=”width: 100%; height: auto;”]
[sps_html tag=”img” src=”https://cdn.northcarolinafinearchitecture.com/2026/06/which-direction-should-ceiling-fan-go-to-cool-my-projects-for-outdoor-cooling-design.jpg” alt=”Which Direction Should Ceiling Fan Go To Cool | My Projects for Outdoor Cooling Design” style=”width: 100%; height: auto;”]
[sps_html tag=”img” src=”https://cdn.northcarolinafinearchitecture.com/2026/06/choosing-the-right-ceiling-fan-blades-for-maximum-airflow-instabioideas-for-outdoor-cooling-design.webp” alt=”Choosing The Right Ceiling Fan Blades For Maximum Airflow - Instabioideas for Outdoor Cooling Design” style=”width: 100%; height: auto;”]
[sps_html tag=”img” src=”https://cdn.northcarolinafinearchitecture.com/2026/06/how-to-choose-the-right-ceiling-fan-size-for-your-room-top-ceiling-fans-with-outdoor-cooling-design.jpg” alt=”How To Choose The Right Ceiling Fan Size For Your Room - Top Ceiling Fans with Outdoor Cooling Design” style=”width: 100%; height: auto;”]
[sps_html tag=”img” src=”https://cdn.northcarolinafinearchitecture.com/2026/06/how-to-choose-the-best-ceiling-fan-carolina-lanterns-lighting-in-choosing-the-right-fan-placement-for-maximum-breeze-on-your-deck.gif” alt=”How To Choose The Best Ceiling Fan - Carolina Lanterns & Lighting in Choosing the right fan placement for maximum breeze on your deck” style=”width: 100%; height: auto;”]