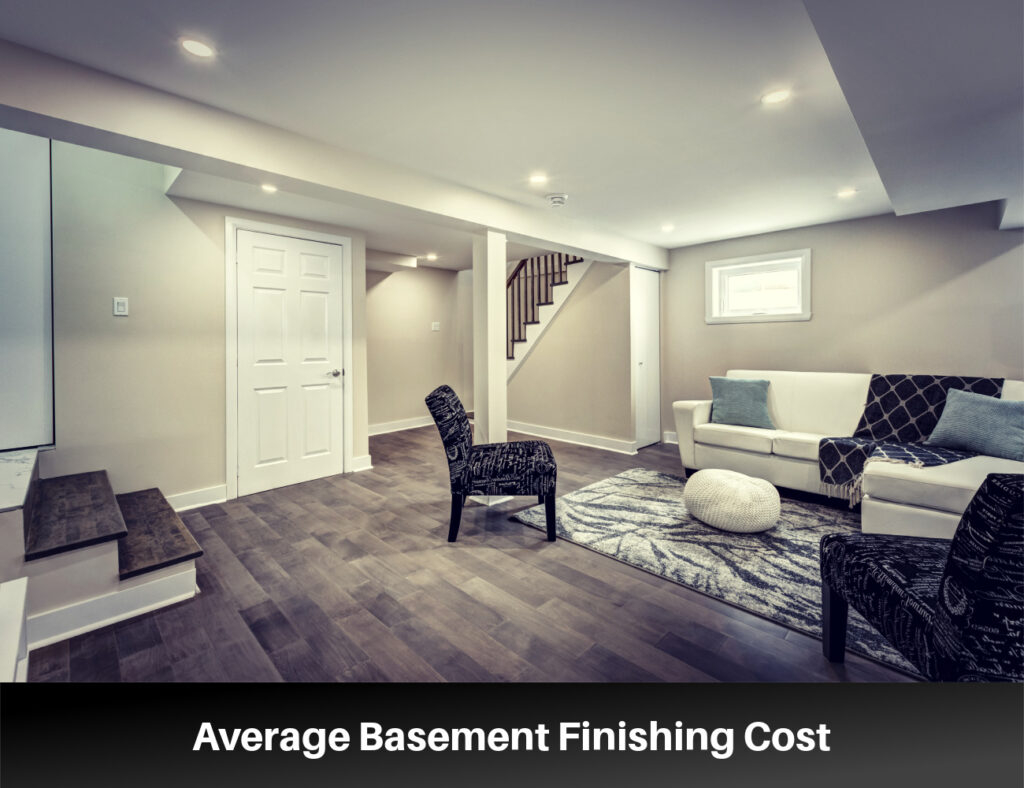
You’re standing in the aisle of the local home center. The air smells like sawdust and pine resin. You’ve got a project in mind—maybe a new deck, a shed, or perhaps you’re finishing off that basement ceiling. You pick up a piece of lumber. It feels solid. Heavy. But is it strong enough?
Most people just grab the straightest board they can find and hope for the best. They assume if it looks thick, it’ll hold. That’s a gamble. And in construction, gambling with gravity is a bad idea. Gravity doesn’t bluff. It doesn’t care about your budget or your timeline. It just pulls. Constantly.
This is where span tables come in. They look like boring grids of numbers. Dense. Confusing. Like reading a foreign language without a dictionary. But they aren’t just data. They’re a promise. A promise that when you walk across that floor, it won’t bounce. A promise that when the snow piles up on your roof in January, the rafters won’t snap. Understanding them isn’t about being an engineer. It’s about respecting the materials you work with. It’s about sleeping soundly knowing your home is safe.
Let’s strip away the jargon. Let’s look at what those numbers actually mean. Because once you get it, you’ll never look at a 2×10 the same way again.
The Weight of the World: Understanding Dead and Live Loads
Before you even glance at a table, you need to know what your beams are carrying. In the construction world, we split weight into two buckets: dead loads and live loads. It sounds simple, but mixing them up is the most common mistake DIYers make.
Dead load is the stuff that’s always there. It’s the weight of the wood itself, the drywall, the roofing shingles, the insulation. It’s permanent. It doesn’t move. For a typical residential floor, the dead load is usually calculated at around 10 pounds per square foot (psf). For a roof, it might be less, maybe 5 to 15 psf, depending on whether you have heavy clay tiles or lightweight asphalt shingles. This weight is constant. It’s pressing down 24/7, year after year.
Then there’s live load. This is the dynamic stuff. People walking around. Furniture. Snow piling up on the roof. A hot tub on the deck. Live loads change. They shift. And they’re usually much heavier than dead loads. The International Residential Code (IRC), which guides most building in the US as of 2026, typically sets the minimum live load for sleeping areas at 30 psf and living areas at 40 psf. But here’s the kicker: if you live in Minnesota or Maine, your roof live load (snow) could be 50, 60, or even 70 psf. If you’re in Florida, it might be zero.
Why does this matter? Because span tables are built on these specific numbers. If you use a table designed for a 30 psf live load in an area that gets heavy snow, you’re under-building. You’re creating a weak point. Always check your local code requirements first. Don’t assume the default numbers apply to your zip code. The weather outside your window dictates the math inside your walls.
Decoding the Grid: Species, Grade, and Size
Okay, so you know the weight. Now you open the span table. It’s a maze. Rows and columns. What do you look for first? Start with the wood itself. Not all 2x10s are created equal. A 2×10 made of Southern Pine is not the same as a 2×10 made of Douglas Fir-Larch. They have different densities. Different strengths.
The table will list species groups. Common ones include Douglas Fir-Larch, Hem-Fir, Southern Pine, and Spruce-Pine-Fir (SPF). SPF is very common in big-box stores because it’s affordable and widely available. But it’s generally weaker than Douglas Fir. If you swap one for the other without checking the table, you might end up with a saggy floor.
Next is the grade. You’ll see stamps on the lumber like "No. 2," "Select Structural," or "Stud." No. 2 is the standard for framing. It has knots and imperfections, but it’s rated for structural use. Select Structural is stronger, with fewer defects, but it costs more. Stud grade is weaker, meant for vertical wall studs, not horizontal joists. Using Stud grade for a floor joist is a recipe for disaster. The span table will have different columns for each grade. Make sure you match the stamp on your wood to the column in the table.
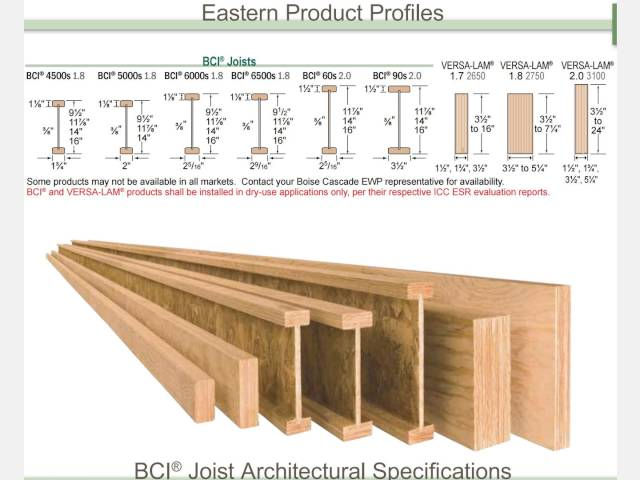
Finally, the size. Nominal size versus actual size. We call it a 2×10, but it’s really 1.5 inches by 9.25 inches. The tables account for this. They don’t care what you call it; they care about the actual dimensions. So when you see "2×10" in the header, trust that it means the standard dimensional lumber you buy. Just don’t try to substitute a 2×8 for a 2×10 because "it looks close." It’s not. The depth of the beam is critical for stiffness. Losing that inch and a quarter makes a huge difference in how much the board bends.
The Bounce Factor: Why Deflection Limits Matter
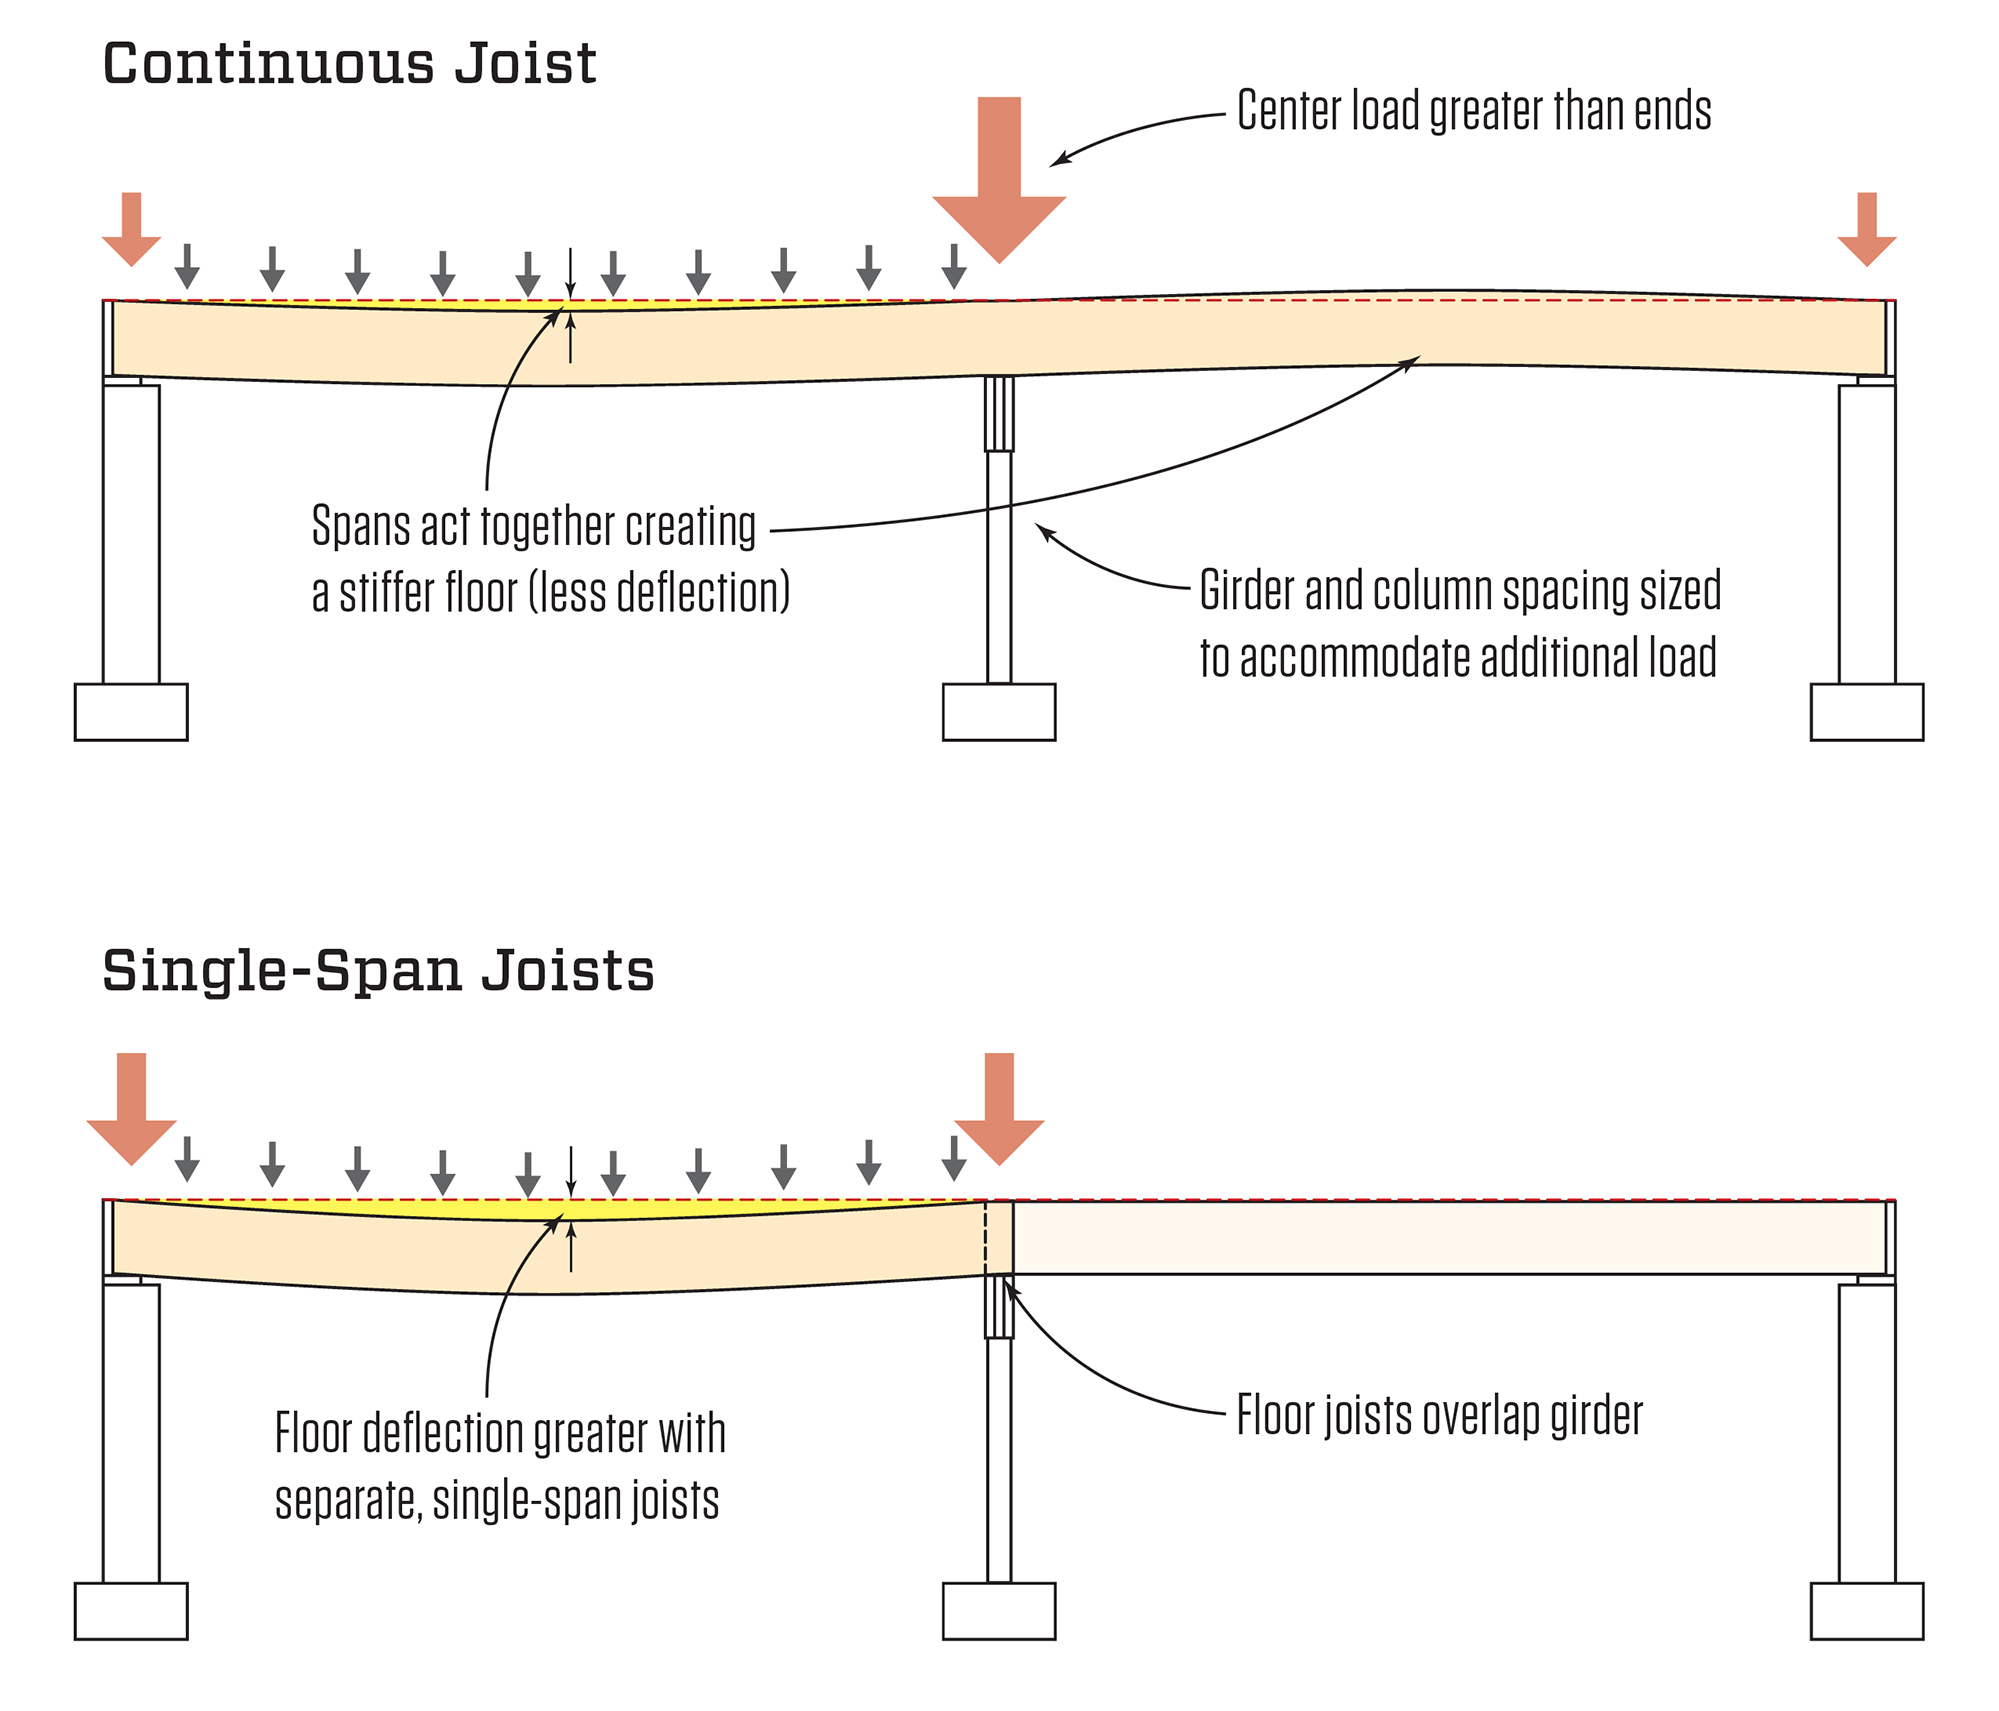
Here’s a secret: a beam can be strong enough to hold the weight without breaking, but still be too bouncy to be usable. This is where deflection comes in. Deflection is how much a beam bends under load. Too much bend, and your tile cracks. Your drywall seams pop. Your doors stick. It feels unsafe, even if it won’t collapse.
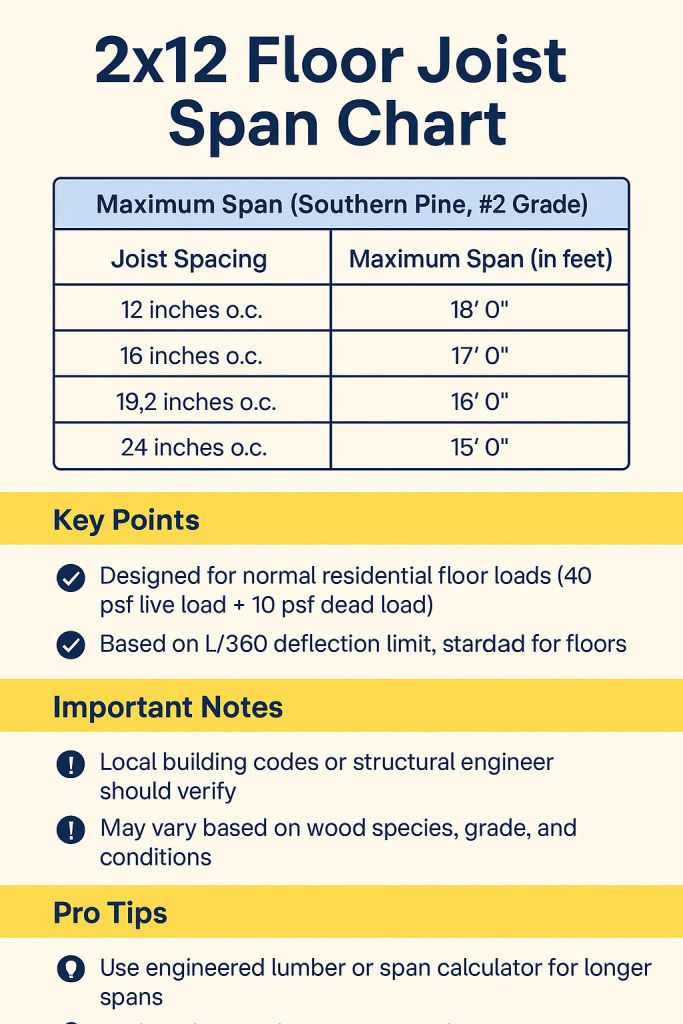
Span tables include deflection limits. You’ll see codes like L/360 or L/240. The "L" stands for the length of the span in inches. So, if you have a 10-foot span (120 inches), L/360 means the beam can’t deflect more than 120 divided by 360, which is 0.33 inches. That’s about the thickness of a pencil. L/240 allows for more bend (0.5 inches).
Which one do you need? For floors, L/360 is the standard. We want floors to feel solid. For roofs with no ceiling attached (like cathedral ceilings where you see the rafters), you might use L/240 because you’re less likely to notice a tiny bit of flex. But if you have drywall on the ceiling, you need L/360 to prevent cracks. Some high-end finishes or sensitive materials might even require L/480.
Don’t ignore this part. I’ve seen decks built to "strength" standards that felt like trampolines. Technically, they wouldn’t break. But nobody wanted to stand on them. They felt wrong. The deflection limit ensures comfort and protects your finish work. When you read the table, check which deflection criterion is being used. If you’re unsure, pick the stricter one (the larger denominator, like L/360). It’s better to be stiff than sorry.
Spacing and Span: The Delicate Balance
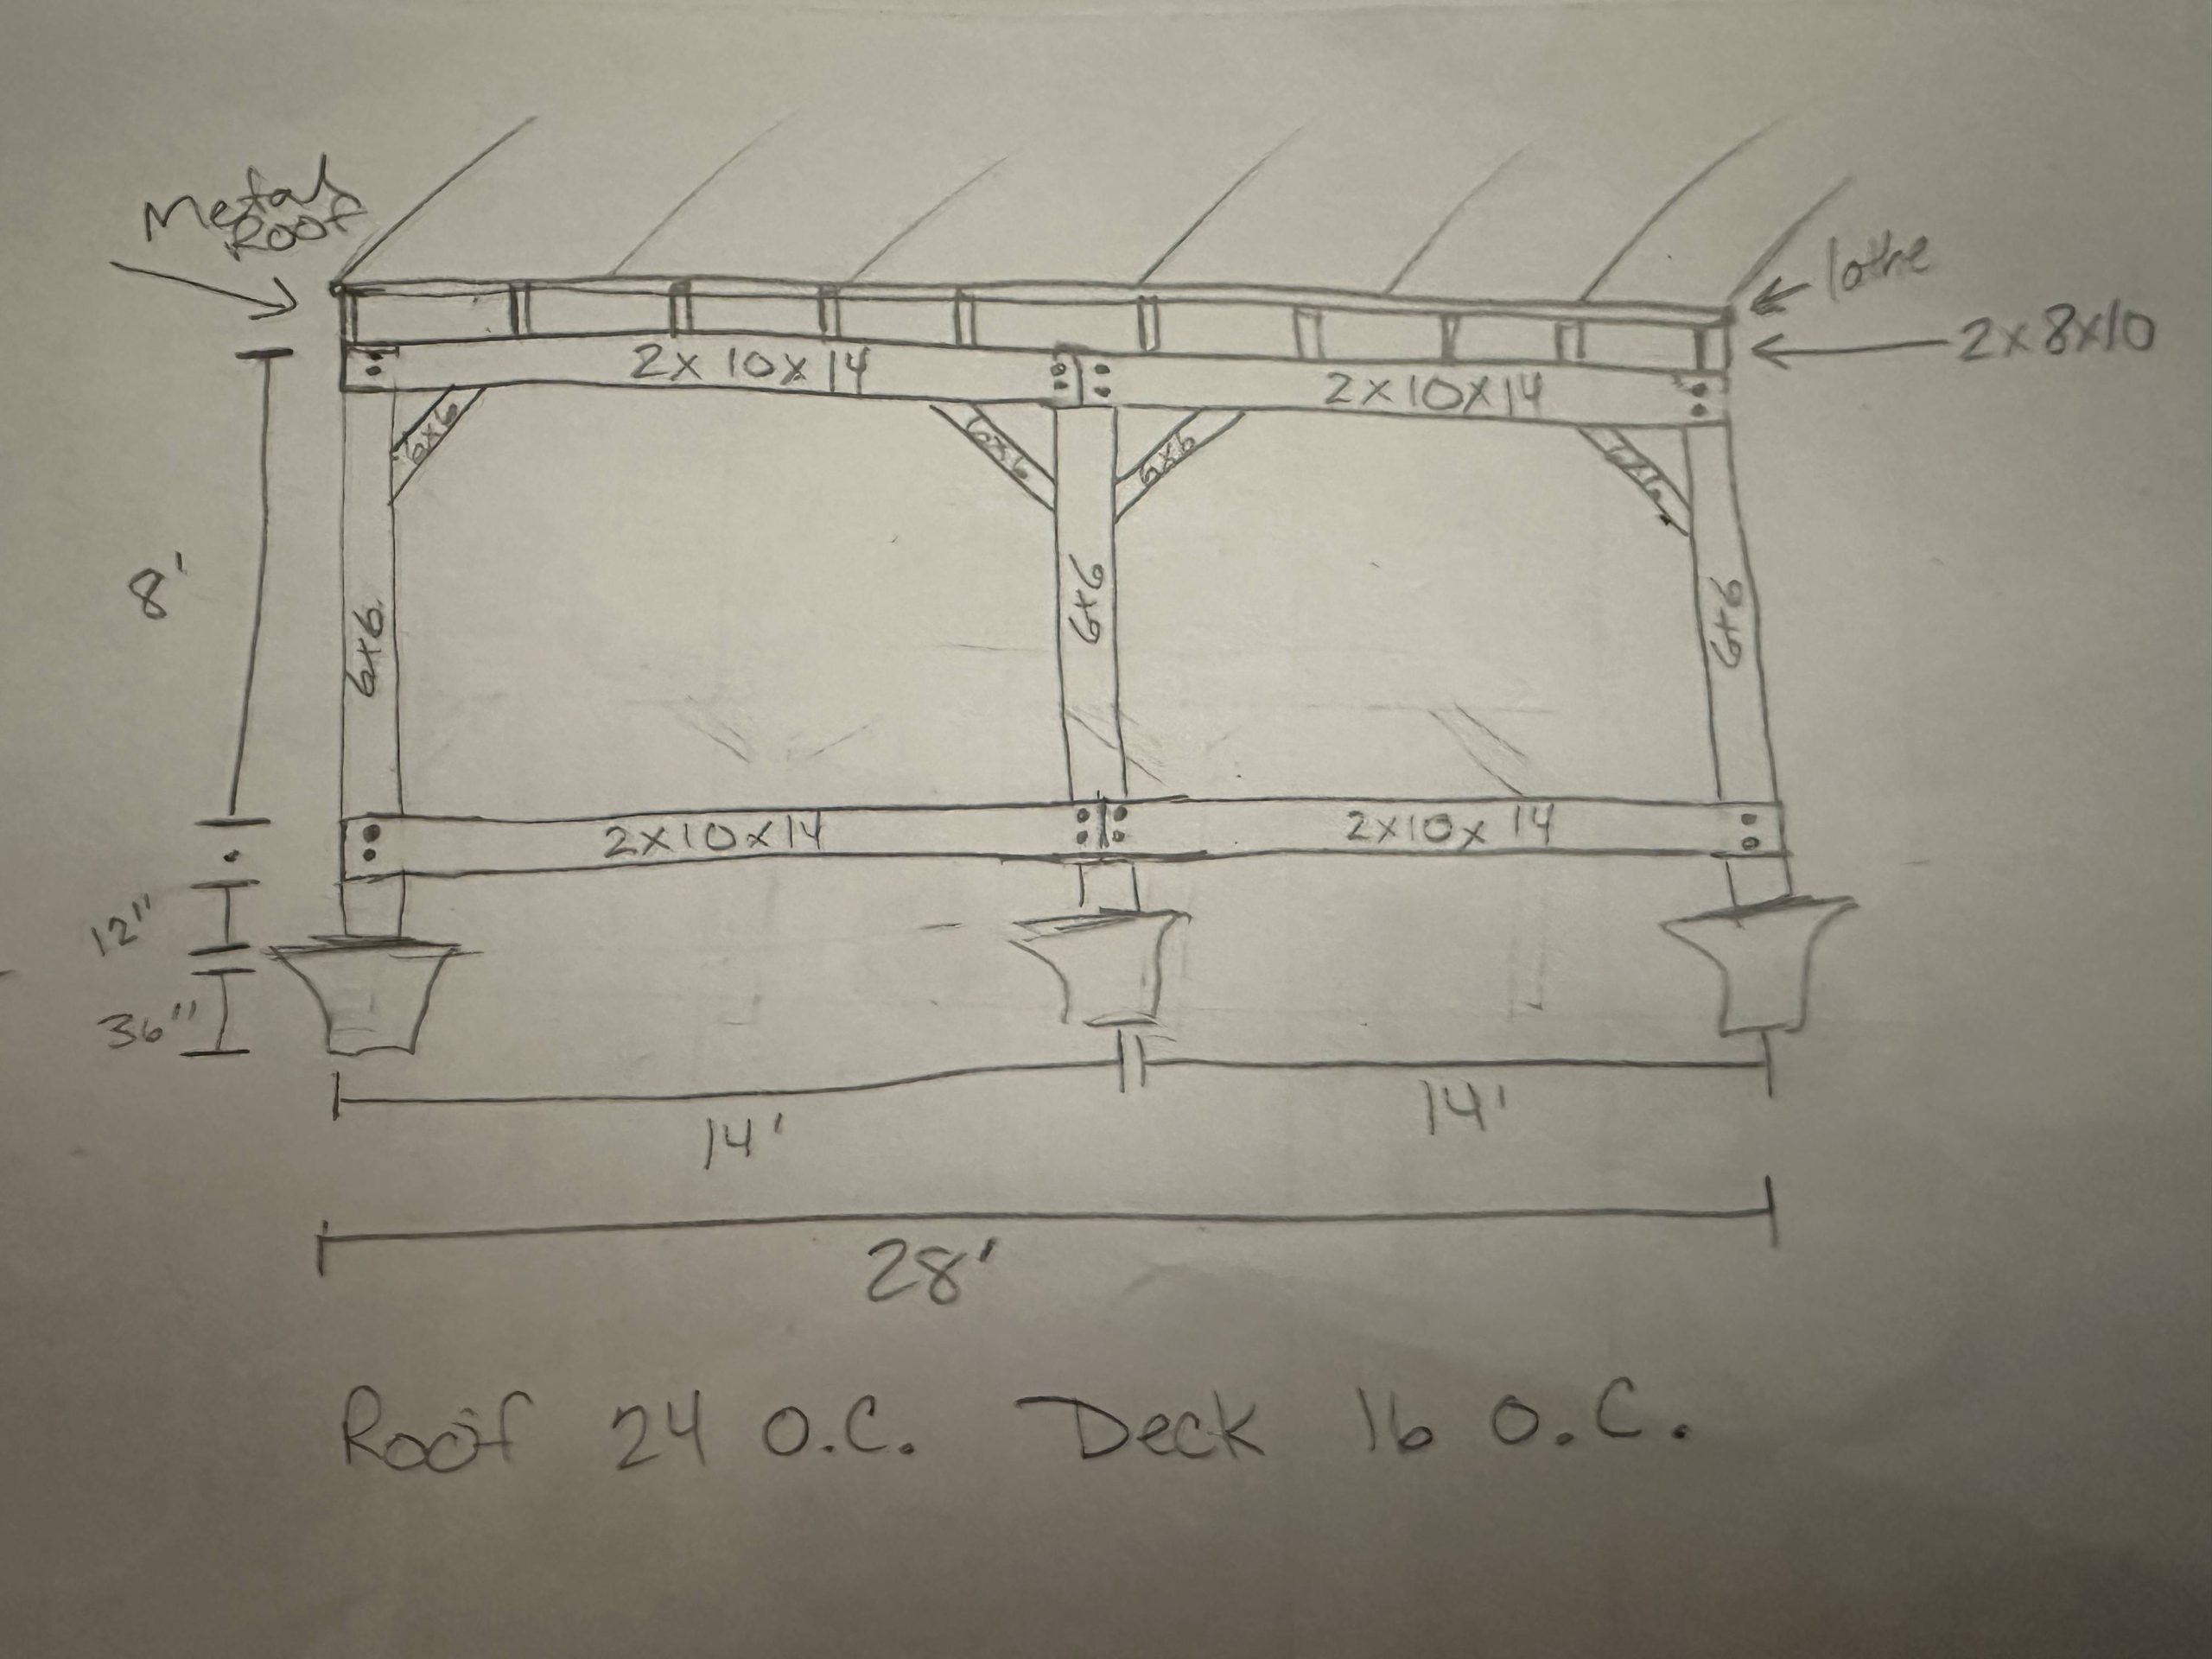
Spacing and span are linked. You can’t change one without affecting the other. Span is the distance between supports—like the distance between two foundation walls or two beams. Spacing is the distance between the joists or rafters themselves—usually 12, 16, or 24 inches on center (OC).
Here’s the rule of thumb: the closer you space your joists, the further they can span. Think about it. If you put joists every 12 inches, each joist carries less weight because the load is shared among more members. If you space them 24 inches apart, each joist carries twice the load of a 12-inch spaced joist. So, it can’t span as far.
When you look at a span table, you’ll see columns for 12", 16", and 24" spacing. Let’s say you’re building a floor with Douglas Fir-Larch No. 2 2x10s. At 16" OC, it might span 16 feet. At 24" OC, that same board might only span 13 feet. If you try to push it to 16 feet at 24" spacing, you’re violating the code and risking failure.
This is where people get tripped up. They buy the right size lumber but space it wrong. Or they keep the spacing right but try to stretch the span. Always cross-reference. If you want wider spacing for easier insulation installation, you might need bigger lumber. If you want to save money on lumber, you might need to add more support beams to reduce the span. It’s a trade-off. There’s no free lunch in structural engineering.
Also, remember the "three or more" rule mentioned by sources like Engineers Edge. Span tables assume you have a system of at least three joists or rafters connected by sheathing (like plywood or OSB). This creates a unified structure that distributes load laterally. A single lone beam doesn’t behave the same way. Don’t try to apply span tables to a single isolated header without professional advice. The system matters.
Reading the Fine Print: Adjustments and Exceptions
Real life is messy. Span tables are based on ideal conditions. Dry wood. Standard temperatures. Straight loads. But your construction site isn’t always ideal. That’s why you need to look for adjustment factors. These are multipliers that tweak the numbers based on specific conditions.
One big factor is wet service. If your lumber is going to be exposed to moisture—like in an unheated crawlspace or an outdoor deck—the wood absorbs water. Wet wood is weaker. Most span tables have a note saying the values are for dry service conditions (moisture content below 19%). If you’re building a deck, you need to use pressure-treated lumber, but you also need to check if the span ratings account for the wet condition. Often, you’ll need to derate the span, meaning you can’t go as far.
Another factor is temperature. If you’re building near a heat source or in a consistently hot environment, wood loses some strength. There are adjustment factors for that too. Then there’s the issue of rafter ties. As noted in the 2021 IBC (and still relevant in 2026 updates), if your ceiling joists aren’t at the bottom of the attic space but are raised up to create vaulted ceilings, the rafters push outward more. You have to multiply the span by an adjustment factor from a specific table (like Table 2308.7.2). Ignoring this can lead to your walls bowing out over time.
And don’t forget local amendments. The IRC is a model code. Your city or county might have stricter rules. Maybe they require deeper joists for certain spans. Maybe they have higher snow load maps. Always verify with your local building department. The table is a tool, not the law. The local inspector has the final say. Consult a structural engineer for anything complex, like long spans over 20 feet or unusual loads. It’s worth the fee for peace of mind.
So, how do you actually do this on a Tuesday afternoon? Here’s a simple workflow. First, define your load. Check your local code for live and dead load requirements. Write them down. Second, choose your material. What species and grade are you buying? Stick to what’s available and stamped correctly. Third, determine your spacing. Do you want 16" or 24"? Pick one.
Now, open the span table. Find the row for your species and grade. Find the column for your spacing. Look across to find the maximum span for your load case. Let’s say the table says 14 feet. Measure your actual span. If it’s 13 feet, you’re good. If it’s 15 feet, you’re not. You have two choices: go up a size (use a 2×12) or add a support beam in the middle to cut the span in half.
Use conservative estimates. If the table says 14 feet and you’re at 13.5 feet, consider going up a size anyway. Lumber isn’t perfect. There’s variability. Being conservative costs a little more in wood but saves you from callbacks and worries. Also, double-check your sources. Websites like WoodWorks and the American Wood Council (AWC) offer free, reliable span tables. Avoid random forums or outdated PDFs. Stick to the 2026 current standards.
Finally, document your decisions. Keep a copy of the table you used. Note the species, grade, spacing, and load assumptions. If an inspector asks, you can show your work. It proves you didn’t just guess. It shows you cared. And that matters. Construction is about trust. Trust in the materials, trust in the math, and trust in the craft. When you follow the tables, you’re honoring that trust.
Building safely isn’t about being paranoid. It’s about being prepared. It’s about knowing that when the storm comes, or when the party guests crowd into the living room, your structure will hold. It’s quiet work. Invisible work. But it’s the most important work you’ll do. So take the extra five minutes. Read the table. Check the stamp. Measure twice. Build it right.
[sps_html tag=”img” src=”https://cdn.northcarolinafinearchitecture.com/2026/05/i-joist-span-tables-for-joists-and-rafters-roof-truss-spacing-chart-regarding-the-hidden-physics-behind-long-span-i-joist-designs.jpg” alt=”I Joist Span Tables For Joists And Rafters Roof Truss Spacing Chart regarding The Hidden Physics Behind Long Span I-Joist Designs” style=”width: 100%; height: auto;”]
[sps_html tag=”img” src=”https://cdn.northcarolinafinearchitecture.com/2026/05/floor-joist-span-chart-at-karen-acuff-blog-inside-the-hidden-physics-behind-long-span-i-joist-designs-scaled.jpg” alt=”Floor Joist Span Chart At Karen Acuff Blog inside The Hidden Physics Behind Long Span I-Joist Designs” style=”width: 100%; height: auto;”]
[sps_html tag=”img” src=”https://cdn.northcarolinafinearchitecture.com/2026/05/how-to-read-joist-span-table-design-talk-with-regard-to-the-hidden-physics-behind-long-span-i-joist-designs.jpg” alt=”How To Read Joist Span Table - Design Talk with regard to The Hidden Physics Behind Long Span I-Joist Designs” style=”width: 100%; height: auto;”]
[sps_html tag=”img” src=”https://cdn.northcarolinafinearchitecture.com/2026/05/lp-i-joist-span-chart-within-the-hidden-physics-behind-long-span-i-joist-designs.jpg” alt=”Lp I Joist Span Chart within The Hidden Physics Behind Long Span I-Joist Designs” style=”width: 100%; height: auto;”]
[sps_html tag=”img” src=”https://cdn.northcarolinafinearchitecture.com/2026/05/engineered-joist-span-tables-inside-the-hidden-physics-behind-long-span-i-joist-designs.jpg” alt=”Engineered Joist Span Tables inside The Hidden Physics Behind Long Span I-Joist Designs” style=”width: 100%; height: auto;”]