The red pen slashed cleanly across my drafted elevation, slicing through a pair of gabled dormers I had spent the better part of a sleepless Tuesday rendering. "They look like eyebrows pasted onto a forehead," my studio critic remarked without looking up. "You’ve drawn the windows, then wrapped wood around them until something fit. That is not design; that is wrapping paper." It was a brutal studio critique, but it was the exact moment I stopped looking at a dormer as a functional box for extra headroom and began seeing it as a critical instrument of rhythm, geometry, and human-scaled proportion on a roofscape.
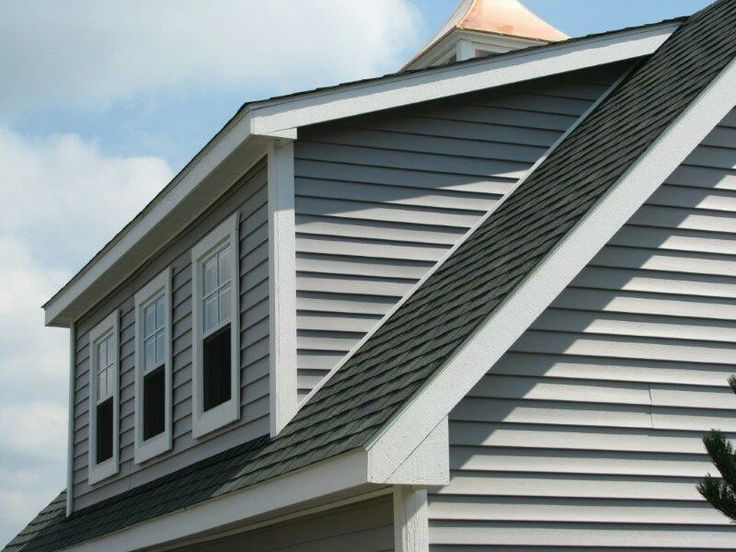
Years later, standing on scaffolding to inspect a historical renovation in 2026, I watched a framing crew hoist a copper-roofed shed dormer into place. The general contractor wiped sweat from his brow and asked the eternal question: "Does it look right to you?" Rightness, in architecture, is rarely an accident. It is the hard-earned product of understanding how a tiny vertical projection from an inclined roof plane can either anchor an entire multi-million-dollar facade or completely destroy its visual balance.
Historically, dormers emerged in European residential architecture during the 16th century, born from a practical necessity to harvest natural light and ventilation from the shadowy expanses of the dormitorium—the sleeping loft. Yet, as architectural styles mutated across centuries from Elizabethan timber frames to crisp American Greek Revival and Colonial revivals, the dormer evolved from a humble utility vent into a sophisticated architectural punctuation mark. When designed without rigorous attention to scale and proportion, a dormer transforms from a graceful crown into a clumsy, top-heavy tumor that betrays poor planning.
The Geometry of the Roof Plane and Visual Weight
Every architectural element on an exterior elevation must carry its weight in mathematical and visual proportion. When we place a dormer onto a sloped roof, we are interrupting a continuous plane of shingles or slate. This interruption creates an immediate focal point, drawing the human eye upward. If the dormer is too wide, it dwarfs the primary roofline, making the house appear compressed, squat, and defensive. If it is too narrow or pinched, it looks starved, frail, and structurally unconvincing.
The primary rule of thumb that decades of practice have burned into my drafting habits is that a single dormer—or a set of synchronized dormers—should never dominate the primary roof mass. Classical proportioning systems dictate that individual dormers should occupy no more than roughly half the width of the roof surface they sit upon, leaving generous margins of roofscape to frame them. The roof is the canvas; the dormer is the brushstroke, not the entire painting.
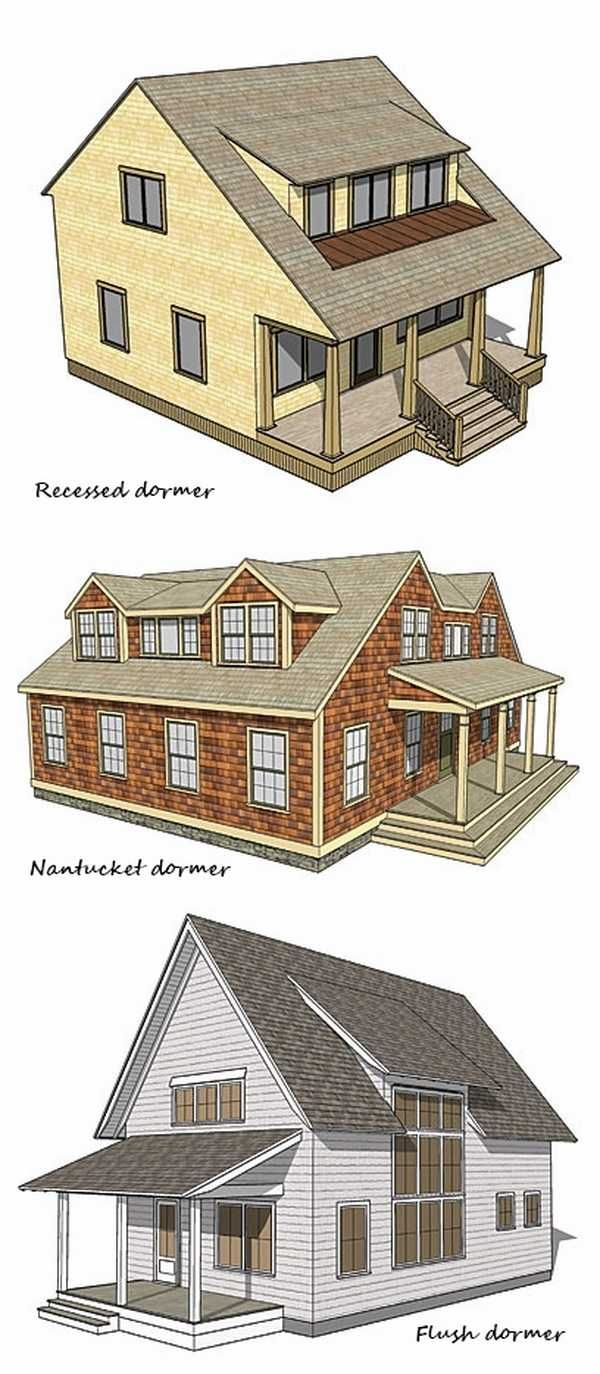
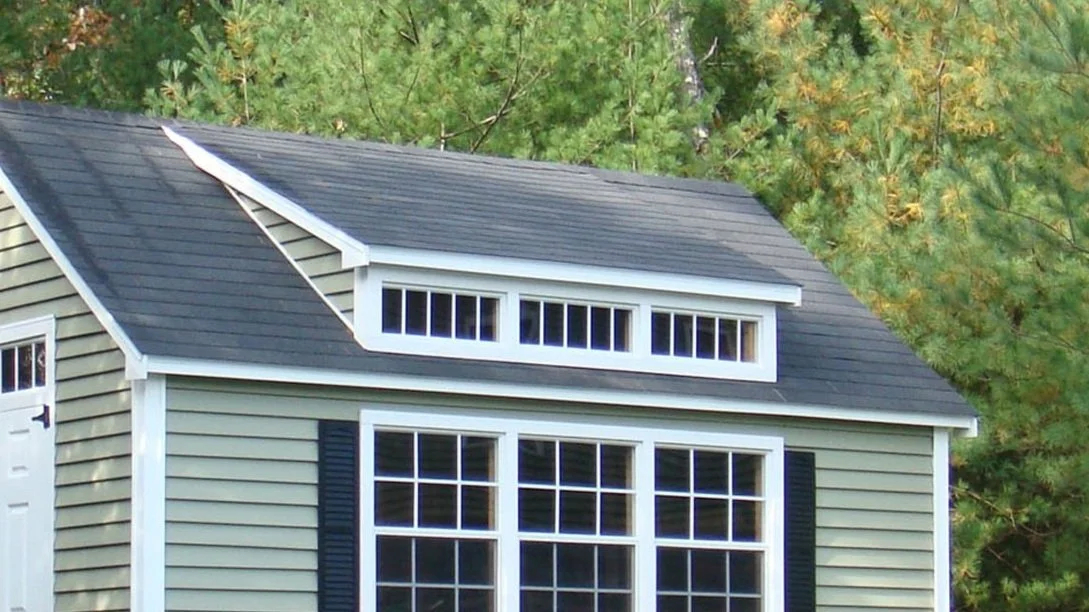
Furthermore, the pitch of the dormer roof must engage in a visual dialogue with the main roof pitch. While a shed dormer relies on a gentler slope falling in the same direction as the primary roof, a gabled or hipped dormer requires a pitch that either echoes the principal roof or introduces a deliberate, calculated contrast. Mismatched pitches create subtle cognitive dissonance for anyone observing the house from the curb. The human brain instantly registers geometry that doesn’t resolve itself cleanly, even if the observer cannot articulate why the building feels uneasy.
Materiality, Trim Profiles, and the Illusion of Size
Scale is not merely a matter of physical dimensions measured with a steel tape; it is deeply psychological. Two dormers with identical floor footprints can look radically different based entirely on their trim profiles, wall cladding, and window muntin patterns. In many residential projects, designers make the fatal mistake of scaling up exterior trim because larger lumber is easier to source or install, completely ruining the delicate interplay of light and shadow required at an upper elevation.
Consider the historic Greek Revival style, where every element must carry classical weight without becoming cartoonish. The corner pilasters, the entablature, and the rake boards of a dormer must be scaled down relative to the main building’s trim, yet remain heavy enough to read clearly from the street below. If your frieze board on the main house is eight inches tall, a literal proportional reduction for a small dormer might yield a two-inch board that lacks visual presence. Adjustments must be made for optical perspective—a concept the ancient Greeks mastered with entasis and which modern architects still manipulate daily.
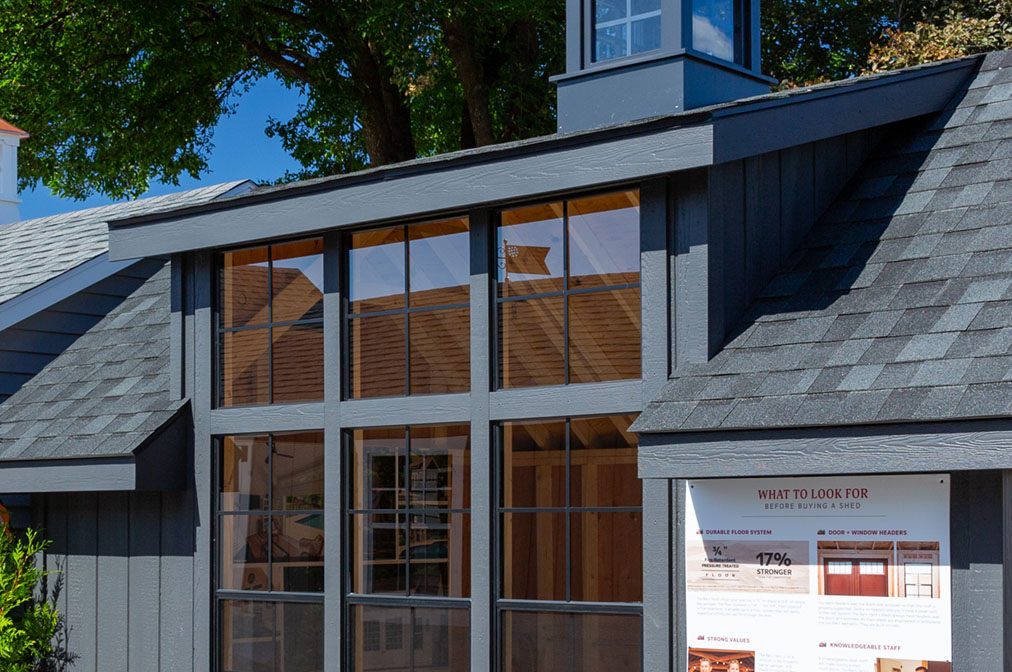
Window selection within the dormer also dictates perceived scale. Multi-pane true divided lites or simulated divided lites break down the glass area into smaller, human-scaled rectangles that relate back to the body of the person standing inside the room. A single large, uninterrupted pane of glass in a small dormer creates a gaping black void on the roofscape, looking less like a traditional window and more like an industrial skylight gone rogue. Framing lumber, flashing details, and the overhang of the eaves must all work in unison to cast crisp shadows that define the dormer’s geometry against the bright sky.
Step-by-Step Methodology for Sizing and Placing Roof Dormers
Designing a successful dormer requires a systematic approach that balances interior spatial requirements with strict exterior facade rules. Skipping steps inevitably leads to a clumsy roofline or awkward interior ceiling heights that fail building code requirements for habitable space.
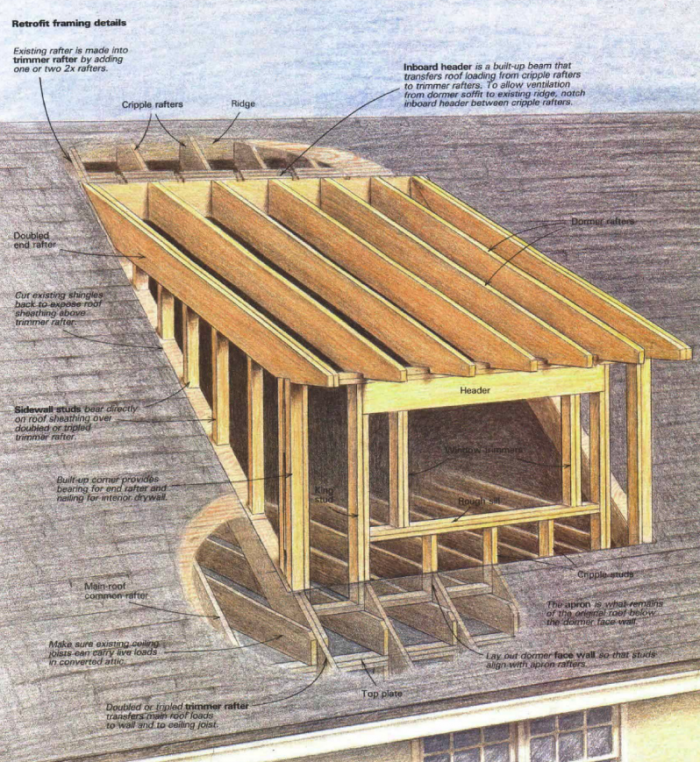
- Step 1 (Establish the Core Function & Spatial Envelope): Determine the exact interior ceiling height and clearance needed under the dormer. Map out the stairwell landing or furniture layout first, ensuring that structural framing (rafters and ceiling joists) can be modified without compromising the structural integrity of the main roof trusses.
- Step 2 (Analyze the Main Roof Geometry): Calculate the primary roof pitch, ridge height, and overall building width. Establish a clear datum line along the eave and ridge to see exactly where the dormer will sit relative to the first-floor windows and doors below.
- Step 3 (Calculate Proportional Width and Height): Apply the golden section or classical height-to-width ratios for the dormer face. Ensure the window rough opening occupies roughly 50 to 60 percent of the total facade area of the dormer, leaving adequate room for vertical corner boards and a proper pediment or frieze.
- Step 4 (Align with Exterior Fenestration): Drop plumb lines down from the corners and center of the proposed dormer locations. Verify that every dormer aligns perfectly with the windows or structural columns of the primary facade below, maintaining the strict symmetry demanded by traditional architecture.
- Step 5 (Integrate Flashing and Drainage Details): Detail the cricket, valley flashing, and side step-flashing meticulously. Ensure the transition where the dormer meets the primary roof plane is mathematically sloped and waterproofed to prevent ice damming and chronic water infiltration.
Common Pitfalls and Field-Tested Workarounds in Dormer Design
Even seasoned designers occasionally fall into traps where interior luxury clashes with exterior elegance. The most common failure point occurs when a homeowner demands maximum headroom inside the loft, prompting the designer to stretch the dormer width until it stretches across nearly the entire roof plane, turning a classic gabled roof into a awkward hybrid monster.
- Pitfall 1 (The Oversized Eyebrow or Monster Shed): Spanning a shed dormer across 80 percent of the main roof destroys the roofline’s identity. Workaround: If massive interior space is mandatory, step the dormer back from the eaves as a true clerestory or break it down into multiple smaller gabled dormers separated by generous swaths of roofing material.
- Pitfall 2 (Floating Without Vertical Alignment): Placing dormers randomly across a roof based solely on where bedroom closets happen to land upstairs creates chaos on the front elevation. Workaround: Use interior furred-down walls or chase ducts to route plumbing and HVAC, allowing you to shift the exterior dormer location so it aligns precisely over the entry porch or primary windows below.
- Pitfall 3 (Ignoring Eave and Rake Overhangs): Designing flush, trimless modern dormers on a traditional house makes them look like cheap afterthoughts. Workaround: Always provide adequate overhangs on the gable rakes and eaves to match the main roof architecture, giving the dormer its own distinct shadow line and architectural gravity.
- Pitfall 4 (Inappropriate Roof Pitch Combinations): Putting a flat or extremely low-pitch roof on a dormer attached to a steep 12:12 Victorian roof looks jarring and unrefined. Workaround: Match the dormer roof pitch to the primary roof pitch whenever structurally feasible, or use a classic barrel-arched or hipped roof design to transition gracefully.
- Pitfall 5 (Neglecting Flashing Integration): Sinking a dormer too low into the eave line creates a pocket that traps melting snow and debris. Workaround: Set the face of the dormer back from the main exterior wall plane by at least two to three feet, ensuring proper water shedding onto the primary roof surface before it reaches the gutter system.
The Broader Impact on Curb Appeal, Resale Value, and Structural Harmony
Beyond the technical drafting table, proportion in roof dormers carries massive financial and aesthetic weight. In high-end real estate markets, a well-executed dormer configuration can elevate a standard suburban box into a residence with timeless character and commanding curb appeal. Buyers instinctively recognize when a house feels "right," even if they cannot parse the mathematical ratios governing the window spacing or roof pitch.
Economically, poorly proportioned dormers frequently become maintenance liabilities. A dormer jammed too close to a valley or gutter line invites chronic leaks, rot, and structural decay. By respecting the golden rules of proportion—ensuring water sheds cleanly, wind loads are evenly distributed across rafters, and materials are scaled to human perspective—you safeguard the long-term structural health of the building. Architecture is fundamentally an act of translating human scale into shelter; when our roofs and dormers speak that language fluently, the entire structure stands with quiet dignity.
Actionable Recommendations and Key Takeaways for Your Next Project
Translating these theoretical principles into your own architectural or remodeling project requires discipline and a refusal to compromise on scale for the sake of a few extra square feet of interior headroom. Keep these core takeaways front and center when reviewing your next set of floor plans and roof elevations:
- Prioritize Facade Rhythm: Always check dormer placement against the first-floor windows and doors; alignment is the bedrock of classical and transitional exterior design.
- Embrace Negative Space: Do not fear empty roof shingles. The negative space around a dormer is just as important as the dormer itself for establishing visual relief.
- Honor Material Scale: Match the thickness of trim, casing, and overhangs to the overall mass of the building, avoiding oversized or undersized architectural details.
- Design for Drainage First: Never sacrifice proper flashing geometry and roof pitch transitions for interior space; a dry, well-detailed roof outlasts any floor plan compromise.
The next time you walk down a historic street or study a newly framed suburban roof, look past the shingles and gaze up at the dormers. Notice how the ones that command your admiration share a quiet, unshakeable sense of proportion. They do not shout for attention; they simply belong.
Achieving that effortless belonging requires patience, geometry, and a healthy respect for the architectural grammar handed down through centuries of building. Whether you are drafting plans for a custom home or restoring a century-old Victorian, let proportion be your ultimate guide. When scale and harmony are locked into place, every line on the page—and every beam on the roof—finally sings in unison.