It’s funny how something so small can cause such a massive headache. You spend months designing a complex machine, running simulations, and optimizing every curve. Then, six months after launch, the whole thing grinds to a halt. Why? Because a single M12 bolt sheared off. Or maybe it didn’t break, but it just loosened up until the vibration turned your precision assembly into a rattling mess. We’ve all been there. It’s frustrating. It’s expensive. And honestly? It’s usually preventable.
In 2026, we have better tools than ever. We have smart torque wrenches, advanced finite element analysis, and materials that would have seemed like science fiction twenty years ago. Yet, bolted joints remain one of the top reasons for field failures. Recent data suggests that nearly half of all mechanical failure investigations trace back to a simple connection issue. That’s a staggering number when you think about it. It’s not always about bad design. Often, it’s about the little things we overlook during assembly or specification. Let’s talk about those mistakes. The ones that cost us time, money, and sometimes, our reputation.
The Preload Paradox: Guessing Instead of Measuring
Here is the biggest myth in fastening: "Tighten it until it feels snug." Or worse, "Just crank it down with an impact gun." This approach is a recipe for disaster. The goal of a bolted joint isn’t just to hold two pieces together; it’s to create a specific clamping force, known as preload. This preload is what keeps the joint intact under load. If you don’t have enough, the parts slip. If you have too much, you stretch the bolt past its yield point, and it loses its springiness. Once a bolt yields, it’s basically useless. It won’t hold tension anymore.
The problem is that torque is a terrible proxy for preload. Only about 10% of the torque you apply actually translates into clamping force. The rest? It’s wasted overcoming friction in the threads and under the nut head. Friction varies wildly. A bit of oil, a speck of dirt, or a different batch of zinc plating can change the friction coefficient by 20% or more. So, if you specify a torque value without controlling the friction, you’re basically gambling. In 2024 and 2025, we saw several high-profile recalls in the automotive sector linked directly to inconsistent preload due to poor lubrication control. Don’t let that be you. Use torque-angle methods or direct tension indicators if you can. They’re more reliable.
Another angle to consider is the tool itself. Are your technicians using calibrated tools? It sounds obvious, but you’d be surprised. An uncalibrated torque wrench can be off by 15%. That’s the difference between a safe joint and a failed one. Regular calibration isn’t just a bureaucratic hoop to jump through; it’s insurance. Think of it this way: would you trust a scale that hadn’t been checked in five years to weigh gold? Probably not. So why trust an unchecked wrench with your product’s integrity? It’s a small step, but it saves huge amounts of trouble down the line.
Ignoring the Grip Length and Thread Engagement
Let’s talk about geometry. Specifically, how much thread is actually doing the work. A common mistake is assuming that any bolt will do as long as it fits through the hole. But if the grip length—the thickness of the materials being clamped—is wrong, you’re asking for trouble. If the bolt is too long, you might run out of thread engagement in the nut or tapped hole. If it’s too short, the threads might end up in the shear plane, which is weak. You want the smooth shank of the bolt to span the grip, with the threads starting only after the nut is engaged. This maximizes stiffness and fatigue resistance.
Thread engagement depth is another spot where corners get cut. The rule of thumb is that you need at least one diameter’s worth of thread engagement for steel-on-steel. So, for an M10 bolt, you need 10mm of threads engaged. But what if you’re threading into aluminum? Aluminum is softer. You need more engagement—usually 1.5 to 2 times the diameter. If you skimp on this, the threads in the soft material will strip out long before the bolt reaches its full strength. I’ve seen assemblies where engineers used standard steel-depth rules for aluminum housings. The result? Stripped holes during final assembly. Rework costs skyrocketed. It was a simple oversight, but it cost thousands.
Also, consider the number of threads sticking out past the nut. Standards usually say one or two threads should be visible. Why? It ensures the nut is fully engaged. If no threads are showing, the nut might not be seated all the way. If too many are showing, the bolt might be too long, reducing the effective grip length. It’s a small detail, but it’s a quick visual check that tells you a lot about the quality of the assembly. In high-volume production, these visual cues are vital for quality control. They help catch errors before the product leaves the factory. Don’t ignore them.
The Lubrication Lottery: Too Much, Too Little, or Wrong Type
We touched on friction earlier, but let’s dive deeper. Lubrication is the wild card in bolting. It’s essential for consistent preload, but it’s often treated as an afterthought. Some teams use whatever grease is handy. Others use nothing at all, relying on the "dry" coefficient. Both approaches are risky. Using the wrong lubricant can cause galling, especially with stainless steel bolts. Galling is when the threads cold-weld together due to heat and pressure. Once that happens, the bolt is stuck. You can’t tighten it further, and you certainly can’t remove it without drilling it out. That’s a nightmare scenario.
On the flip side, too much lubricant can be just as bad. If you flood the threads, the hydraulic pressure can actually prevent the bolt from seating properly. Or, the excess lube can attract dirt and debris, turning into an abrasive paste that increases friction over time. The key is consistency. Specify a lubricant. Stick to it. Train your assembly team on how much to apply. A thin, even coat is usually best. In 2026, we’re seeing more use of dry-film lubricants and specialized coatings that provide a consistent friction coefficient. These are great for critical applications where reliability is paramount. They eliminate the variability of liquid oils and greases.
Don’t forget about the environment, either. If your joint is exposed to high temperatures, standard grease might burn off or carbonize. If it’s in a chemical plant, certain lubes might react with the process fluids. Always check the compatibility. I recall a project where a standard lithium grease was used on bolts in a food processing plant. The grease degraded when exposed to the cleaning agents, leading to corrosion and eventual joint failure. It was a costly lesson in specifying the right lube for the right environment. Take the time to research it. It pays off.
Overlooking Vibration and Dynamic Loads
Static loads are easy. You calculate the force, pick a bolt, and tighten it. Done. But the real world isn’t static. Machines vibrate. Vehicles bounce. Wind shakes structures. These dynamic loads can loosen a bolt over time, even if it was tightened correctly initially. This is called self-loosening. It happens when the transverse motion (side-to-side movement) between the joined parts causes the nut to rotate slightly with each cycle. Over thousands of cycles, that small rotation adds up. The preload drops. The joint becomes loose. And then, failure is imminent.
Many engineers still rely on lock washers or nylon insert nuts to prevent this. But here’s the truth: standard lock washers are largely ineffective against severe vibration. They can flatten out and lose their spring action. Nylon inserts can wear down or degrade with temperature. For critical applications, you need better solutions. Wedge-locking washers, like Nord-Lock, are a game-changer. They use tension instead of friction to secure the bolt. As long as the bolt is under tension, they can’t loosen. Another option is chemical locking, using thread-locking adhesives. These fill the gaps between threads and cure to form a solid plastic mass. Both methods are far superior to traditional mechanical locks in high-vibration environments.
It’s also worth considering the joint design itself. If you can eliminate the transverse motion, you eliminate the risk of loosening. Use dowel pins or shoulder bolts to take the shear load, leaving the bolt to handle only the tensile load. This is a fundamental principle of good joint design. Don’t rely on the bolt friction to resist shear if you can avoid it. It’s much safer to have positive location features. In aerospace and automotive industries, this is standard practice. But in general machinery, it’s often overlooked. Take a cue from the pros. Design for the loads you actually have, not just the ones you hope for.
Material Mismatches and Galvanic Corrosion
Mixing metals can be dangerous. Not in an explosive way, but in a slow, insidious way. When two dissimilar metals are in contact in the presence of an electrolyte (like water or humidity), galvanic corrosion occurs. One metal becomes the anode and corrodes preferentially, while the other becomes the cathode and is protected. In a bolted joint, if you use a stainless steel bolt in an aluminum plate, the aluminum will corrode around the bolt hole. This weakens the joint and can lead to seizure, making future disassembly impossible. It’s a classic mistake, especially in marine or outdoor applications.
To prevent this, you need to isolate the metals. Use non-conductive washers or sleeves. Or, choose materials that are close together in the galvanic series. Stainless steel and titanium are relatively compatible. Aluminum and carbon steel are not. If you must mix them, use a protective coating or sealant to keep moisture out. In 2026, we’re seeing more use of composite materials and advanced coatings that offer better corrosion resistance. But the basic principle remains: know your materials. Understand how they interact. Don’t just pick a bolt because it’s strong. Pick one that plays nice with the rest of the assembly.
Temperature changes can exacerbate this issue. Different metals expand and contract at different rates. This thermal cycling can break protective oxide layers, exposing fresh metal to corrosion. It can also change the preload in the joint. If the bolt expands more than the clamped parts, the preload increases. If it expands less, the preload decreases. Both scenarios can lead to failure. When designing for extreme temperatures, consider the coefficient of thermal expansion for all components. It’s a complex interaction, but ignoring it is not an option. Run the numbers. Simulate the thermal cycles. Catch the problems on paper, not in the field.
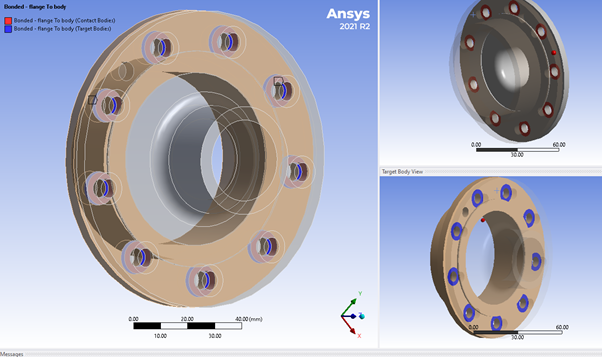
Finally, let’s talk about the people tightening the bolts. You can have the best design, the best materials, and the best tools. But if the operator doesn’t know what they’re doing, it doesn’t matter. Assembly is a skill. It requires training and attention to detail. Yet, it’s often treated as a low-skill task. "Just tighten these bolts," is a common instruction. But which order? What speed? What feel? These details matter. Cross-tightening patterns are essential for flange connections to ensure even sealing. Tightening in a star pattern prevents warping. Skipping this step can lead to leaks or uneven stress distribution.
Training should be ongoing, not a one-time event. People forget. New techniques emerge. Tools change. Regular refreshers keep everyone sharp. Use visual aids. Show them what a good joint looks like. Show them what a bad one looks like. Explain why it matters. When operators understand the "why," they’re more likely to follow the "how." Involving assembly technicians in the design phase can also be incredibly valuable. They often spot potential issues that engineers miss. Maybe a bolt is hard to reach. Maybe the angle makes it difficult to use the torque wrench. Their feedback can save you from costly redesigns later.
Technology can help, too. Smart tools that record torque and angle data for every bolt are becoming more common. This creates a digital trail of quality. If a joint fails, you can look back and see exactly how it was assembled. Was the torque correct? Was the angle within spec? This data is invaluable for root cause analysis. It takes the guesswork out of failure investigations. It also holds everyone accountable. But remember, technology is a tool, not a replacement for skill. You still need trained, attentive humans to operate it. Invest in your people. They are your first line of defense against failure.
So, there you have it. Six common mistakes. Preload guessing, poor geometry, lubrication chaos, vibration neglect, material clashes, and human error. They’re all fixable. They all require attention to detail. But the payoff is huge. Reliable products. Happy customers. Lower warranty costs. Less stress for you. Bolting might seem simple, but it’s deceptively complex. Treat it with the respect it deserves. Check your specs. Train your team. Monitor your process. It’s not just about turning a wrench. It’s about building trust. And in engineering, trust is everything. Don’t let a simple bolt undermine all your hard work. Get it right, and you’ll sleep better at night. I promise.
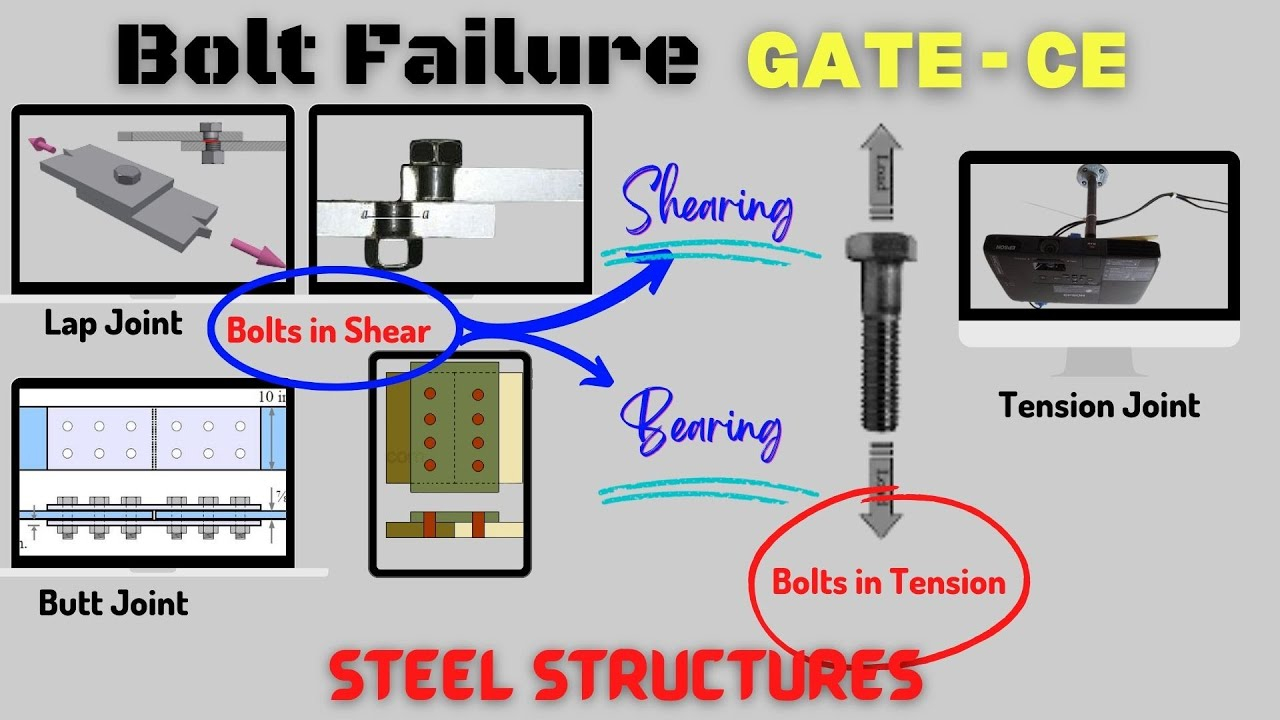
[sps_html tag=”img” src=”https://cdn.northcarolinafinearchitecture.com/2026/05/bearing-failure-of-bolted-connection-design-talk-pertaining-to-bolt-joint-design.jpg” alt=”Bearing Failure Of Bolted Connection - Design Talk pertaining to Bolt Joint Design” style=”width: 100%; height: auto;”]
[sps_html tag=”img” src=”https://cdn.northcarolinafinearchitecture.com/2026/05/forces-acting-on-the-bolted-flange-connection-artg-for-bolt-joint-design.jpg” alt=”Forces Acting On-The Bolted Flange Connection | Artg for Bolt Joint Design” style=”width: 100%; height: auto;”]
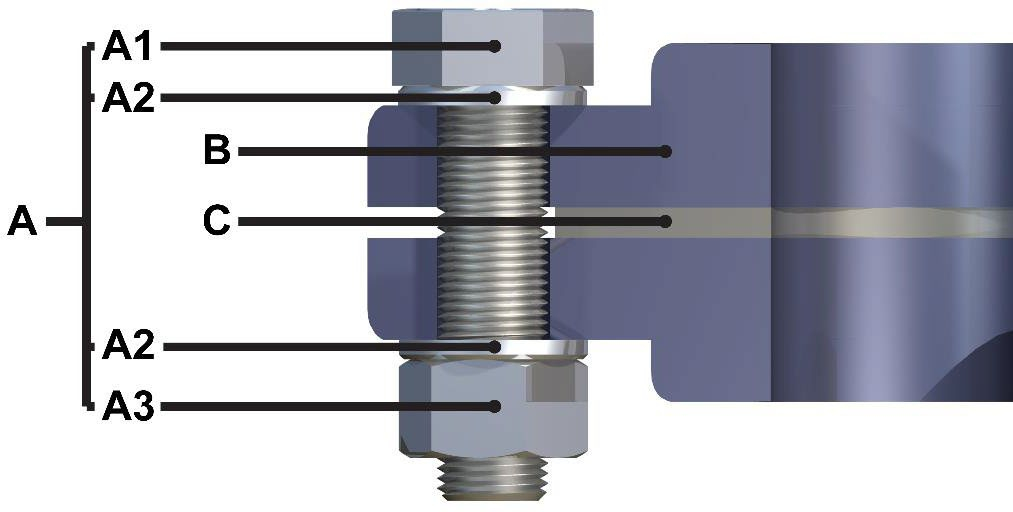
[sps_html tag=”img” src=”https://cdn.northcarolinafinearchitecture.com/2026/05/ansys-mechanical-strategies-for-modelling-bolted-connections-edrmedeso-within-bolt-joint-design.png” alt=”Ansys Mechanical: Strategies For Modelling Bolted Connections | Edrmedeso within Bolt Joint Design” style=”width: 100%; height: auto;”]
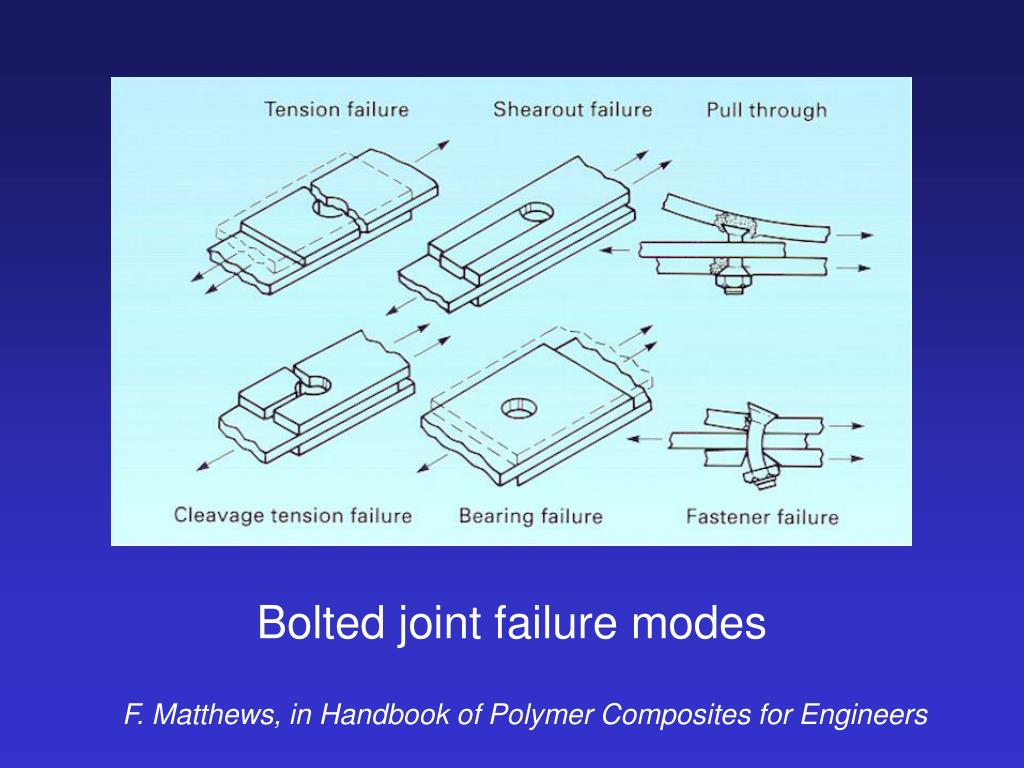
[sps_html tag=”img” src=”https://cdn.northcarolinafinearchitecture.com/2026/05/ppt-bolted-joint-failure-modes-powerpoint-presentation-free-download-regarding-bolt-joint-design.jpg” alt=”Ppt - Bolted Joint Failure Modes Powerpoint Presentation, Free Download … regarding Bolt Joint Design” style=”width: 100%; height: auto;”]
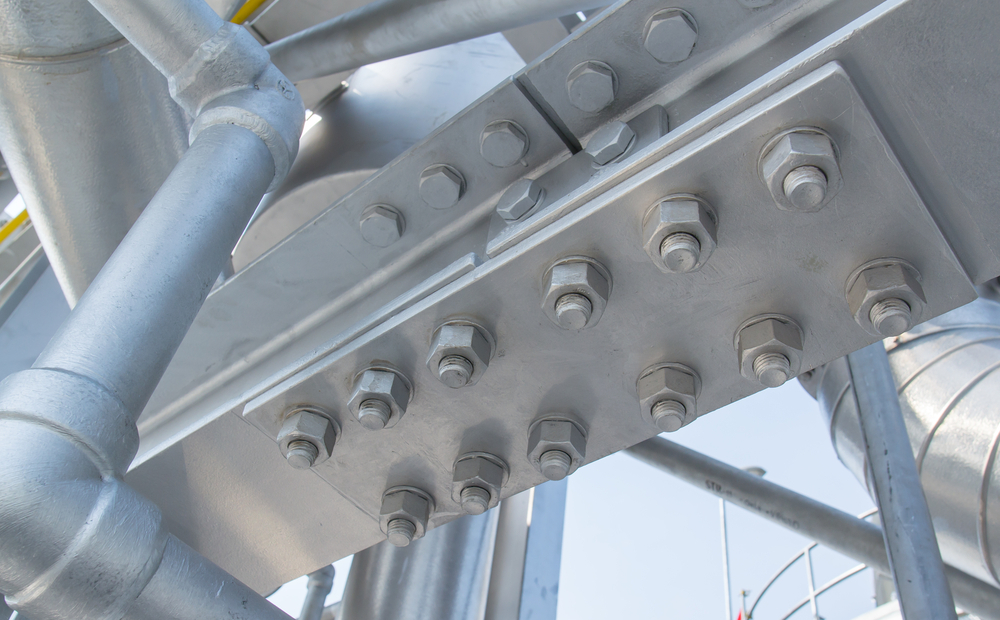
[sps_html tag=”img” src=”https://cdn.northcarolinafinearchitecture.com/2026/05/structural-engineering-welded-vs-bolted-connections-throughout-common-mistakes-engineers-make-when-analyzing-bolted-assemblies.jpg” alt=”Structural Engineering: Welded Vs. Bolted Connections throughout Common Mistakes Engineers Make When Analyzing Bolted Assemblies” style=”width: 100%; height: auto;”]