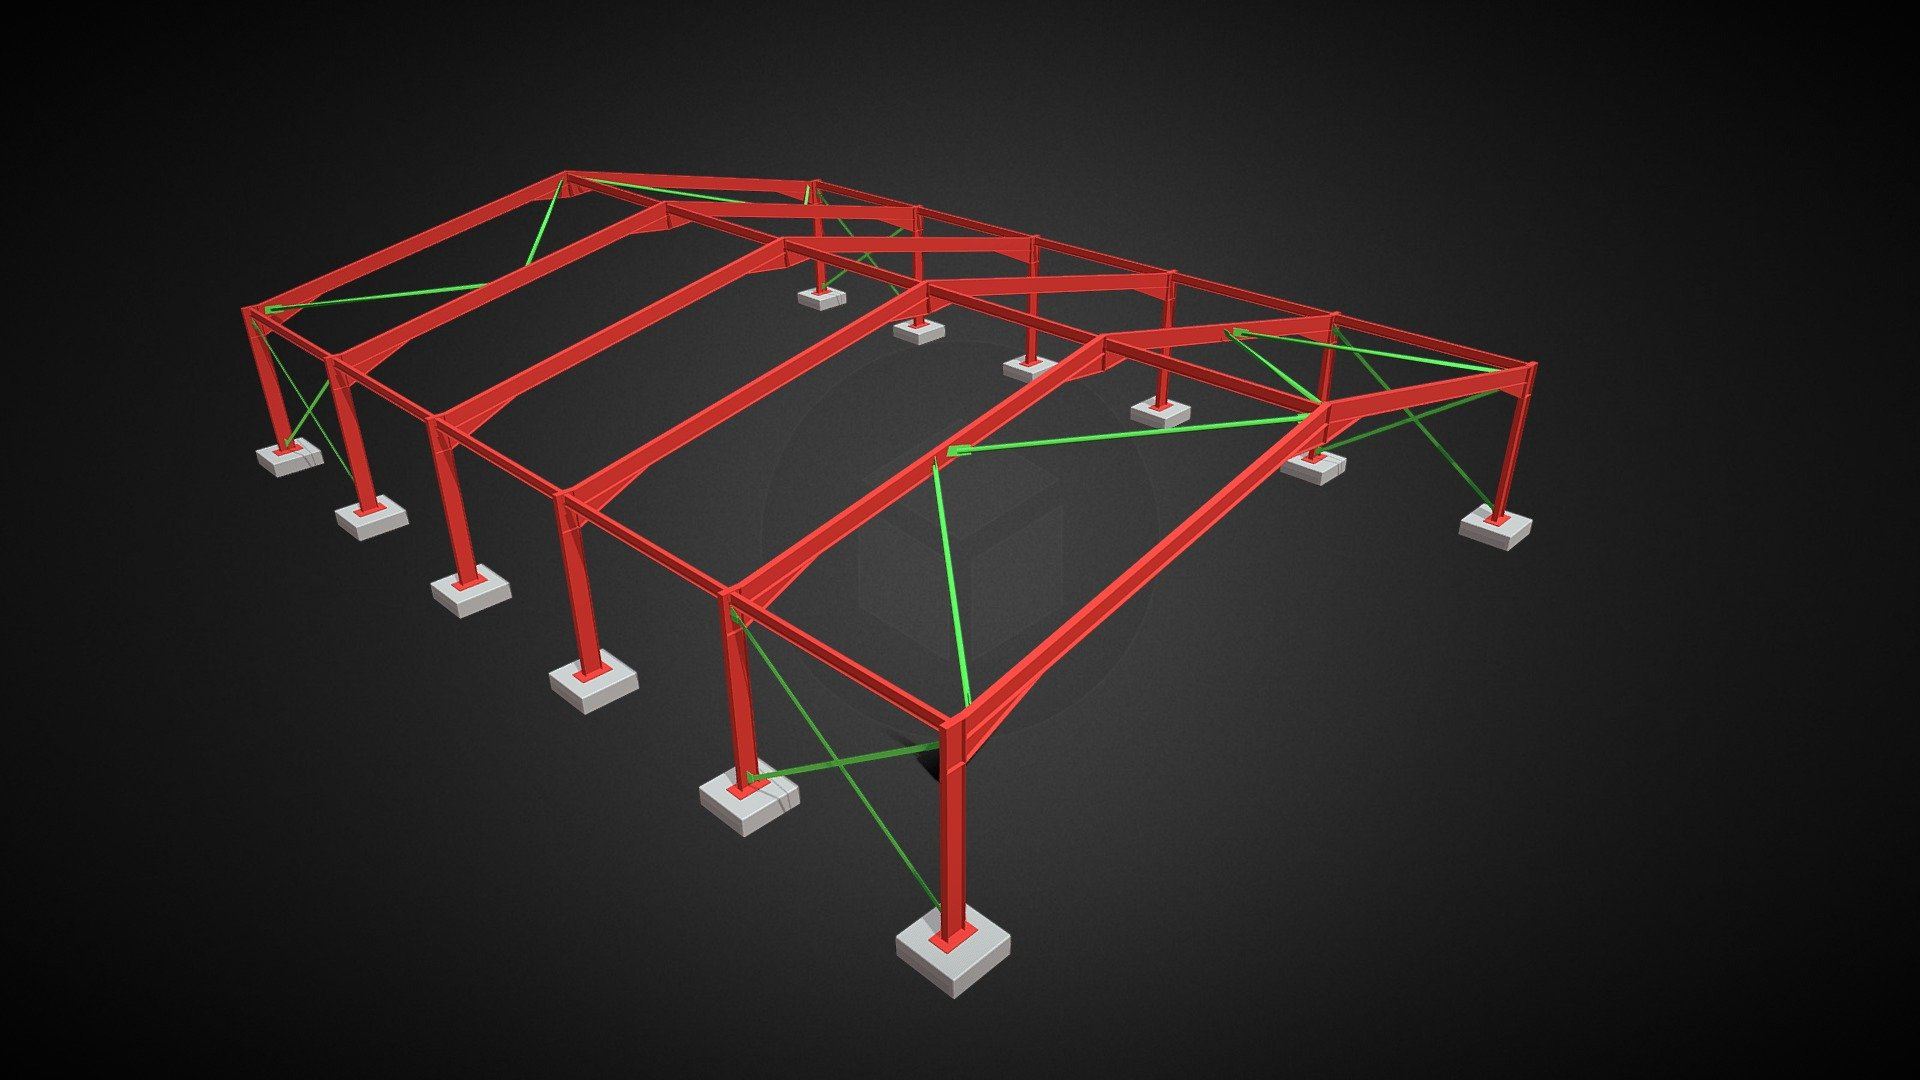
Have you ever looked up at a long, sleek steel rafter and wondered how it stays so perfectly straight under all that weight? It looks simple enough. Just a beam, right? But underneath that calm exterior, there is a constant battle against physics. Specifically, a phenomenon called lateral torsional buckling, or LTB for short. It’s the structural equivalent of a tightrope walker losing their balance and twisting mid-air. If you don’t account for it, things can go wrong fast. And nobody wants a roof that decides to take a unexpected nap.
In 2026, we are building bigger, lighter, and more efficient structures than ever before. This means rafters are getting longer and slimmer. While this is great for material costs and aesthetics, it makes them much more susceptible to twisting. The good news? We know exactly how to stop it. It isn’t about guessing. It’s about understanding how the compression flange behaves and giving it the support it needs. Whether you are designing a massive warehouse or a small workshop, the principles remain the same. You have to restrain that twist.
So, how do we actually do it? It’s not just about throwing more steel at the problem. It’s about smart connections, understanding the role of the roof deck, and knowing when a simple brace isn’t enough. Let’s dive into the practical side of things. No complex jargon without explanation. Just real talk on how to keep those beams stable and your structure safe. Because at the end of the day, peace of mind is worth more than any savings on bracing clips.
Understanding the Twist: What Is LTB Anyway?
Imagine holding a long ruler flat between your hands. Now, push down on the middle. If the ruler is thin enough, it won’t just bend downwards. It will likely snap sideways and twist. That is basically what happens to a rafter. When a beam bends, the top part (the compression flange) gets squeezed. If it’s not held in place, it wants to buckle out to the side. Since the bottom part is in tension and staying put, the whole beam ends up twisting. It’s a messy failure mode. And it happens suddenly.
The key factors here are length and restraint. The longer the unsupported span of that compression flange, the easier it is for it to buckle. In older designs, engineers might have just made the beam heavier to compensate. But today, we look at efficiency. We want to use the minimum amount of steel necessary. This means we have to be very precise about where we put our braces. If you miss a spot, the effective length increases, and the capacity of the beam drops through the floor. Literally.
It is also important to note that not all loads are created equal. A uniform load acts differently than a point load. But regardless of the load type, the compression flange is the weak link. It needs a friend. It needs something to hold it steady. Without that lateral support, even the strongest steel grade won’t save you. So, when we talk about preventing LTB, we are really talking about controlling that compression flange. Keep it straight, keep the beam straight. Simple as that, though the math behind it can get a bit hairy.
The Standing Seam Solution: More Than Just a Roof Cover
In North America, the standing seam roof (SSR) system has become the go-to choice for metal buildings. And for good reason. It’s not just about keeping the rain out. These panels, attached to Z-shaped or C-shaped purlins with clips, play a huge role in structural stability. For a long time, people assumed the roof deck did nothing for the rafters. We now know that’s wrong. The SSR system provides significant restraint against lateral motion.
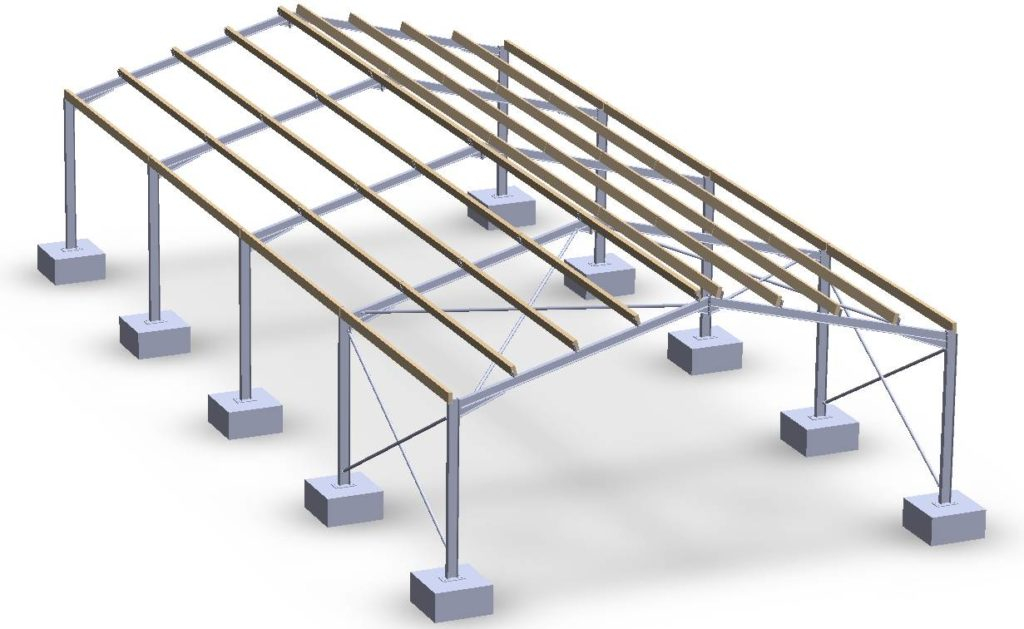
Here is how it works. The clips connect the panels to the purlins. The purlins sit on top of the rafters. When the rafter tries to twist, it pushes against the purlin. The standing seam panels, being stiff in their own plane, resist the relative longitudinal motion of those purlins. This creates a sort of frame action. It’s like a team effort. The purlin and the roof deck work together to provide torsional bracing to the rafter. This is a game changer. It means you might not need as many additional braces as you thought.
However, it’s not a magic bullet. The effectiveness depends on the clip type and the panel stiffness. Some clips allow for thermal movement, which can reduce the bracing effect. You have to check the specifics. But generally, in 2026, most modern SSR systems are designed with this structural contribution in mind. Engineers can now model this interaction more accurately. This leads to lighter, more cost-effective designs. Just make sure your supplier provides the right data on the rotational stiffness of their clips. Don’t guess. Ask for the test results.
Bottom Flange Bracing: The Unsung Hero
While the roof handles the top flange, what about the bottom? In many portal frames, the bottom flange of the rafter is in compression near the supports. This is a critical zone. If you ignore it, the rafter can buckle right at the column connection. That’s bad news. This is where bottom flange braces come in. They are often overlooked, but they are essential for complete stability.
A bottom flange brace connects the bottom of the rafter to a stable point, usually the column or a strut. It provides direct torsional restraint. Think of it as anchoring the beam so it can’t rotate. When combined with the purlins at the top, you create a full torsional brace. The flange brace and the purlin act together. This frame action is incredibly effective. It reduces the unbraced length significantly. And since the capacity of a beam is inversely proportional to the square of its unbraced length, even a small reduction in length yields a big gain in strength.
Installation matters here. These braces need to be stiff. If the brace itself is floppy, it won’t do much good. Use angle irons or tubular sections that are properly welded or bolted. Also, pay attention to the connection details. A loose bolt can compromise the whole system. In recent years, we’ve seen more prefabricated brace kits that ensure correct alignment and stiffness. These are worth considering. They save time on site and reduce the risk of installer error. After all, a brace that isn’t installed right is just decorative steel.
Diagonal Stays and Stringers: Reducing Effective Length
Sometimes, the standard purlin spacing isn’t enough. Maybe the spans are just too long. Or maybe the loads are unusually heavy. In these cases, you need to bring in the heavy artillery. Diagonal stays and stringers are excellent tools for reducing the effective length of the rafter. They act as intermediate supports, breaking up the long span into smaller, more manageable segments.
Diagonal stays run from the rafter down to the column or a lower beam. They provide direct lateral support to the compression flange. By adding a stay at mid-span, you effectively cut the unbraced length in half. This can quadruple the buckling resistance. It’s a powerful lever. Stringers work similarly but run horizontally between rafters. They tie the system together and provide mutual support. If one rafter starts to wobble, the stringer helps hold it back.
The placement of these elements is crucial. You want to put them where the compression flange is most vulnerable. Usually, this is near the points of maximum moment. But don’t just slap them in anywhere. Analyze the moment diagram. Identify the zones of compression. Then, target your bracing there. In Europe, this approach is very common. The "Design of Steel Portal Frames" guidelines emphasize the use of diagonal stays to control lateral stability. It’s a proven method. And it’s becoming more popular globally as buildings get larger.
The Role of Sheathing and Bridging in Wood Structures
Not every building is made of steel. Wood trusses and rafters have their own set of challenges. But the principle is the same: prevent the compression chord from buckling. In wood structures, the sheathing often plays the primary role. Plywood or OSB sheets nailed to the top chords provide continuous lateral restraint. It’s simple, effective, and cheap. But it only works if the nailing pattern is correct. Skip nails, and you create weak spots.
For the bottom chords, or in situations where sheathing isn’t present, we use bridging and metal connectors. Bridging consists of diagonal members that connect adjacent trusses. They keep the trusses vertical and prevent them from tipping over. Metal connectors, like hurricane ties, add extra security. They help transfer loads and maintain alignment. In many homes, a combination of sheathing, rafter ties, and collar ties creates a robust system. Collar ties, located in the upper third of the roof, help prevent the rafters from spreading and buckling under snow loads.
It’s important to remember that wood behaves differently than steel. It’s anisotropic, meaning its properties vary with direction. It also creeps over time. So, your bracing needs to account for long-term deflection. Don’t rely solely on friction or loose fits. Use positive connections. Nails, screws, and bolts should be specified clearly. And inspect them. A loose bridge is worse than no bridge because it gives a false sense of security. In 2026, we have better adhesives and connectors than ever before. Use them. They make a difference.
Even with the best knowledge, mistakes happen. One of the most common errors is assuming that purlins alone are enough. They aren’t always. If the purlins are not adequately braced themselves, they can’t brace the rafter. It’s a chain. If one link is weak, the whole thing fails. Make sure your purlins have proper sag rods or bridging. Otherwise, they will twist along with the rafter. Defeatting the purpose entirely.
Another mistake is ignoring the construction sequence. Bracing needs to be in place before the full load is applied. If you leave a bay unbraced while lifting in heavy panels, you risk temporary instability. I’ve seen roofs collapse during construction because the permanent bracing wasn’t installed yet. Temporary braces are your friend. Use them. Also, watch out for modifications. Cutting a hole in a rafter for a duct or pipe can severely weaken it. Always consult an engineer before making changes. What looks like a small cut can be a major stress concentrator.
Finally, don’t underestimate the power of inspection. A design on paper is perfect. Reality is messy. Bolts get missed. Welds get cracked. Clips get installed backwards. Regular site inspections can catch these issues early. Take photos. Check the torque on bolts. Verify the spacing of screws. It takes time, but it saves money in the long run. And it saves lives. Structural integrity isn’t something you can fix with a coat of paint. Get it right the first time. Or at least, catch it before it’s too late.
Preventing lateral torsional buckling in long rafters isn’t rocket science. It’s about understanding the forces at play and providing the right support. Whether you are using a standing seam roof system, bottom flange braces, or diagonal stays, the goal is the same. Keep that compression flange stable. In 2026, we have the tools and the knowledge to do this efficiently. We don’t need to overbuild. We just need to build smart.
The key takeaway is integration. The roof, the purlins, the braces, and the rafters all work together. You can’t design them in isolation. Look at the whole system. Consider the construction process. And never skip the details. Those little clips and bolts matter. They are the unsung heroes of structural stability. So, next time you look at a long rafter, appreciate the invisible dance of forces keeping it upright. And make sure you’ve done your part to keep it that way.
At the end of the day, safety is paramount. But so is elegance. A well-braced structure is a beautiful thing. It’s efficient, reliable, and safe. And that’s something we can all appreciate. So, go forth and brace wisely. Your rafters will thank you. And so will your clients. Because nobody likes a call back for a sagging roof. Let’s keep things straight, stable, and secure.
[sps_html tag=”img” src=”https://cdn.northcarolinafinearchitecture.com/2026/06/advantages-and-disadvantages-of-portal-frame-structures-at-karen-acuff-blog-with-portal-frame-design.jpeg” alt=”Advantages And Disadvantages Of Portal Frame Structures At Karen Acuff Blog with Portal Frame Design” style=”width: 100%; height: auto;”]
[sps_html tag=”img” src=”https://cdn.northcarolinafinearchitecture.com/2026/06/everything-you-need-to-know-about-portal-frames-by-proconsult-with-portal-frame-design.jpg” alt=”Everything You Need To Know About Portal Frames By Proconsult with Portal Frame Design” style=”width: 100%; height: auto;”]
[sps_html tag=”img” src=”https://cdn.northcarolinafinearchitecture.com/2026/06/portal-frame-types-in-the-hidden-complexity-behind-simple-looking-portal-frame-connections.jpg” alt=”Portal Frame Types in The Hidden Complexity Behind Simple Looking Portal Frame Connections” style=”width: 100%; height: auto;”]
[sps_html tag=”img” src=”https://cdn.northcarolinafinearchitecture.com/2026/06/welded-steel-connections-for-portal-frame-design.jpg” alt=”Welded Steel Connections for Portal Frame Design” style=”width: 100%; height: auto;”]
[sps_html tag=”img” src=”https://cdn.northcarolinafinearchitecture.com/2026/06/3d-portal-frame-3d-model-by-dr-sean-carroll-degreetutors-c807e9b-for-the-hidden-complexity-behind-simple-looking-portal-frame-connections.jpeg” alt=”3D Portal Frame - 3D Model By Dr Seán Carroll (@Degreetutors) [C807E9B … for The Hidden Complexity Behind Simple Looking Portal Frame Connections” style=”width: 100%; height: auto;”]