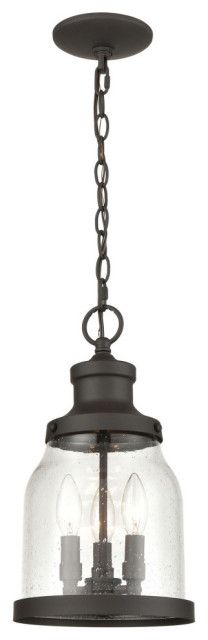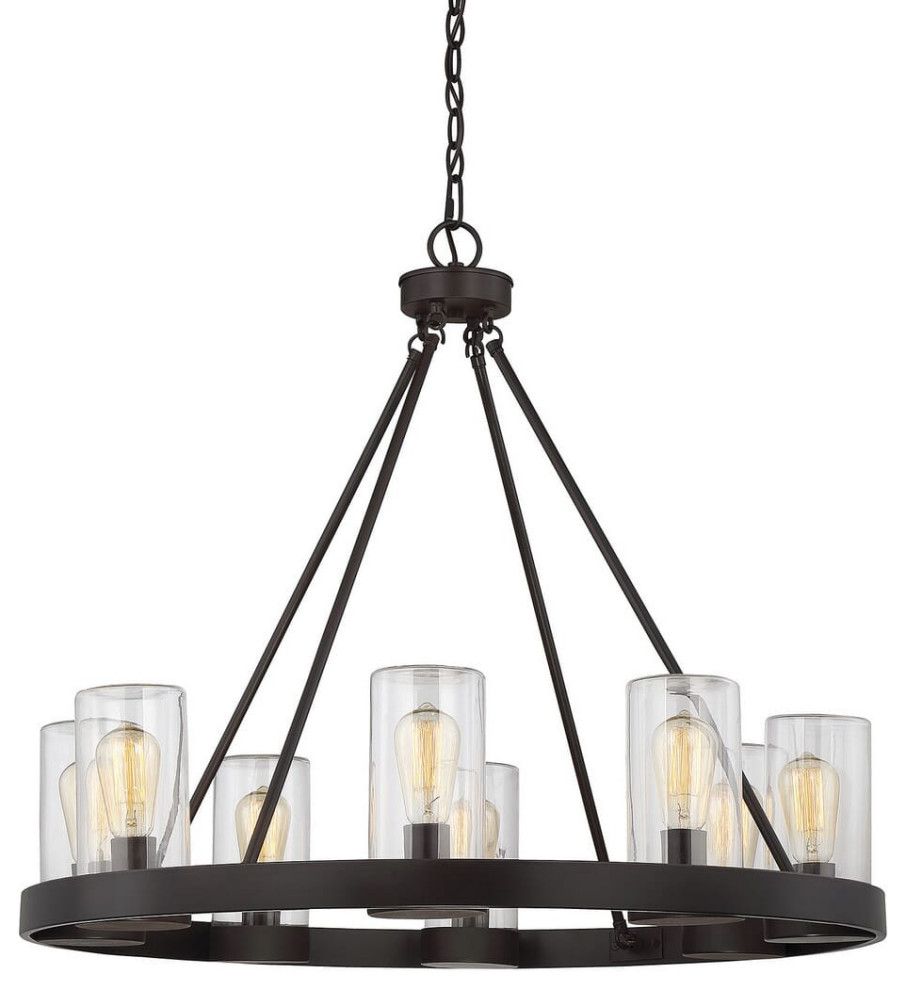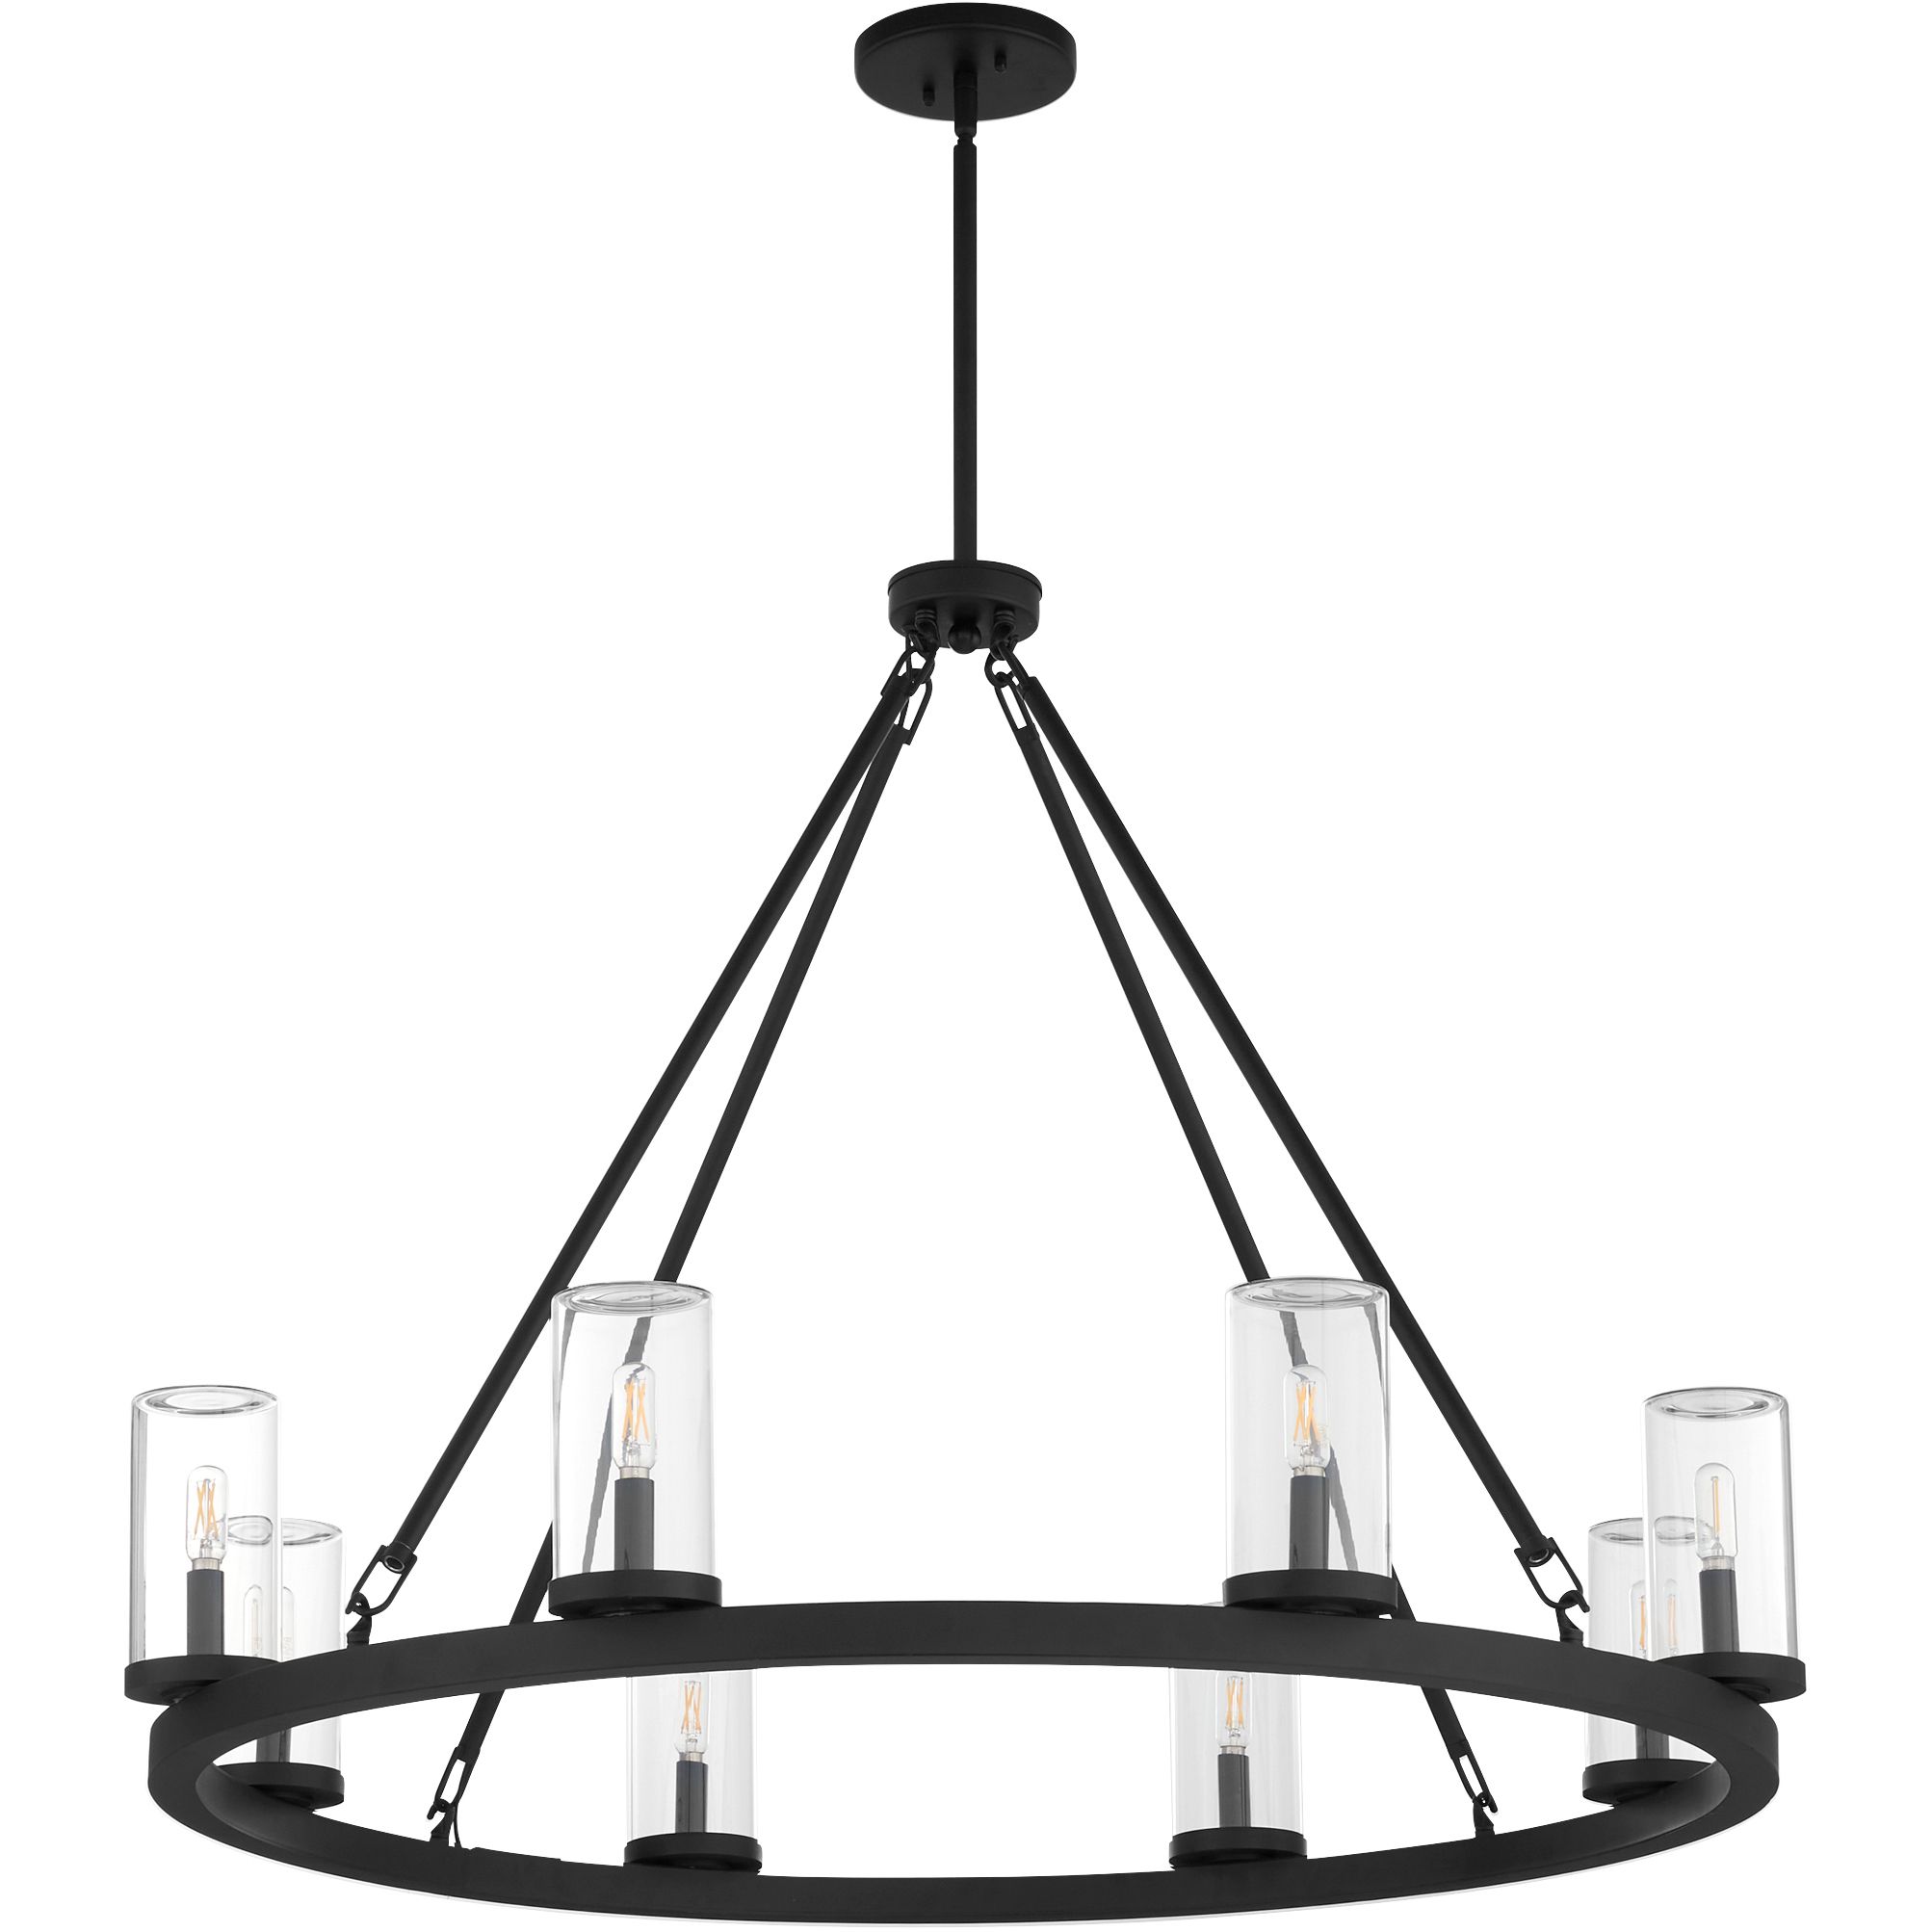
Hey everyone, it’s your friendly neighborhood lighting guru! Today, we’re diving headfirst into something I get asked about all the time: installing the gorgeous Sutter 24" Outdoor Pendant. This piece is a total game-changer for porches, patios, and any outdoor area that needs a touch of elegance and, of course, good light. I’m talking about a significant amount of people reaching out, so I thought, why not create the ultimate, step-by-step guide? Consider this your personal installation manual, filled with my hard-earned wisdom, to help you get the job done right, safely, and with a smile on your face. Let’s get started, shall we?
The Sutter 24" Outdoor Pendant isn’t just a light fixture; it’s a statement. It elevates any outdoor area, adding both style and functionality. But let’s be real, installing a light can seem daunting. Wires, electricity, heights… it can be a bit intimidating. That’s where I come in. I’ve installed (and, admittedly, messed up a few times – we all learn, right?) lights of all shapes and sizes. This guide is designed to break down the process into manageable steps, making it accessible, even if you’re not a seasoned electrician. We’ll cover everything from safety precautions to the final touches. My goal is to empower you to install your Sutter pendant confidently and create a beautiful outdoor space you’ll love.
1. Pre-Installation Prep: Safety First!
Before you even think about touching those wires, safety is paramount. First, and most importantly, turn off the power to the circuit that controls the existing light fixture at your circuit breaker. This is crucial. Double-check it with a non-contact voltage tester (a small, inexpensive tool you can find at any hardware store) to be absolutely sure the power is off.
Next, gather your tools. You’ll need:
- A screwdriver (Phillips and flathead)
- Wire strippers and crimpers
- Wire connectors (wire nuts)
- A ladder (sturdy and the right height)
- Safety glasses
- Gloves (optional, but recommended)
- Your Sutter 24" Outdoor Pendant, of course!
And, if you’re replacing an existing fixture, have a helper. It’s always easier – and safer – with an extra set of hands.
2. Taking Down the Old and Getting Ready for the New
Okay, power is off, tools are ready. Now, let’s get rid of the old fixture. Carefully remove the existing light fixture. Take a photo of the wiring before you disconnect anything. This will be super helpful later. Usually, you’ll see three wires: a black (hot), a white (neutral), and a green or bare copper (ground). Disconnect the wires using the wire connectors (unscrew them). Gently lower the old fixture, being mindful of any remaining wires.
Next, mount the mounting bracket that came with your Sutter pendant to your electrical box. Make sure it’s securely attached. This is what the pendant will hang from, so it needs to be sturdy. If you’re not sure how to do this, consult the Sutter pendant’s instruction manual for the specific instructions that are tailored to the fixture. You can also seek the guidance of a professional. Be cautious; it’s better to be safe than sorry.
3. Wiring the Sutter Pendant: The Heart of the Matter
Now for the wiring. This is where your photo from step two comes in handy. Match the wires from your Sutter pendant to the wires from your electrical box. Typically:
- Black to Black: Connect the black wire from the pendant to the black wire from the electrical box.
- White to White: Connect the white wire from the pendant to the white wire from the electrical box.
- Green or Bare Copper to Green or Bare Copper: Connect the ground wires.
Use wire connectors (wire nuts) to securely attach the wires. Twist the wires together, then screw the wire nut on tightly. Give each wire a gentle tug to ensure the connection is secure. No loose wires allowed. It is really important. After that, tuck the connected wires neatly back into the electrical box.
4. Mounting the Pendant and Finishing Touches
Carefully attach the Sutter pendant to the mounting bracket. This will depend on the specific design of your pendant, so follow the instructions that came with it. Usually, you’ll align the pendant’s mounting holes with the bracket and secure it with screws.
Once the pendant is securely mounted, install the light bulb (make sure it’s the correct type and wattage for your pendant). Double-check all the connections. Make sure everything is snug. Then, if your pendant has any decorative elements (like glass panels or shades), attach them now. Finally, turn the power back on at the circuit breaker. Cross your fingers and flip the switch! If everything is connected correctly, your Sutter pendant should light up beautifully.
5. Troubleshooting: When Things Don’t Go as Planned
Sometimes, things don’t work perfectly the first time. Don’t panic! Here are some common issues and how to address them:
- The light doesn’t turn on: Double-check the circuit breaker. Make sure the bulb is installed correctly and isn’t burnt out. Re-check all wire connections. If you’re still having issues, there might be a problem with the wiring in the electrical box. If in doubt, call an electrician.
- The light flickers: This could indicate a loose wire connection. Turn off the power and re-check all the connections. It could also be an issue with the bulb or the dimmer (if you have one).
- The light is dim: The bulb might be the wrong wattage or type. Make sure you’re using the correct bulb for your Sutter pendant. Also, inspect the wiring.
Always prioritize safety. If you’re not comfortable troubleshooting, call a qualified electrician.
6. The Final Flourish: Making it Your Own
Now for the fun part: enjoying your new lighting! The Sutter 24" Outdoor Pendant looks fantastic on its own, but you can also enhance the look. Consider adding a few decorative elements around the pendant. Maybe some potted plants, a comfortable chair, or some other outdoor decor. This is your chance to personalize your space and make it truly yours. Take a step back, admire your handiwork, and revel in the warm glow of your new outdoor lighting. You did it. You successfully installed the Sutter pendant! Congratulations!
Installing the Sutter 24" Outdoor Pendant might seem like a big task, but by breaking it down into manageable steps, you can do it. Remember, safety is always the most important thing. Take your time, follow the instructions, and don’t be afraid to ask for help if you need it. I hope this guide has been helpful, and that you’re now enjoying your beautiful, well-lit outdoor space. Happy lighting, everyone. And, as always, feel free to drop any questions in the comments below. I’m always happy to help. Now go forth, illuminate your world, and have a great time doing it.